


 Rene Castro
Introduction
This tutorial will show you how to create foreign keys in DB2 using IBM Data Studio.
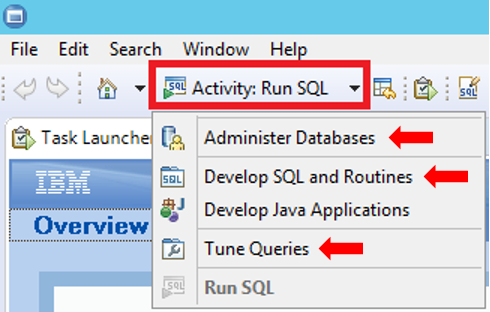
There are three options in IBM Data Studio called Activities from which you can create a foreign key.
- Administer Databases
- Develop SQL and Routines
- Tune Queries
All these options can be selected from the Activity option menu buttons.
Using the Administer Databases activity
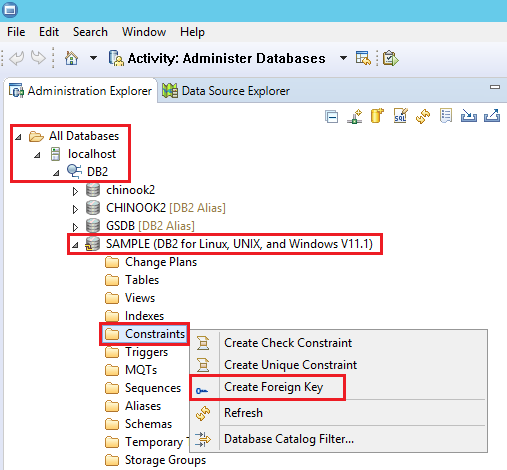
- In the left pane of the screen that is displayed, expand the All Databases node and select the appropriate database to expand its objects tree, then right-click on Constraints and select the Create Foreign Key option.
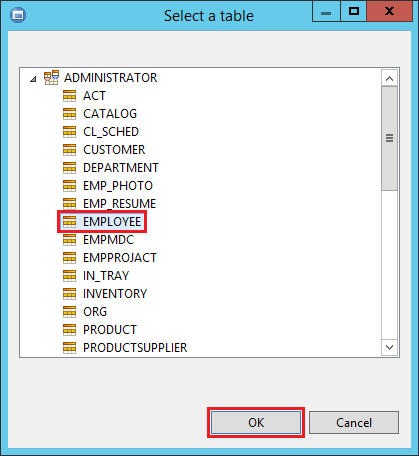
- Select the table where the foreign key will be created. To do this, expand the node of the appropriate database, select the table and click on the OK button.
- Now select the parent table. As in the previous step, expand the node of the appropriate database, select the corresponding table and click on the OK button.

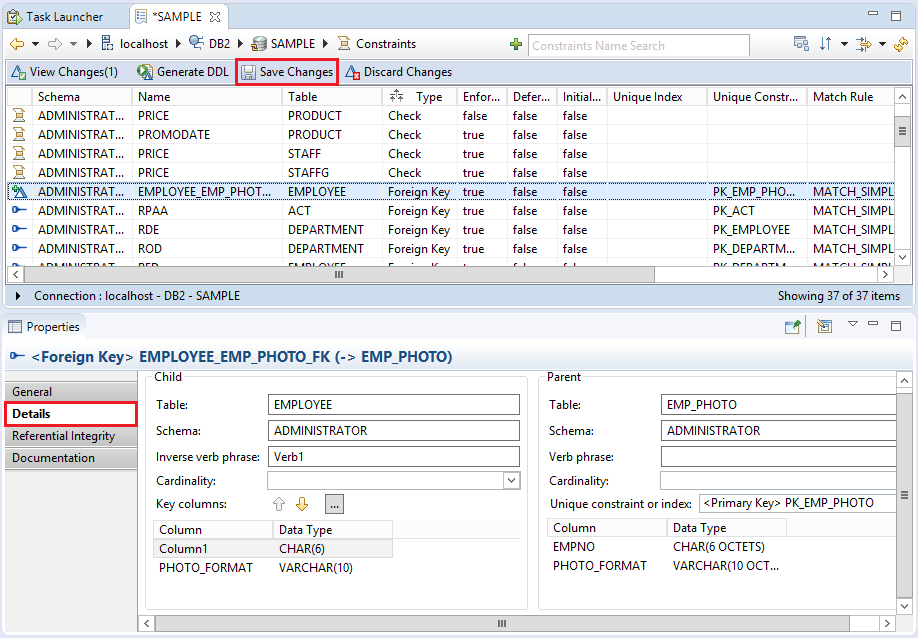
- Two panes are shown. The upper one shows the foreign key to be created and the lower one allows you to configure the foreign key in the Details option. Once done, save your work using the Save Changes button.
After saving any changes, you need to generate a DDL to deploy the changes. You can do this using any of the following two options:
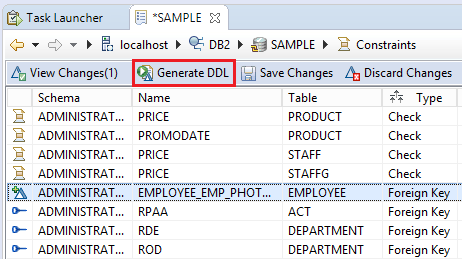
- If the change plan is active and displayed in the change plan toolbar (you are viewing the previous screen), click on the Generate DDL button located in the upper pane.
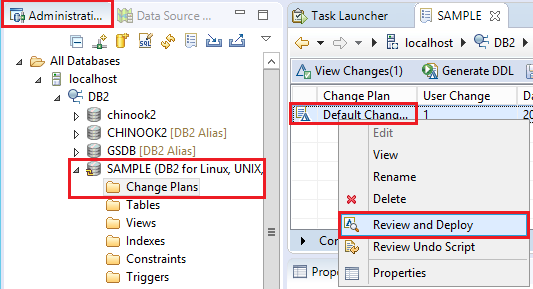
- If the change plan is not active (you are viewing a different screen than the previous one), in the Administration Explorer, click the Change Plans folder in the database. From the Object List, right-click on the change plan to deploy and select the Review and Deploy option.
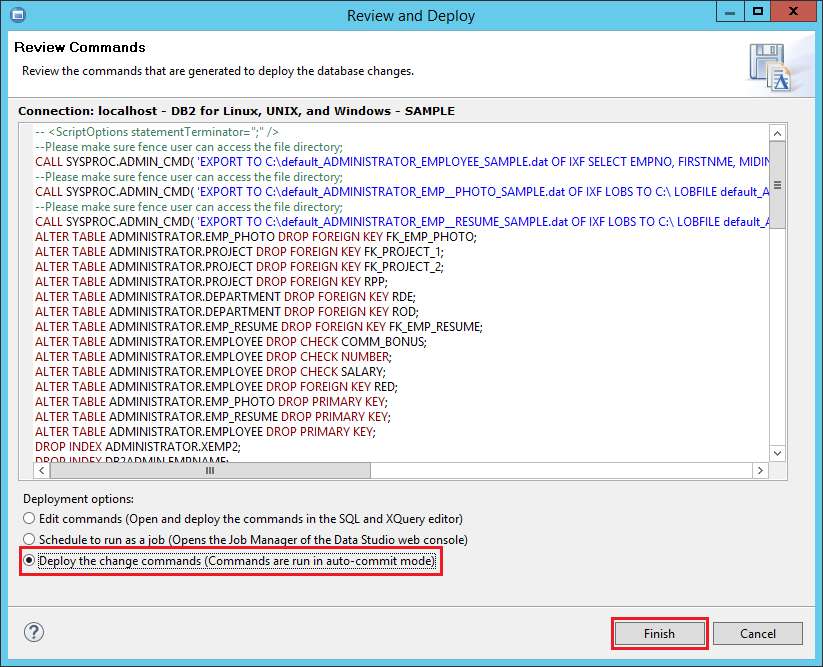
Now you will see a progress screen and then you will get the review and deploy screen, where you can review the commands that will be executed. Select the option Deploy the change commands and click on the Finish button.
Using the Develop SQL and Routines or the Tune Queries activity
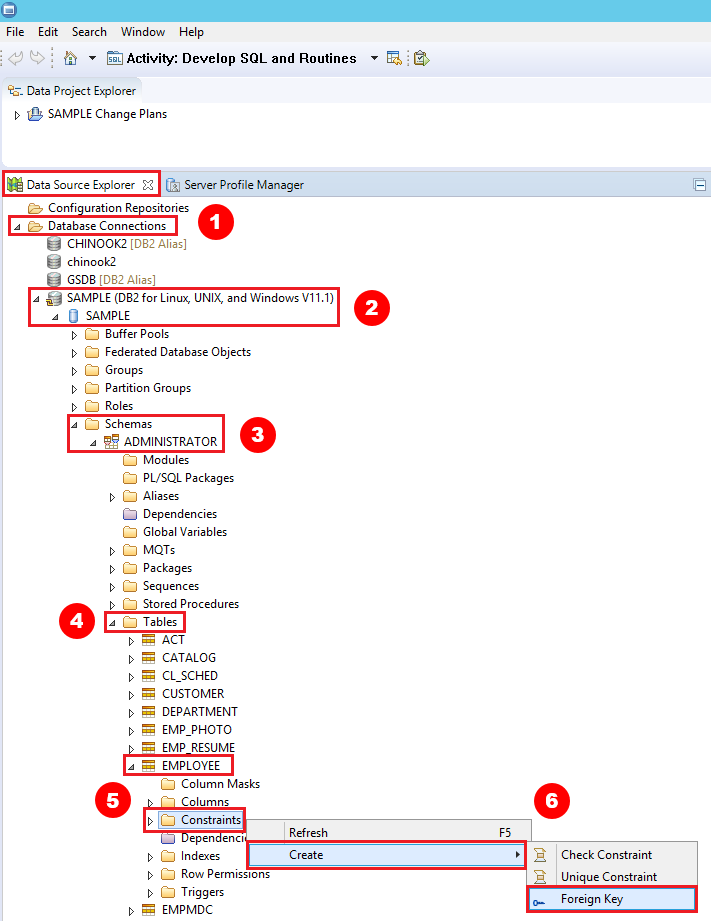
- In the left pane of the screen that is displayed, select the Data Source Explorer tab and expand the Database Connections node.
- Select the appropriate database to expand its objects tree.
- Expand the Schemas node and the schema name.
- Expand the Tables node.
- Select the corresponding table and right click on the Constraints container.
- Choose the Create, Foreign Key option in the context menu.
- A window is displayed to select the table where the foreign key will be created. From this point, the steps are the same as those described in the previous section: select the parent table, configure the foreign key, save your work and generate a DDL to deploy the changes.