


 Piotr Kononow
This is a quick tutorial on how to create ER diagram for your existing relational database that has no foreign keys with Dataedo.
The problem
You want to create ER diagram but your database has no foreign keys and therefore diagrams generated by most tools are missing key element - relationships.
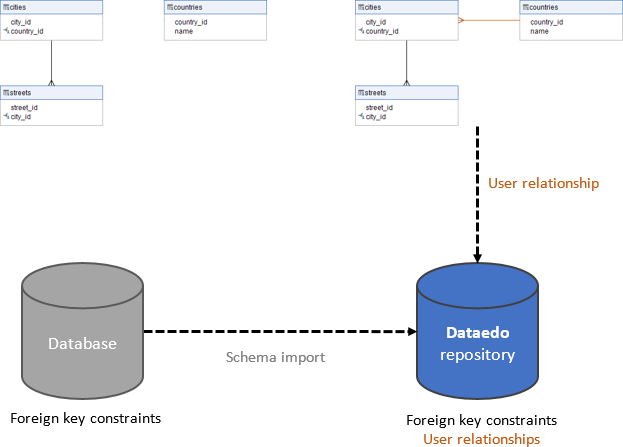
How does Dataedo make a difference
Dataedo enables you to define relationships in a separate metadata repository without impacting your database in any way. Here is how it stands out:
- You can define relationships without interfering into your database,
- Easy update of the schema from the source without worries to destroy diagrams,
- Ability to add titles, descriptions, and custom fields to tables and columns,
- Easy to update schema from the source,
- One source of truth about the database schema,
- Easy sharing of diagrams with full data dictionary specification in interactive HTML.
Prepare
First you need to download and install Dataedo on your computer.
Dataedo has two options to store metadata:
- In a local file
- In shared repository - advised (requires SQL Server)
If you want to get started with this tutorial quickly then try the file first. To create file repository click Create file repository button on the welcome screen.
1. Import database schema
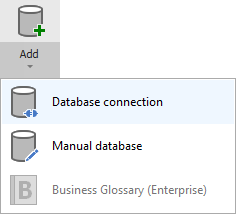
Now you need to connect to your database and add new documentation to the repository. Click Add documentation and choose Database connection.
Now choose your DBMS, provide connection details (more on that here) and follow wizard to import schema to the repository.
2. Create module for diagram
Diagrams in Dataedo are held in so called "modules". Modules are objects existing solely in Dataedo repository and are used to organize databases into smaller pieces, document subject areas or create diagrams.
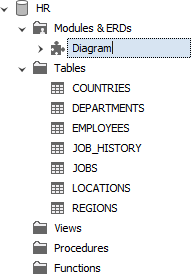
In the repository explorer Modules & ERDs under documentation element, right click and choose Add module/ERD. Enter name and confirm with Enter (to change name press F2).
3. Add entities (tables)
Select module and go to ERD tab. You will see all tables and views in the list on the right. Right click tables you want to add to diagram or drag & drop them into the diagram pane.

If your database has no FKs you'll see a list of unconnected tables on the pane. Arrange them in more useful order.
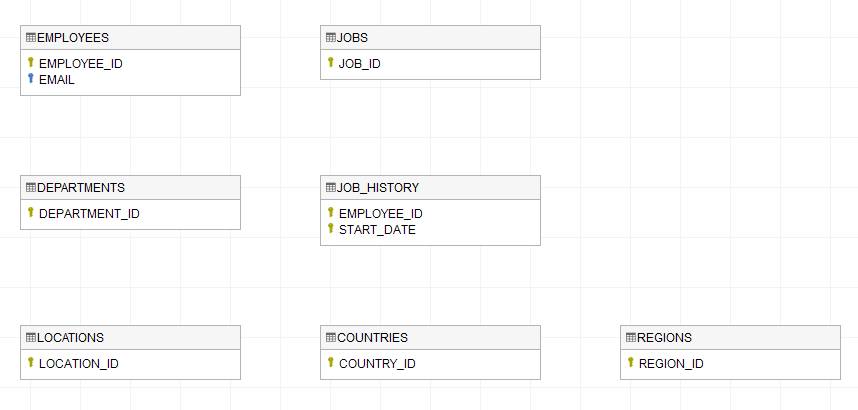
That is not what we're looking for so we need to add relationships.
4. Define relationships
Now we need to define relationships in Dataedo.
Where are relationships created?
Don't be worried about this step. Anything you do now will not be saved back to your database. Relationships you add will be stored in Dataedo repository only.
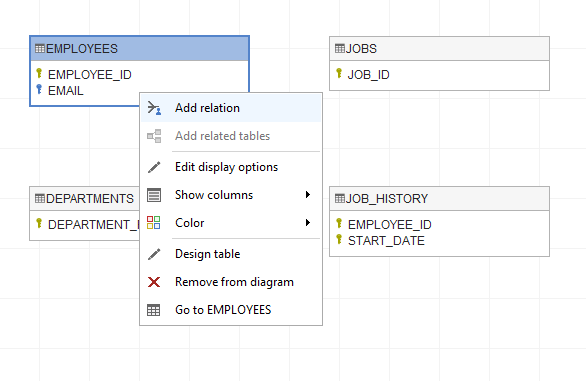
Add relationships
To add relationship right click foreign table and choose Add relation.
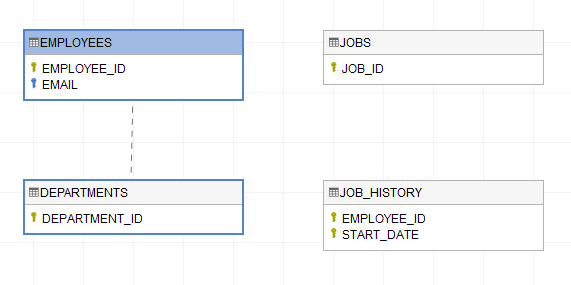
Now drag to the primary table and left click.
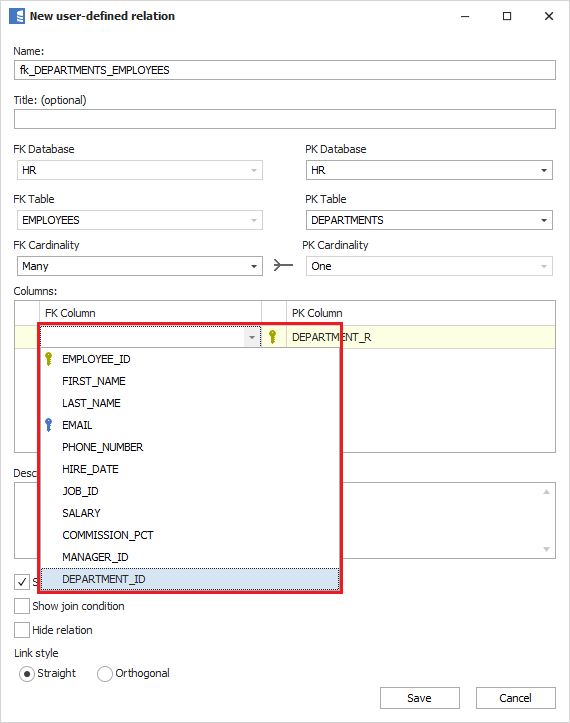
This will open a window where you need to define relationship foreign (FK) and primary (PK) columns. Click Save when done.
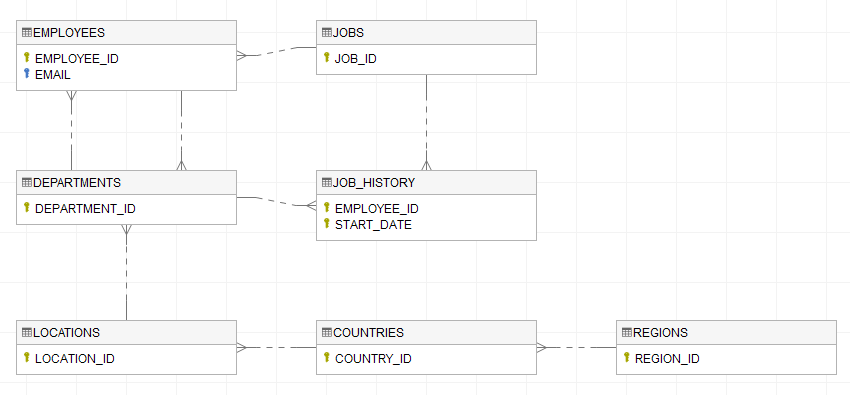
When you are done adding relationships you should end up with something more like this:
Show all columns
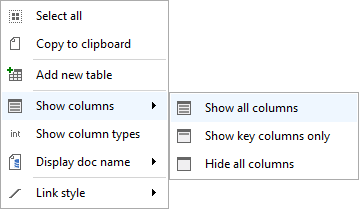
When you don't know how tables are related because you don't know what columns they have then you might want to show all columns on the diagram. To do this, right click pane empty space and choose Show columns > Show all columns.
5. Another way to define relationships
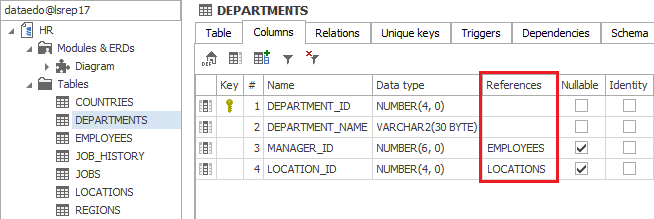
Another way to define relationships is from the schema (data dictionary) explorer. Browse tables and columns (in Tables folder and Columns tab of the table). References column shows all (DBMS and user defined) existing relationships/foreign keys.
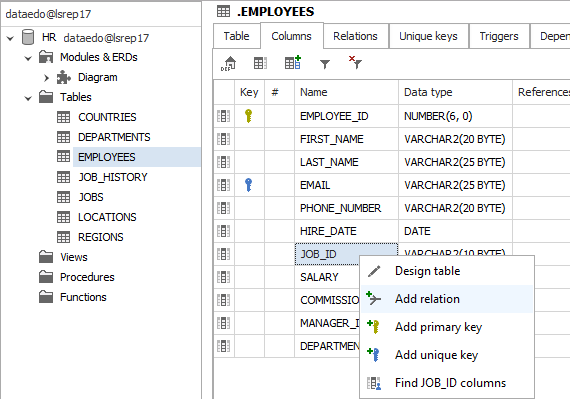
If you find a column that should have a FK then right click it and choose Add relation option. This will open familiar relationship form where you'd also need to define PK table.
6. Export and share
And now, one of the key functionalities and benefits of Dataedo - exporting to interactive HTML. This is important for you because you can easily and conveniently share diagrams with complete data dictionary documentation with your team and organization.

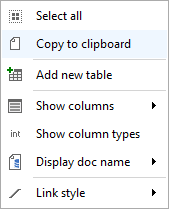
You can also copy diagram to clipboard. Right-click blank part of diagram pane and choose Copy to clipboard option.
That's it for this tutorial. You might want to try yourself now.