 Piotr Kononow

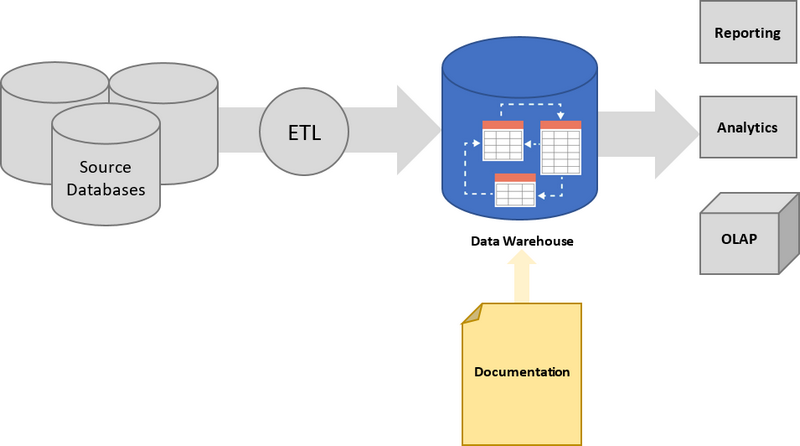
This tutorial will show you how you can document your existing data warehouse and share this documentation within your organization.
A data warehouse is a complex system with many elements, and this tutorial will discuss only relational database element of it.
Why bother
Let's start with why you need a data warehouse documentation at all. Well, you have spent countless person-days and $ on finding source data, its analysis, extraction, data mapping, data warehouse design, ETL development and monitoring... and you want to use your data warehouse for querying and reporting. But when you look into the database, and you are not sure:
- what specific tables hold,
- how tables are related and how to write joins,
- what specific columns represent,
- how were they calculated and what is their source.

So you need documentation. Even more so than the usual application database because data warehouses have a much longer life span and are accessed directly by more people from different background, departments or even external vendors and consultants.
This tutorial will show you step by step how to do it using powerful database documentation tool - Dataedo.
Prepare
First you need to download and install Dataedo on your computer.
Dataedo has two options to store metadata:
- In a local file
- In shared repository - advised (requires SQL Server)
If you want to get started with this tutorial quickly then try the file first. To create file repository click Create file repository button on the welcome screen.
Now you need to create new documentation and import your data warehouse schema.
- Click Add documentation
- Provide connection details and click Connect
- Click Next twice to start the import.
Now Dataedo repository has a copy of the schema of your data warehouse database.
1. Group common dimensions
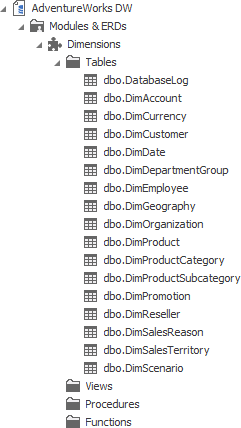
Let's first create a module called Dimensions that will group all dimensions tables. Modules in Dataedo are folders you can use to group tables and other objects that are similar or relate to the same functionality. It helps you organize objects, find them easier and speed up the learning process. You can also provide a narrative and a diagram for each module, but more on that later.
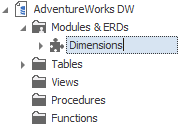
To create a module right click Modules element and choose Add module/ERD. Then type in "Dimensions" and confirm with Enter. Then select Tables element in the navigation panel to display all tables in your data warehouse. Now for each dimension table in the data warehouse select newly created module from the drop down in the Module column or select all of them with Shift (or Control) key and drag & drop them into the module.
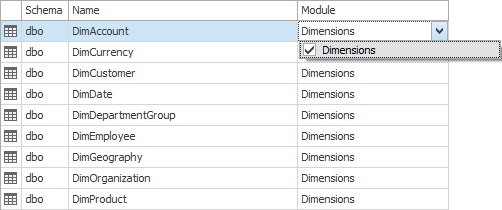
The effect looks like this.
2. Create modules for processes
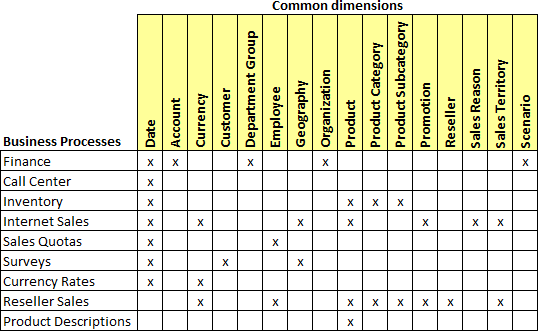
Now, it's time to group the facts, but this time not into one module but separate business processes. This idea comes from Kimball's Enterprise Data Warehouse Bus Architecture. First, you need to identify processes and then create a module for each. The simplest approach is to create a process per fact table, but I advise you to group similar facts into larger modules.
In my example, data warehouse by Enterprise Data Warehouse Bus Matrix looks like this one below. You can use MS Excel to create a similar table and paste it into documentation introduction (description field). But this is a manual process.
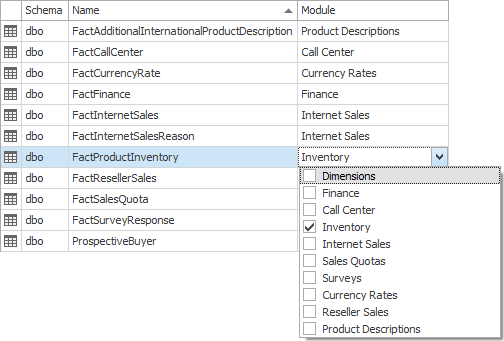
Modules look like this:

Now, let's assign tables just like we did for dimensions.
3. Provide narrative for each process
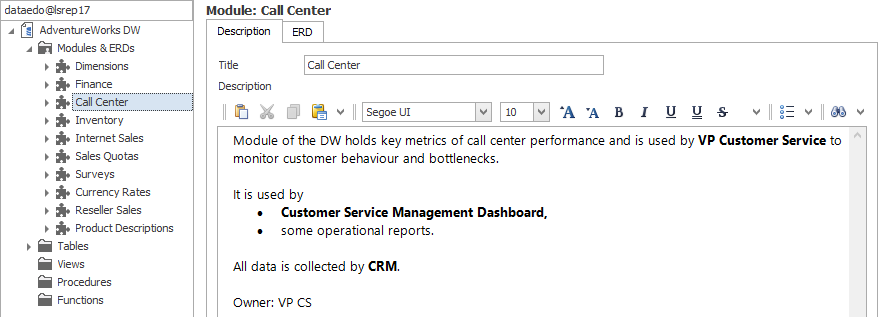
Now we have a basic structure for our documentation. It is now time to provide a top level description of each process. Explain what it is used for, key concepts (glossary, metrics), what data it holds, where does the data come from, etc.
To provide narrative go to a specific module and enter your text in the text field in the Description tab. You can use rich text features, such as text formatting, lists, tables, hyperlinks and you can paste images.
4. Document table relations
Data warehouses often don't have foreign key constraints as data is not edited by users and referential integrity is taken care of by ETL before inserting data. This also helps save load time. But it also makes a discovery of data model more difficult. Dataedo helps developers and architects with the ability to define table relationships in the repository (without interfering in the database schema).
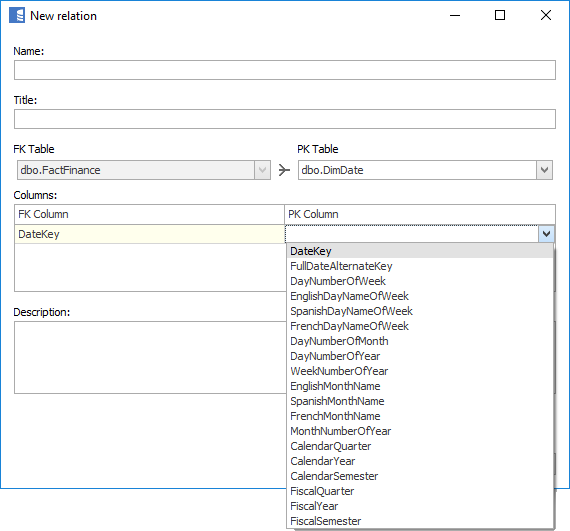
To discover and define missing FKs go to the specific table and Relations tab. To add new relation press Add relation button on the ribbon or under right mouse click. Then specify the foreign table, join columns and save.
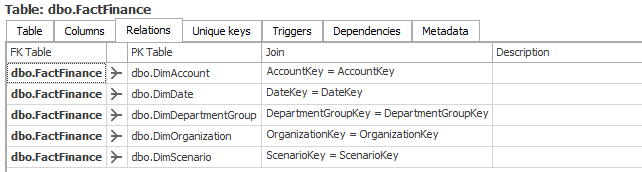
You will see all relationships (both, defined in database and repository) in one table.
Relations will be part of your data dictionary documentation and help developers discover relations, but they will also be used to create ER diagrams. You can also create relations directly on the diagrams editor.
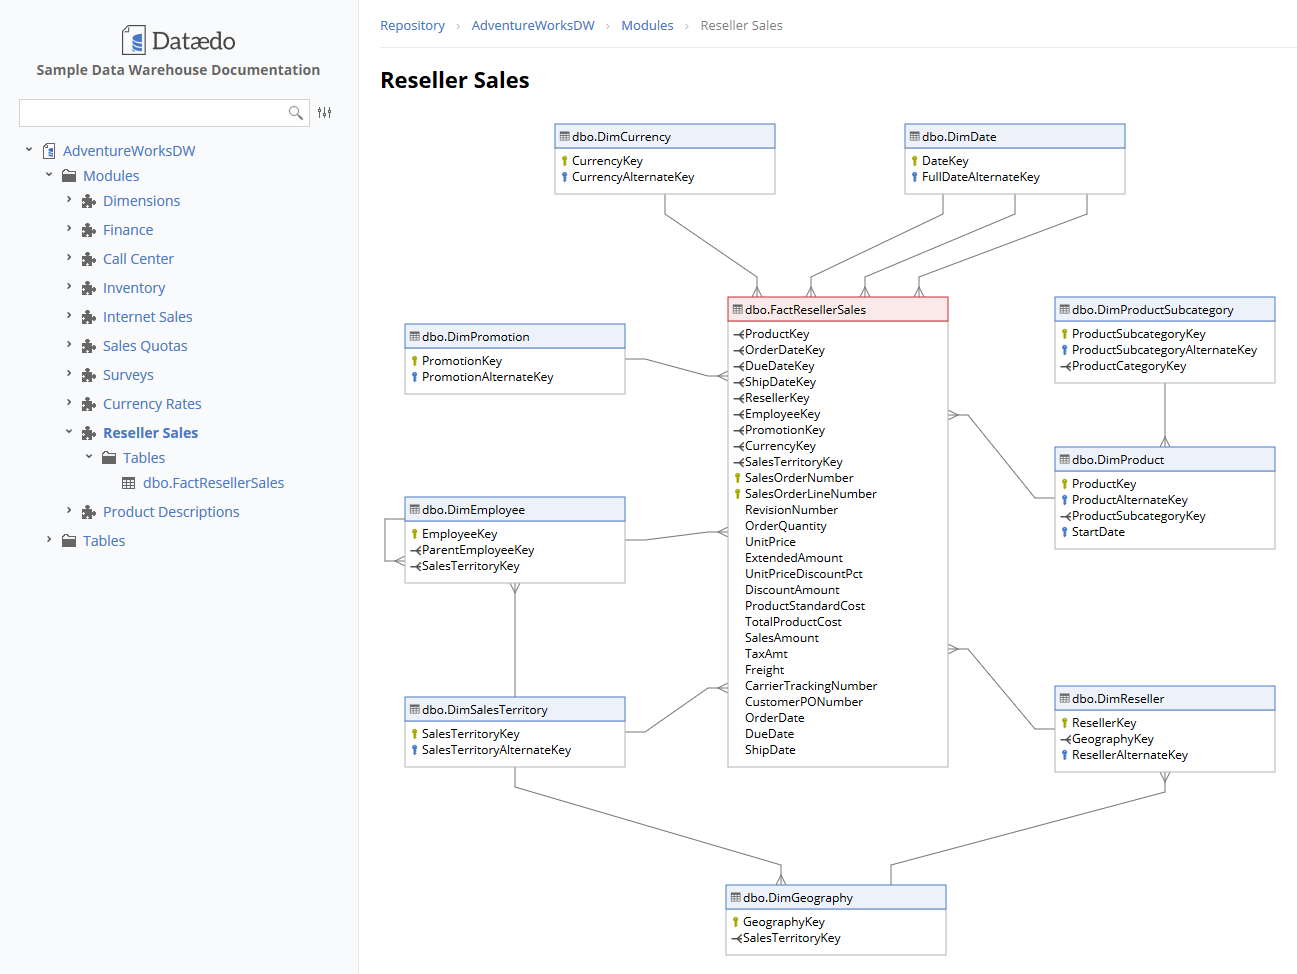
5. Visualize data model with ER diagrams
Let's move on to the fancy stuff. You worked a lot with the text for now, and it's time to document it with diagrams. You can create one ER diagram for each module. You will visualize your star and snowflake schemas.
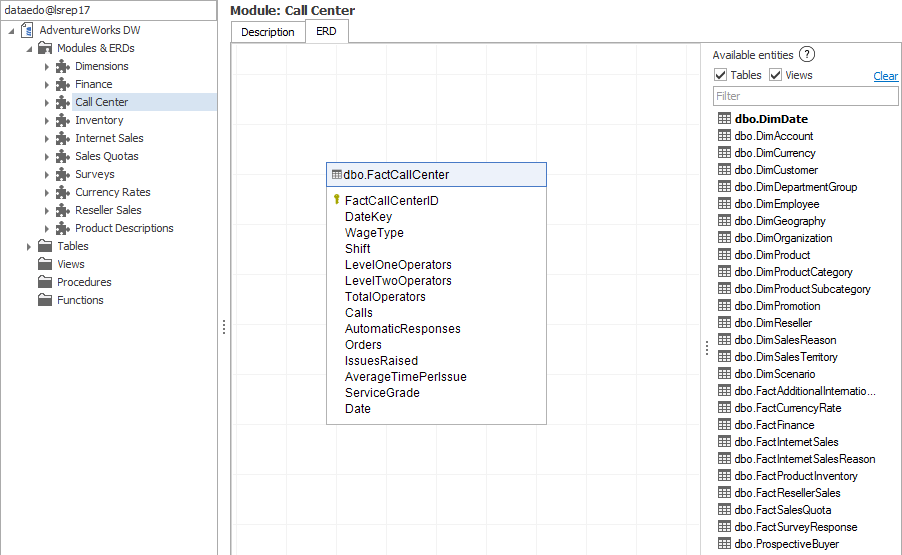
To create diagram go to ERD tab of a module and drag & drop tables from right pane list to the drawing canvas. Fact table will be highlighted on the top of the list as the table that is assigned to the diagram. When you add it, linked dimensions will get highlighted as they are joined to table on the diagram.
Double click table (or right click and Edit) to enter table editor to choose which columns you want to show on the diagram. Select just the key columns. Too many columns may obscure diagram, and its function is to communicate key tables and their relations quickly. List of all columns with the descriptions will be available in the data dictionary.
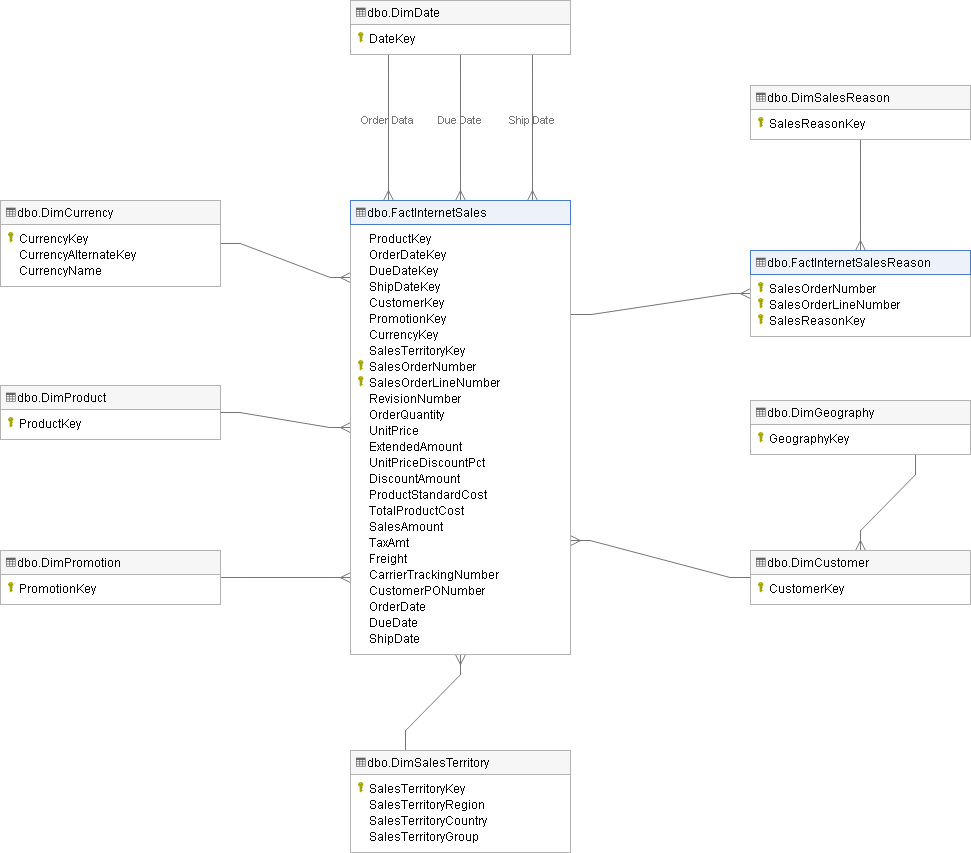
Use color (right click on a table) to differentiate facts from dimensions.
Create diagram for each process.
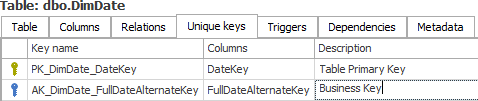
6. Document primary and business keys
You probably know what primary key (PK) is. It is a column (or set of columns) that will identify rows in your tables. The idea of keys in data warehouses is a bit more complicated than "regular databases" because it consumes data from various databases. Each table has an auto-generated integer surrogate primary key, and it is used to join tables. Like in other databases there are also natural/business keys - those are attributes from real data and identify rows in the real world. There also might be primary keys from the source system so that ETL can match rows from source and DW. It is not advised to use source PKs in DW because it can consume data from multiple databases and values can overlap.
If those keys don't have a physical representation as a constraint, then define them in the repository, similarly as you did with foreign keys. You can see existing keys as the icon in the columns table and on the Unique keys tab.
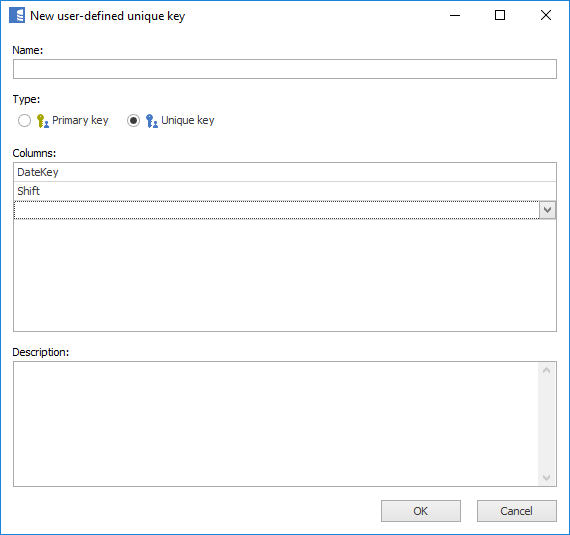
To add a new key to the repository go to Unique keys tab and click the New key button on the ribbon or under right mouse click on the table.
Use PK type to document DW primary key and UK as all other keys. Provide its purpose in the description field.
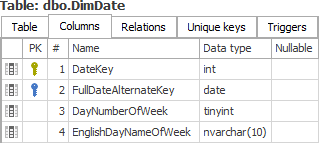
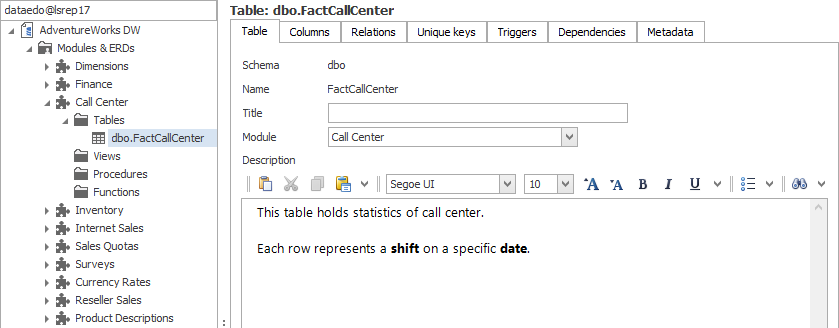
7. Describe tables
Now it's time for a tedious but very important work - describing each table and its columns (dimension and fact).
Describe table
Go to Description tab of a table and use a text field to provide a free text description of the table:
- what data it holds
- table granularity - what one row represents and what is the aggregation level (is it one document, one document line or daily snapshot?)
- use Title field to provide a convenient alias
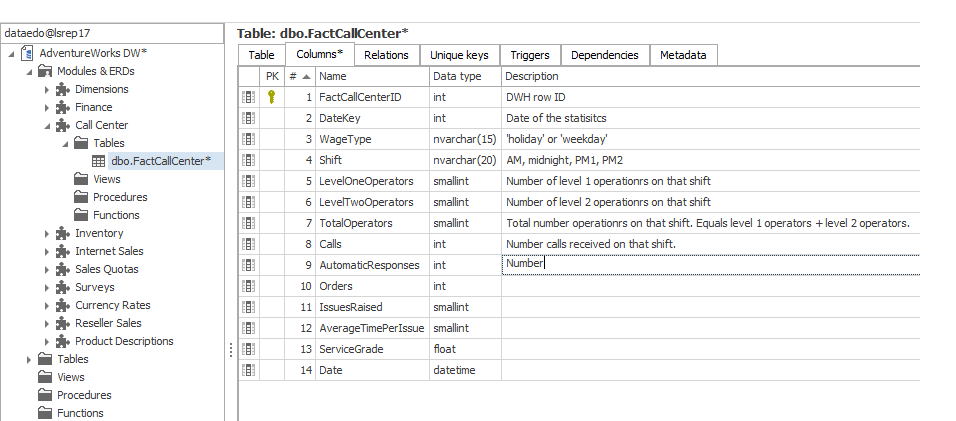
Describe columns
Go to Columns tab of a table and use the description field to describe each column:
- column purpose
- lists of values
- document calculations
- use Title field to provide convenient column alias
8. Export & share
Congratulations, you have created a very valuable asset - a description of your key data (metadata). Now you want to brag and make people use your work. You can export and share documentation in interactive HTML (or PDF).
Here is how it looks: