Predefined classification functions
Dataedo is shipped with built-in predefined functions. Those functions are (and will be growing):
- CCPA - California Consumer Privacy Act
- FERPA - Family Educational Rights and Privacy Act
- GDPR - finds columns potentially holding personal data as defined by European GDPR
- HIPAA - Health Insurance Portability and Accountability Act
- PCI - Payment Card Industry
- PII - finds columns PII (Personally Identifiable Information)
Please note that the above built-in Dataedo classifications should be treated as a starting point and help with fulfilling the above policies. We do not track the most recent changes in them and we can't guarantee that it's up to date with the current regulation status.
How it works
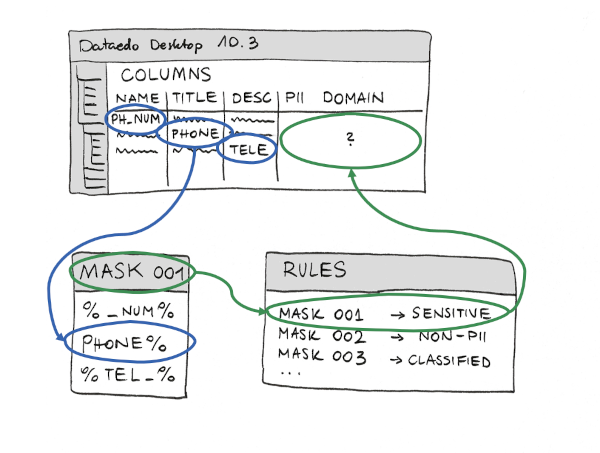
The algorithm scans Data Catalog and finds all matching objects.
- Dataedo search for columns where name or title or description fits one of the predefined masks, e.g.
%date%birth%. - Dataedo searches for columns that have names the same as columns with the already assigned same classification.
- Dataedo search for columns linked to a classified Business Glossary entry (where entry name or title matches the mask).
Run Data Discovery and Classification
Click the Data Classification button from the ribbon to invoke a new window.

In the new window, you should only see the list of available classifications.
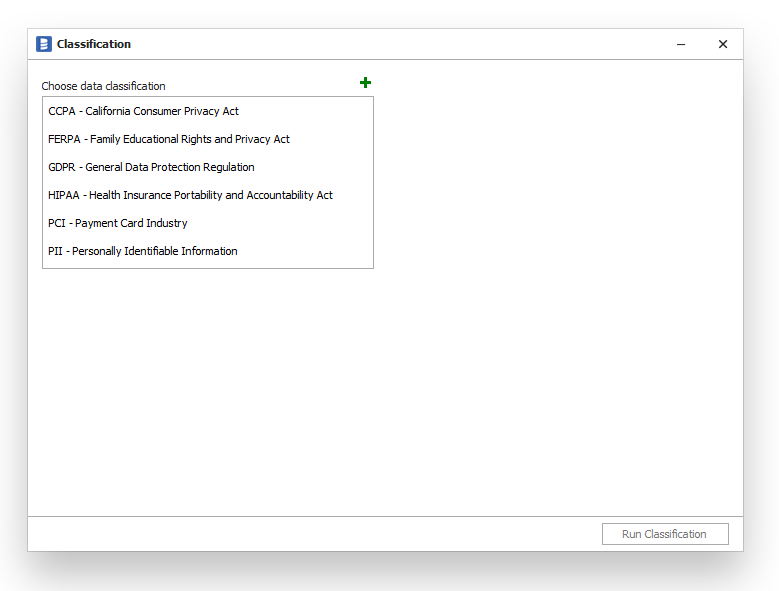
After selecting any classification and selecting the scope (databases which you would like to classify) you should be able to Run Classification.
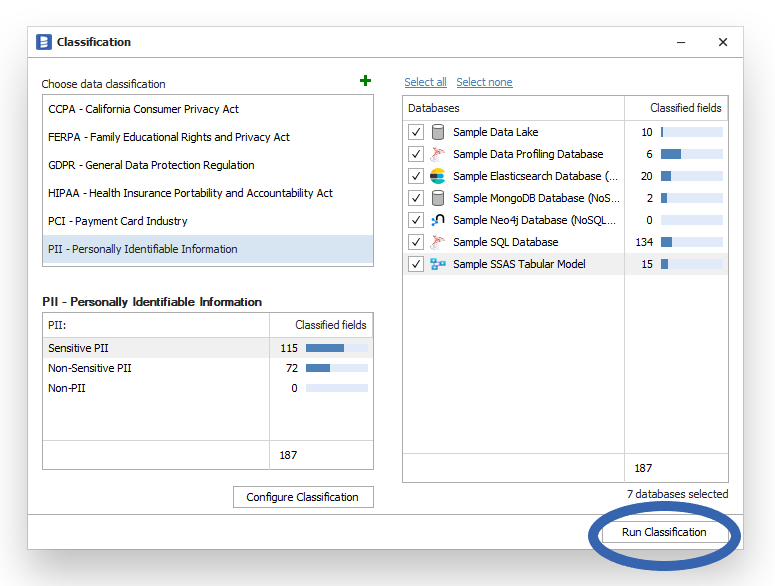
This will run a column search and open a window with the results and classification suggestions.
Review suggestions
The grid contains the list of all table columns from a selected scope that matches conditions.
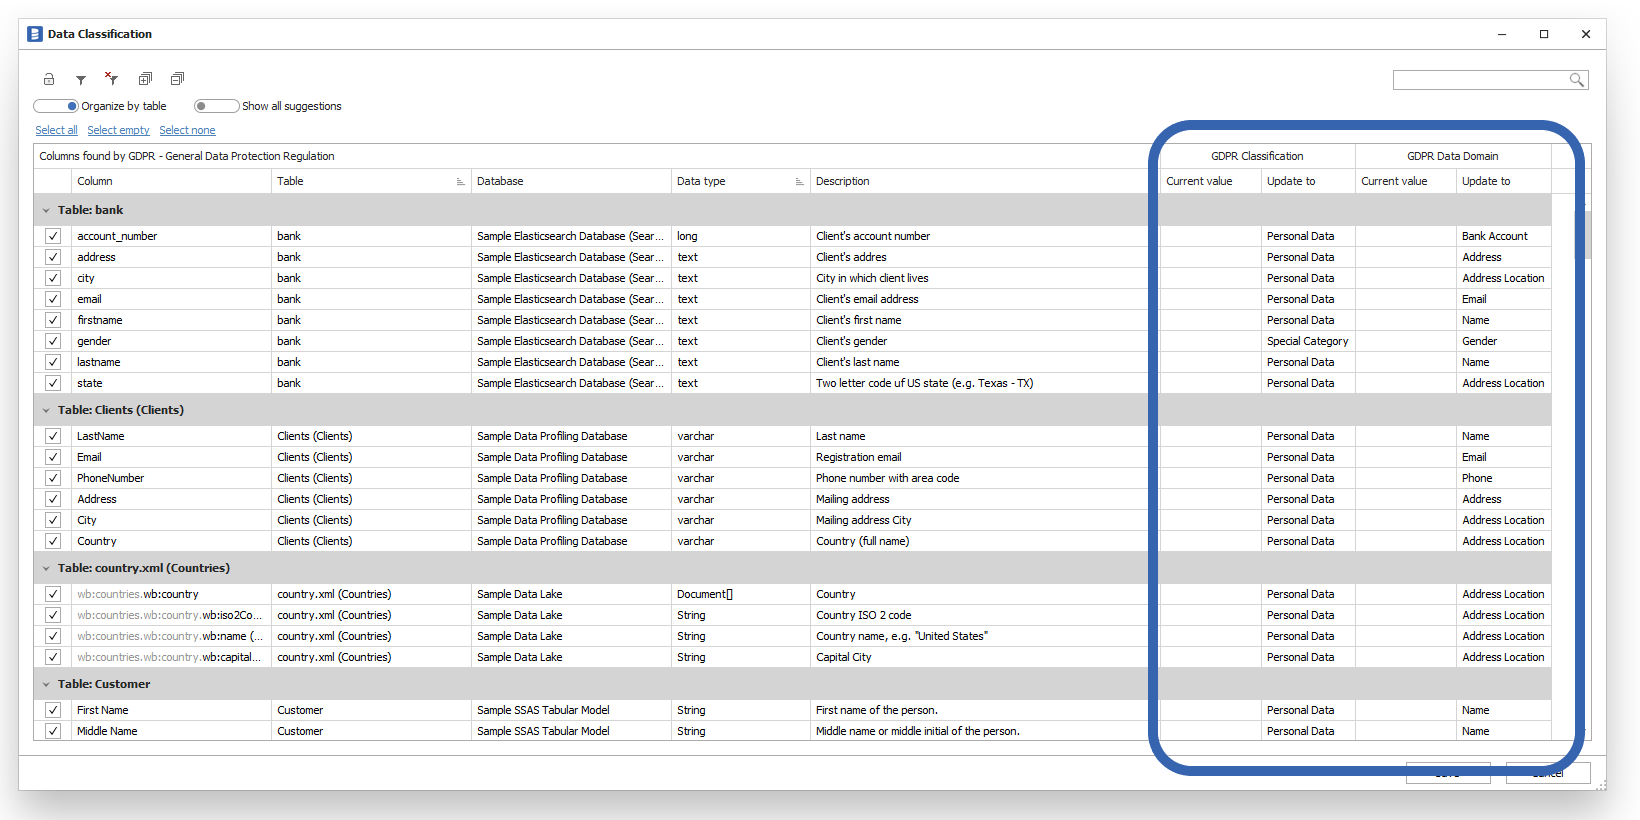
The right side of the grid presents current (Current value column) and suggested (Update to column) values of
Each classification function has its set of classification fields but usually, they are:
- Classification - Sensitivity level such as "Sensitive", "Non-sensitive"
- Domain - Type/domain of data held in the column. Types include name, email, phone number, date of birth, address, etc.
Your task is to review them before you save classifications.
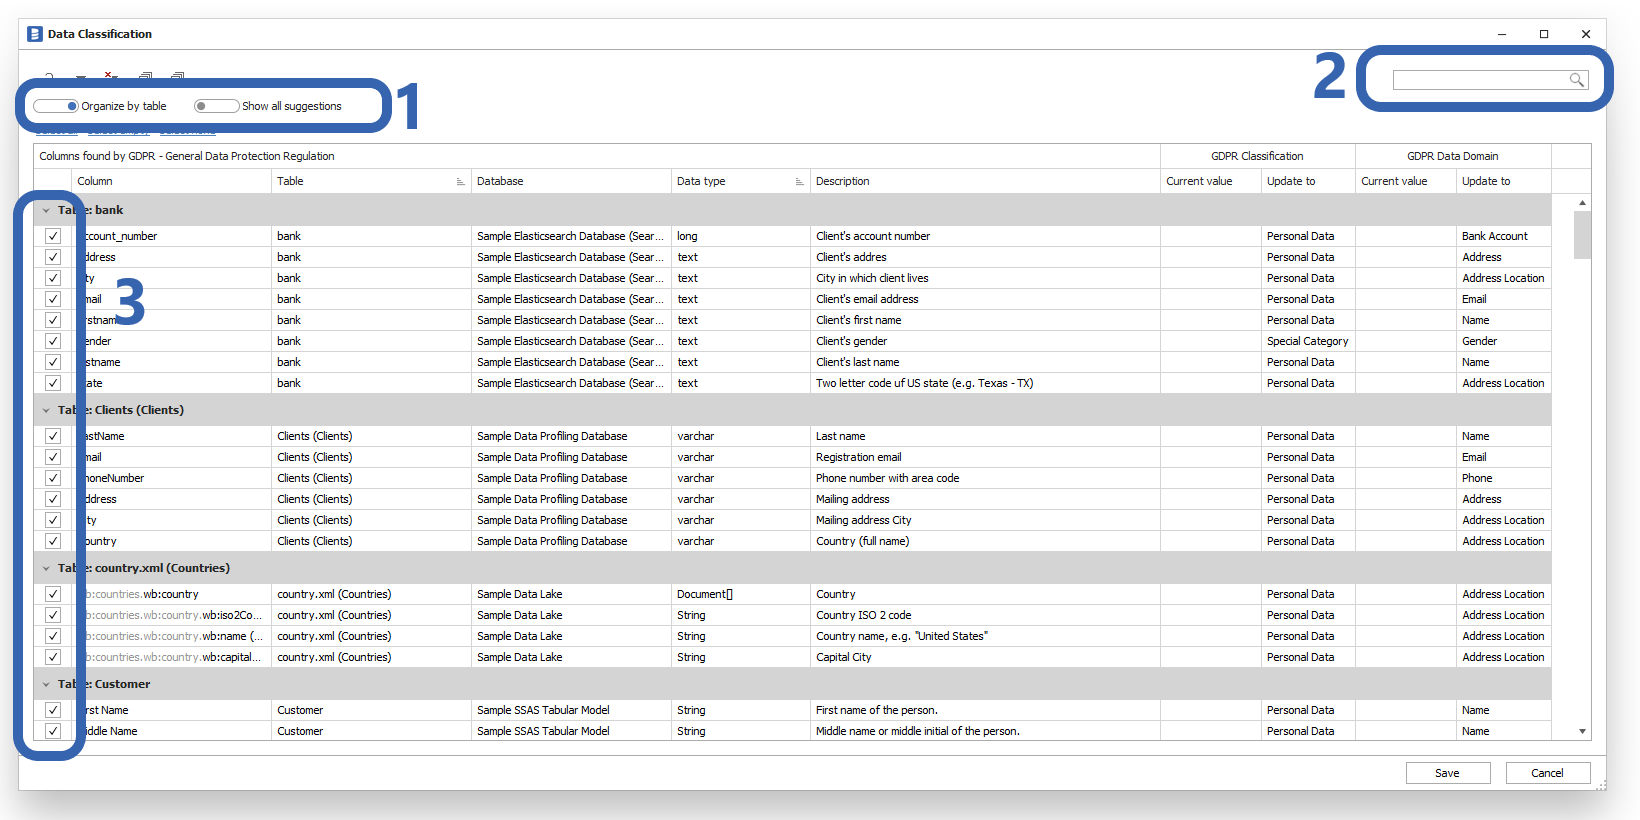
Below are a few tips, that can make your work more effective:
- You can switch from table-based structure to column-based structure, to go through the list in the context of the same-named columns.
- Use search to narrow the context to one topic at a time.
- Saving only influences selected columns, so you might start with deselecting all of them, and save as you go.
Save classifications
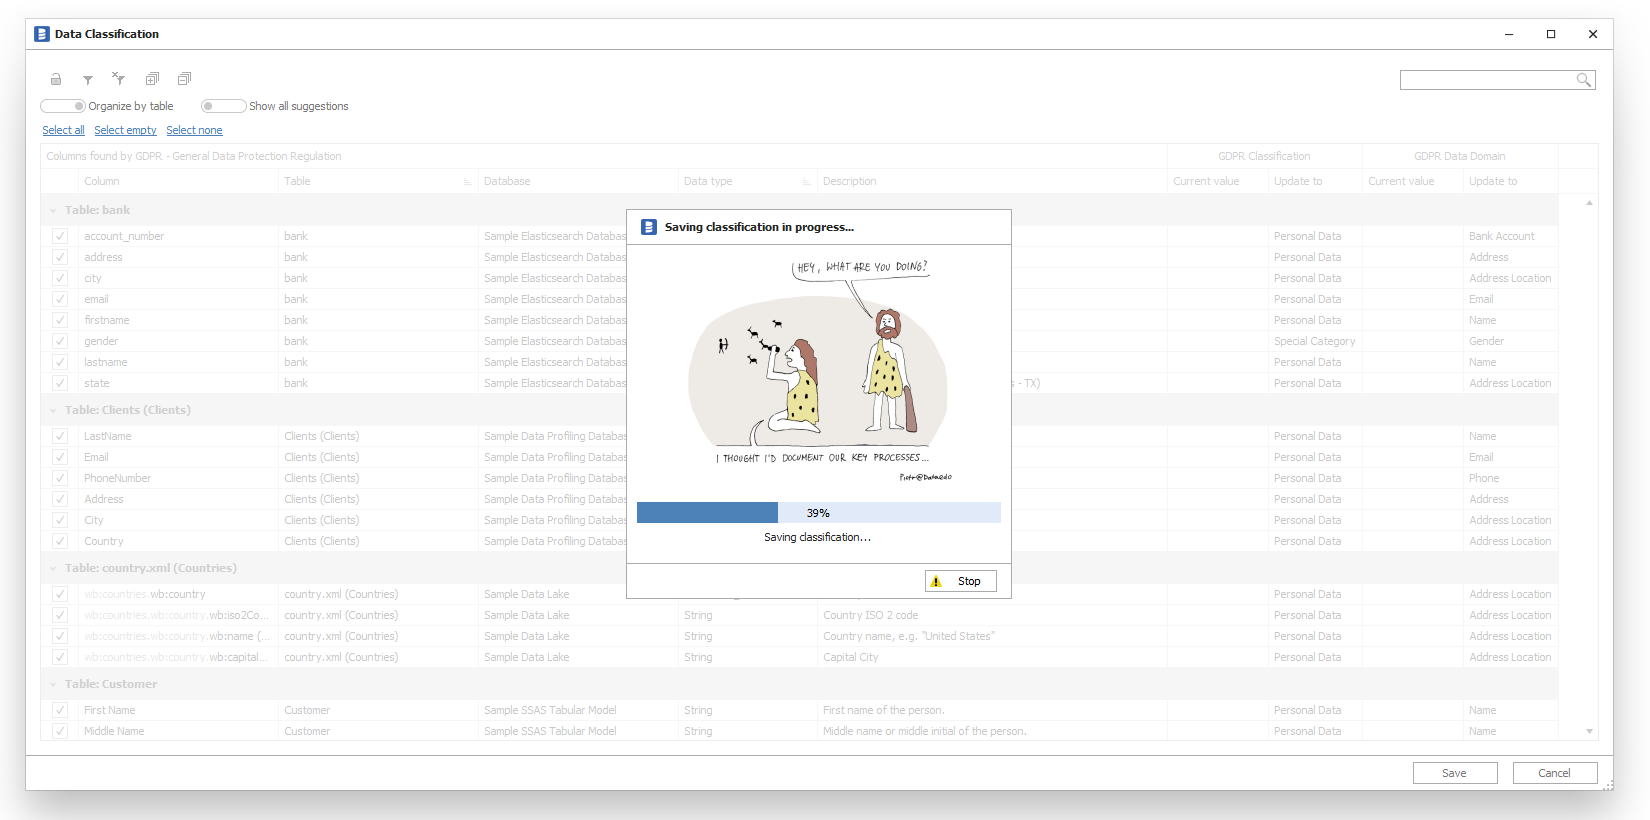
After you have reviewed classification labels and selected (with a checkbox) columns to classify you need to save them in the repository. To do it click the Save button.
Browse classifications
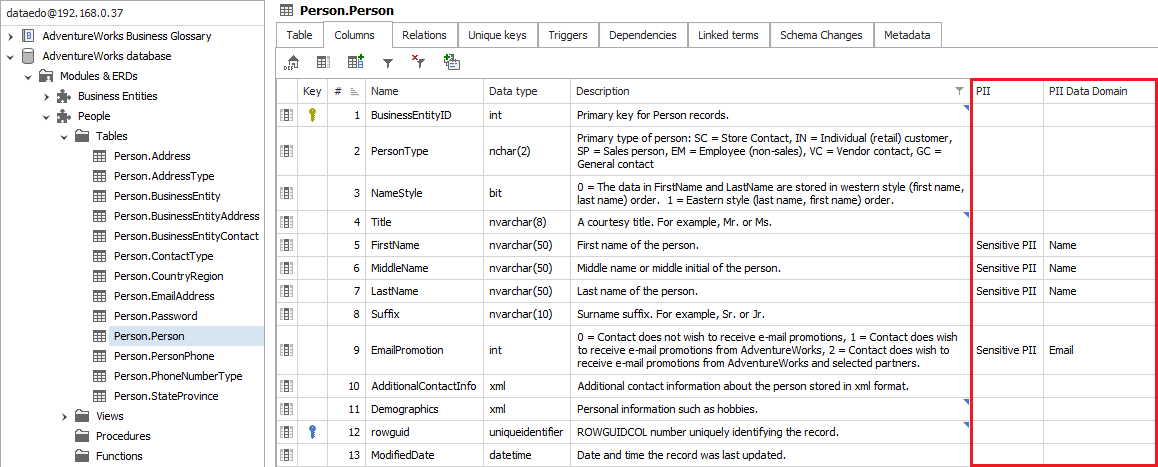
You can browse classifications in the catalog editor or HTML exports. Classification labels are visible next to table columns like any other custom field.
Manual curation
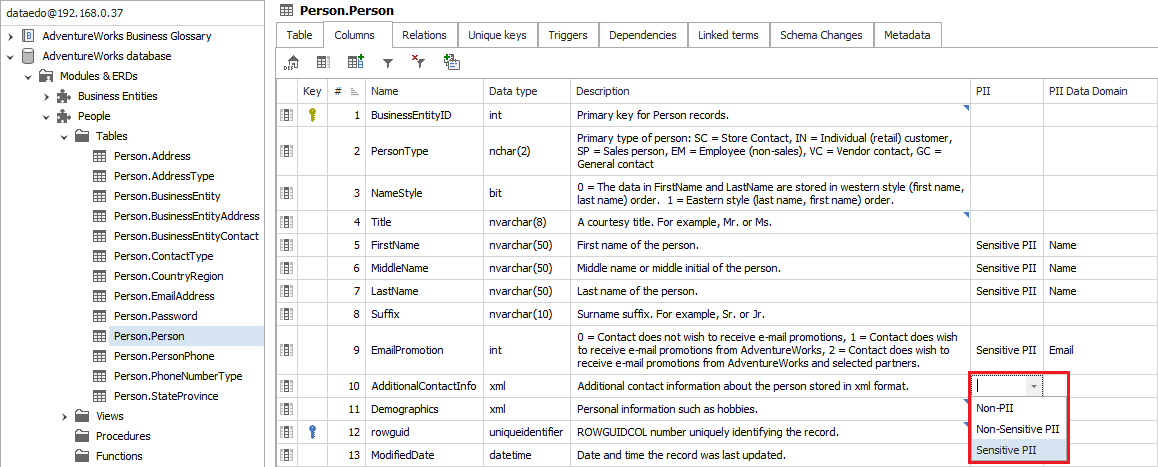
You can curate labels manually directly in the catalog editor and classify columns that were not found by the discovery function in the same way as in the case of manual classification.
Running multiple times
You can run the function multiple times. You need to do so if you review suggestions in packages.
The next run of classification can find new fields because after saving classification is propagating to similar columns (having the same name). It is advised to run classification as long as it returns any results.


 Mac Lewandowski