 Adam Adamowicz
This tutorial will show you how to generate documentation of your Oracle database with a free tool from Oracle – SQL Developer Data Modeler (as a standalone product or built into SQL Developer – a data console). It was based on version 17.2.
1. Introduction
To generate documentation, you will need to create a design in Oracle SQL Developer Data Modeler.
The easiest way to create the new design is simply open Oracle SQL Developer Data Modeler. In Browser window you will see folder “Designs” and “Untitled 1” inside (this is your design you will work with).
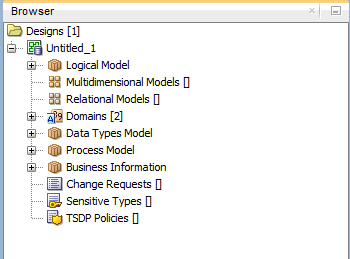
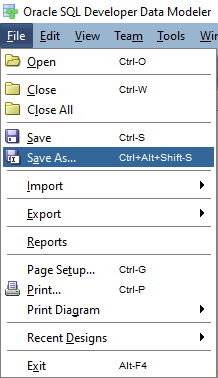
Before you start the actual work, save the design on your computer by Open File -> Save As… and choose the file you want your design to be saved in. You might need it later if you want to generate documentation again.
In the top level of elements inside your new design, you can see a list of different model types. To generate database documentation, you need only Relational Model. So your first step is creating a new model. To do this right-click on Relational Models and choose New Relational Model. So now, when you have a blank model in your design you can import objects from your database - such as tables, views, and procedures.
2. Import Database Objects
Now you need to import objects from your database to the model created.
To import objects select File -> Import -> Data Dictionary (or press Ctrl + Shift + B).
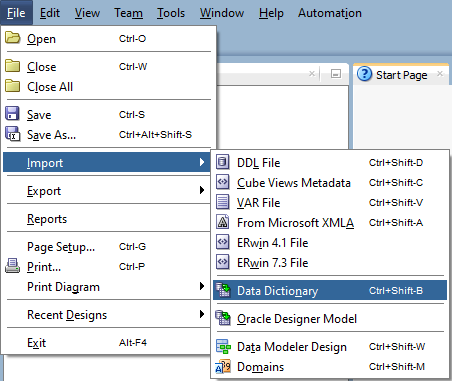
As you can see in the picture above, you can import database structure from various sources. But in this tutorial, you will import objects directly from the database, so you need to choose Data Dictionary option.
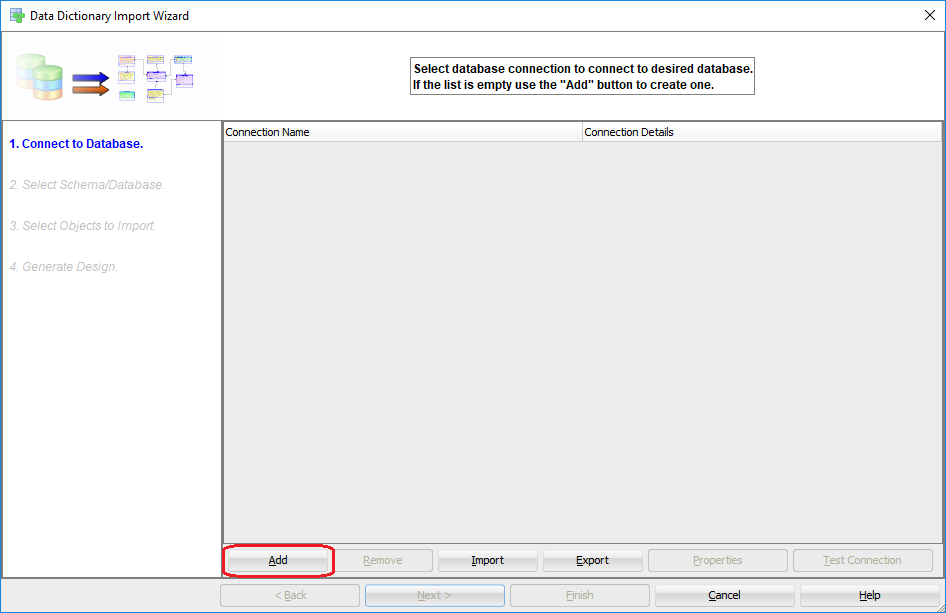
In the first step of Data Dictionary Import Wizard, you will have the option to choose database connection. Because you connect to the database you will not have any connection listed in this window. So you will need to create a new one.
Create database connection
Adding new connection is very simple and if you used Oracle SQL developer before you will know what to do.
To create the new connection you will need to click Add button.
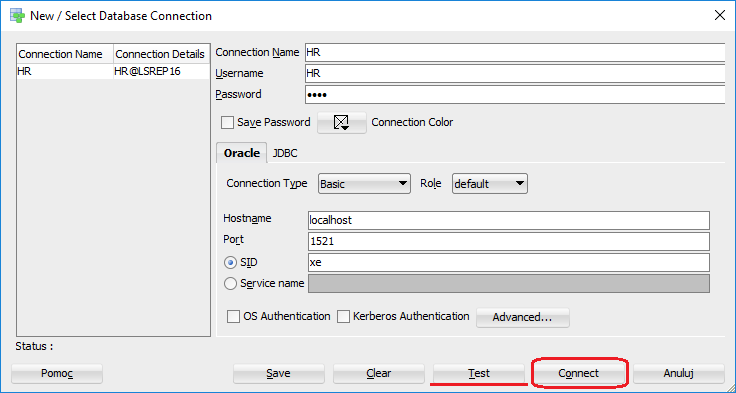
Next, you will see the window when you need to provide connection details. To save connection click Connect button. You can also click Test button to check if your configuration is correct.
Import objects
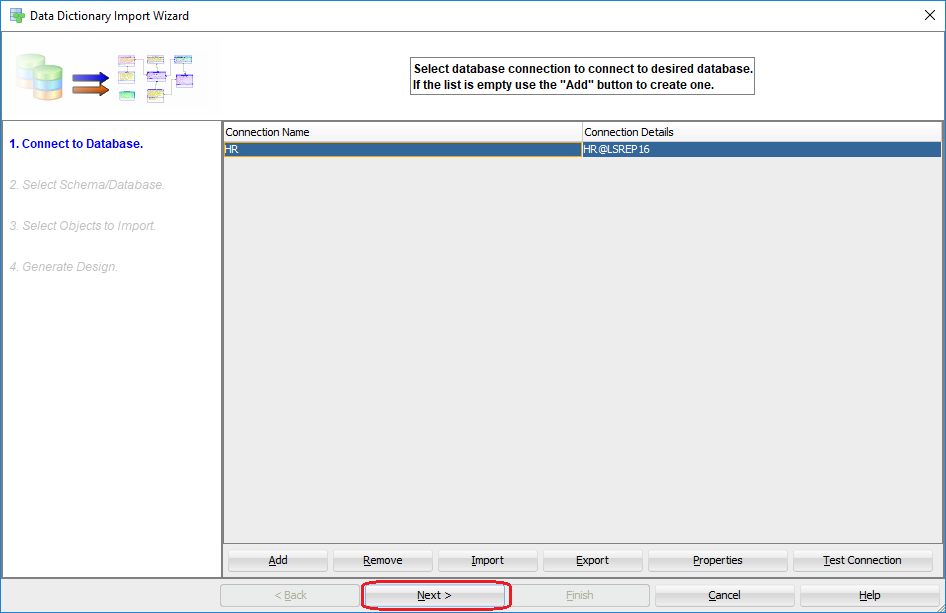
Now when you created the connection to your database, you can start schema import. First, select the connection you just created and press the Next button.
In next window, you will see a list of available schemas on the server. You can also choose to which model you want to import objects. At this moment, you have only one Relational Model (by default named Relational_1), so you don’t have a big choice.

Since you chose the schema from which you want to import objects, now you need to mark the ones you actually want to import. Objects are grouped by their type. Each type has its own tab visible on the bottom of the window. Let’s go to Tables and Views tabs (as only those objects are being exported), and select all objects with the icon on the bottom right.

After you press the Next button, you will see a summary on how many objects were imported by their type. As you can see below, I have imported seven tables and one view. To end process of importing objects press the Finish button. After that, you will see import log, press Close to finish the import.

3. Customize ER diagram
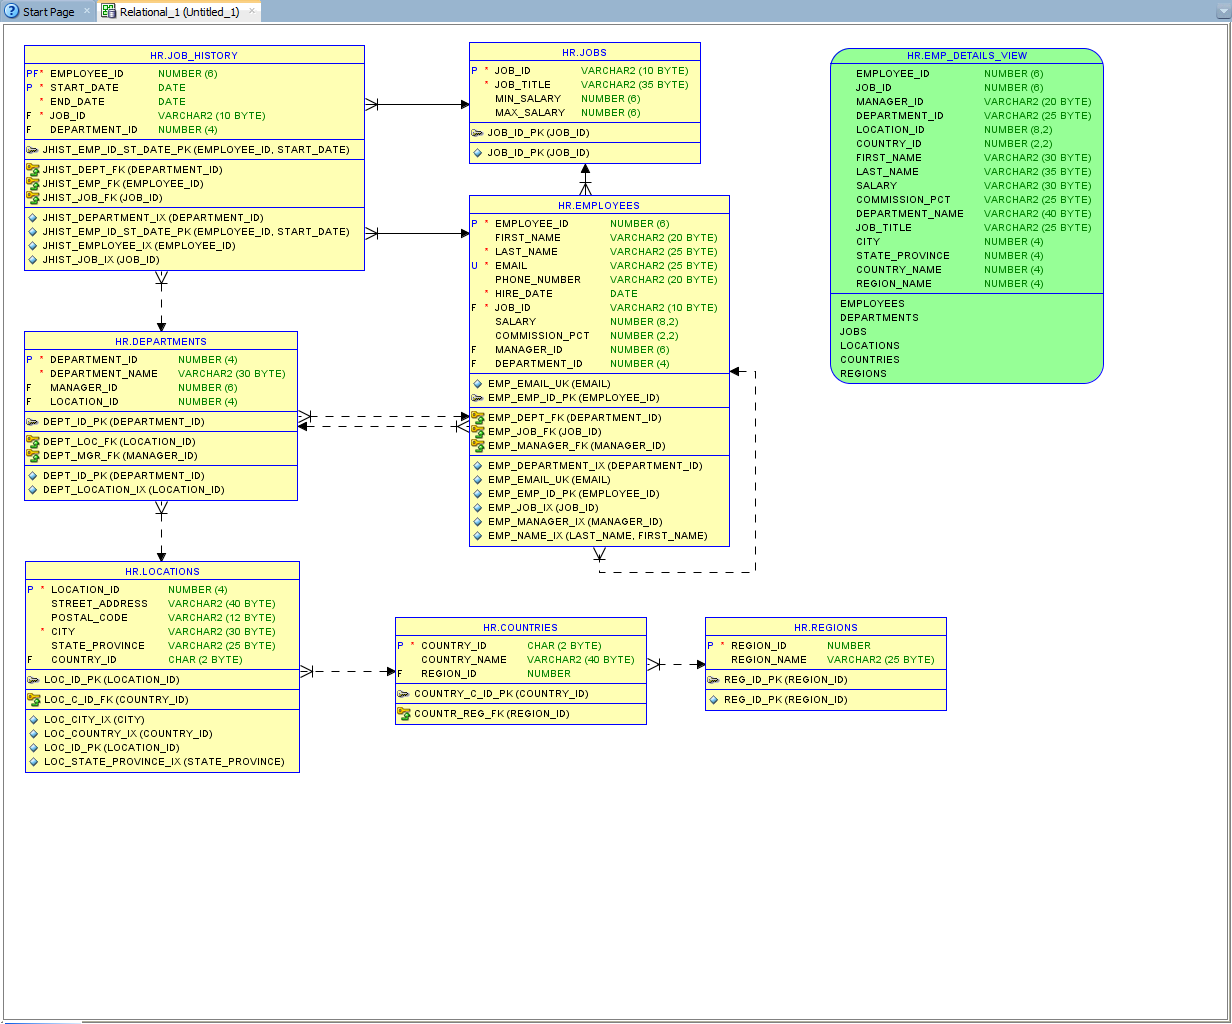
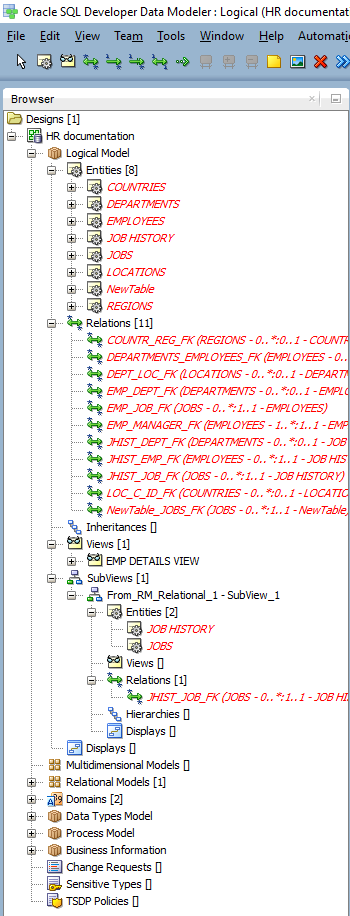
For now, you connected to the database and imported objects from it. After import, objects are added to your Relational Model, and the database (ER) diagram will be automatically created.
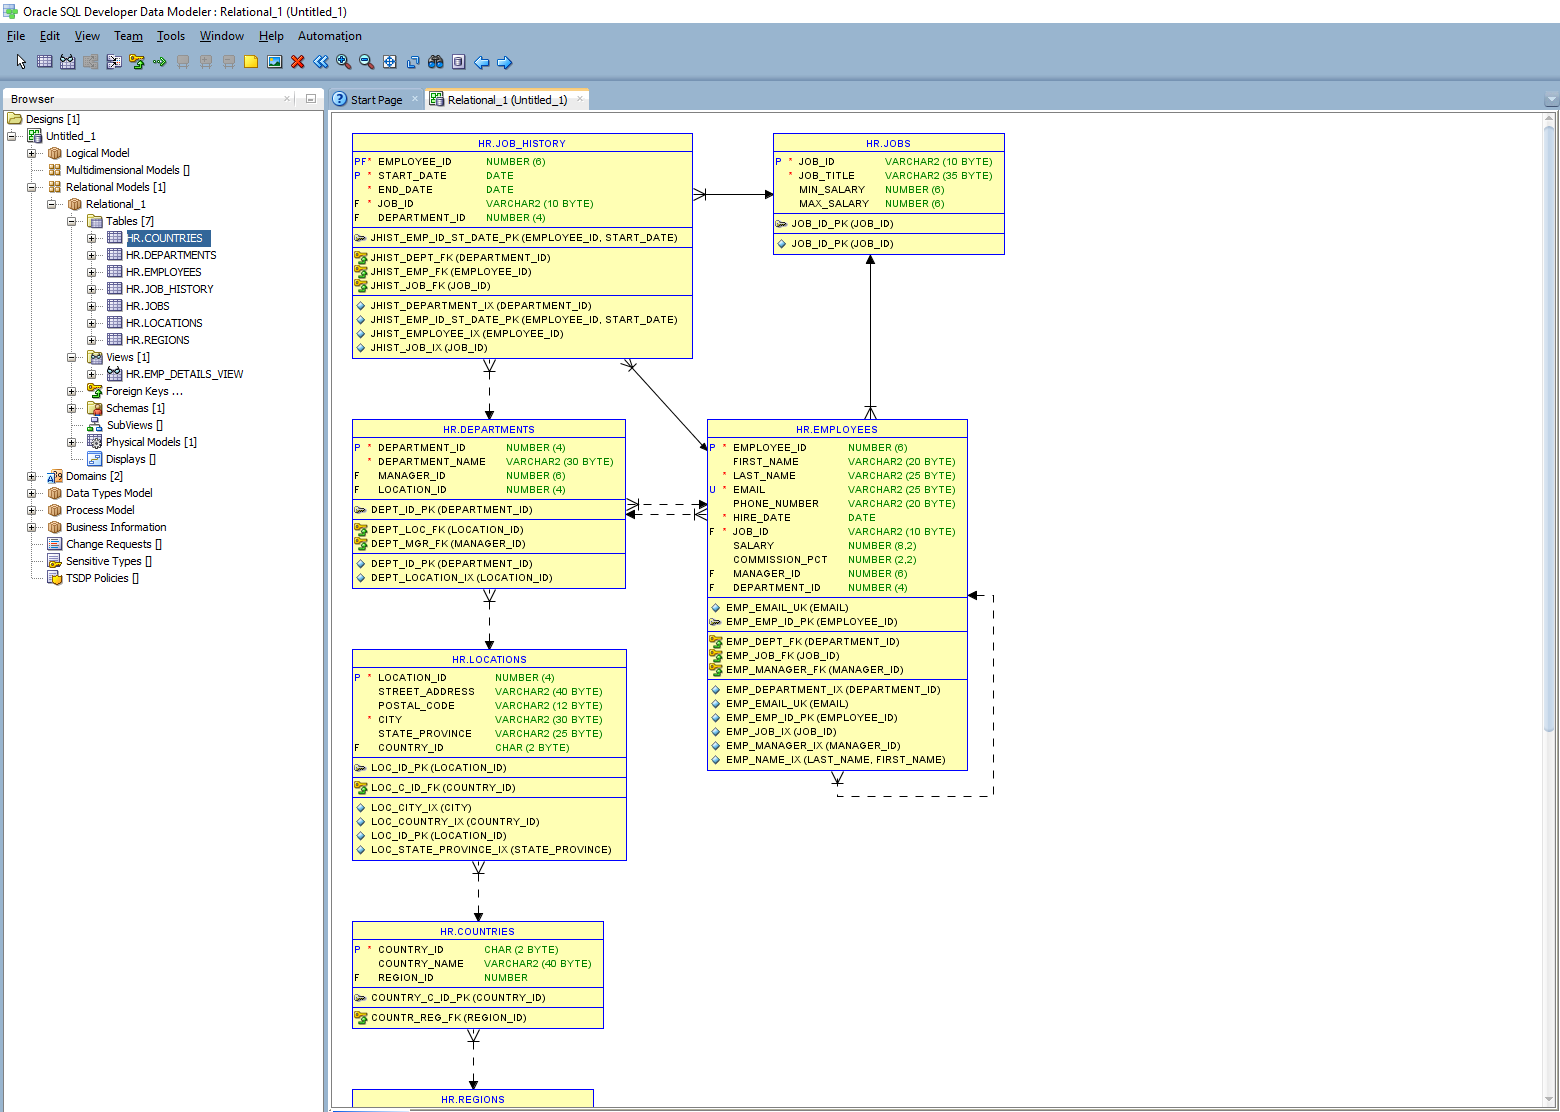
If you would like to modify the appearance of the model just move objects on the pane. The automatic layout doesn’t handle well large amounts of tables, so you need to fix it manually. In my example I moved around some tables:
Diagrams with no relations
If your database didn’t have foreign key constraints, your diagram is going to look different to the one above, and it will consist of tables without relations. Handling this case is a material for the next tutorial.
Create smaller diagrams for large databases
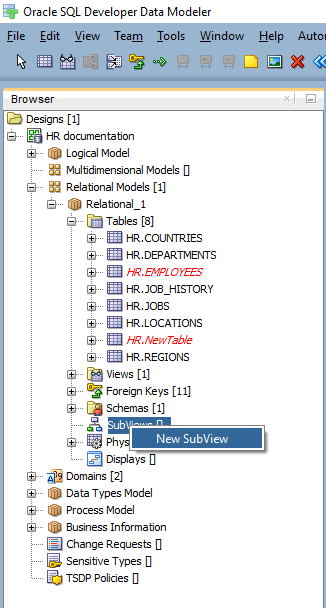
Data Modeler has an option called SubViews. SubViews, as the name suggests, is part of the whole model. All your objects were imported to Relational Model (Relational_1). If you imported a lot of tables and views, you might want to break your diagram into smaller, more manageable diagrams. This is where SubViews come into play.
To create new SubViews right click on SubViews element under Relational Model and press New SubView.
To add a table to the SubView just drag it from the list of tables in Relational Model and drop it on Relational SubView pane. I have added two tables to my SubView.
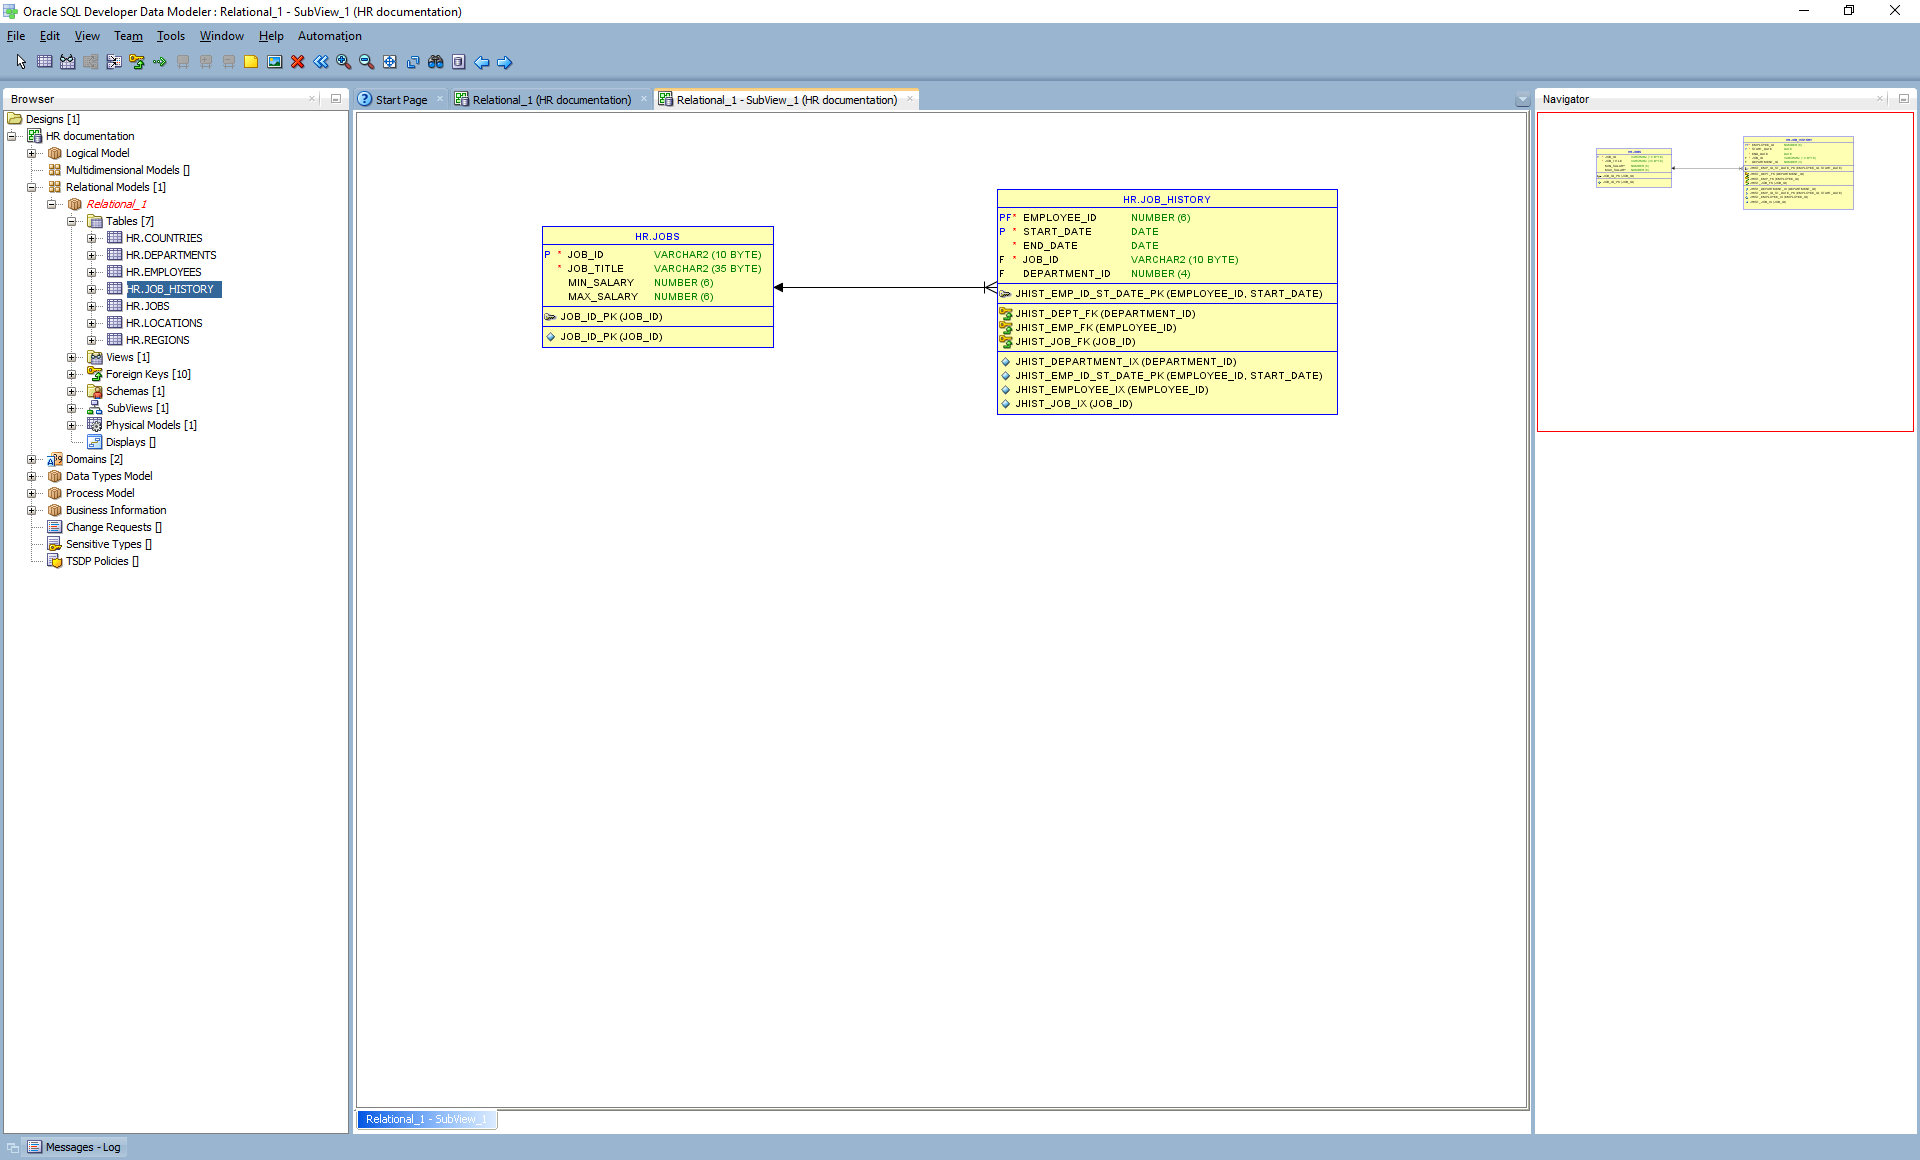
Objects which you moved to SubView are the same instance as an object in the Relational Model so you can edit comments in both Relational Model and any SubView.
4. Describe tables and columns
Now we are moving to the most important part of this tutorial, which is providing descriptions to your tables and columns if they don’t have comments already in the database.
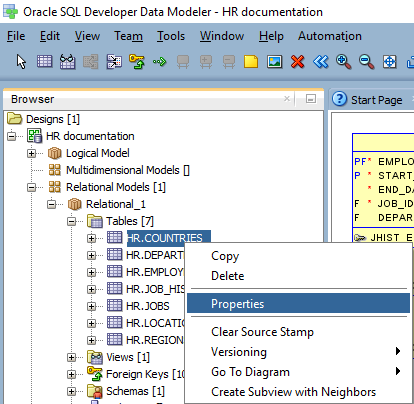
Let’s choose a table and right-click on it and choose Properties.
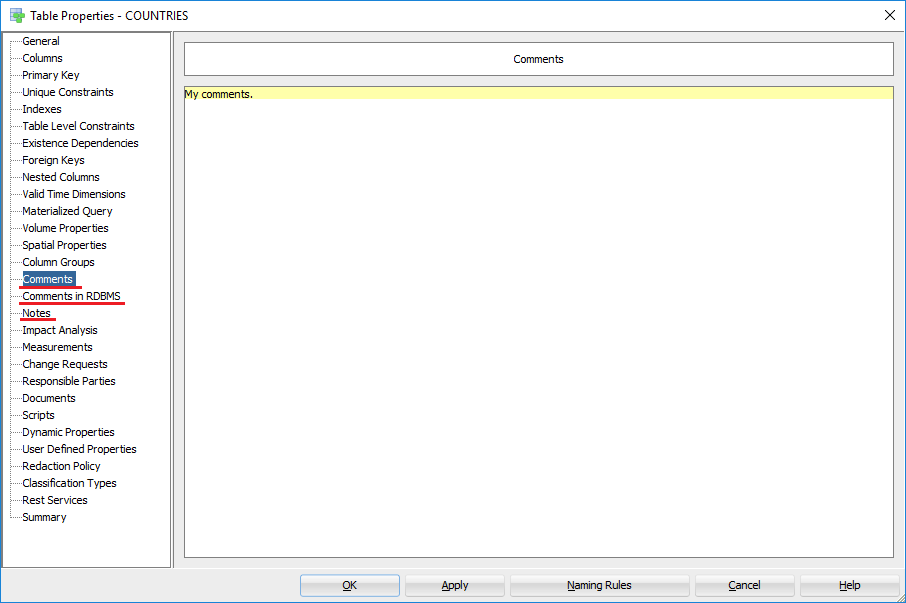
If your database had comments saved directly in the database, you can see them in tab Comments in RDBMS. In Oracle SQL Developer Data Modeler you have three fields where you can insert table description.
- Comments in RDBMS - holds information imported from the database (if you update this field you will be able to export descriptions back to your database - this is a material for another tutorial). This field has not limited length but if you exceed 4000 characters and will try to save descriptions back to the database the script will throw an error.
- Comments - holds descriptions which are saved only in the design file you are working with at this very moment.
- Notes - are used to add additional information, and they will not be included in the exported documentation.
Export includes only one description field - by default, it is Comments field. Comments in RDBMS are visible only if Comments field is empty.
We suggest you use Comments in RDBMS fields, as you get the option to export your comments to the database. When using Comments in RDBMS keep in mind that you should not insert text longer than 4000 characters as it will cause an error. Unfortunately the tool doesn't cant handle it properly nor tells you that you exceeded this length.
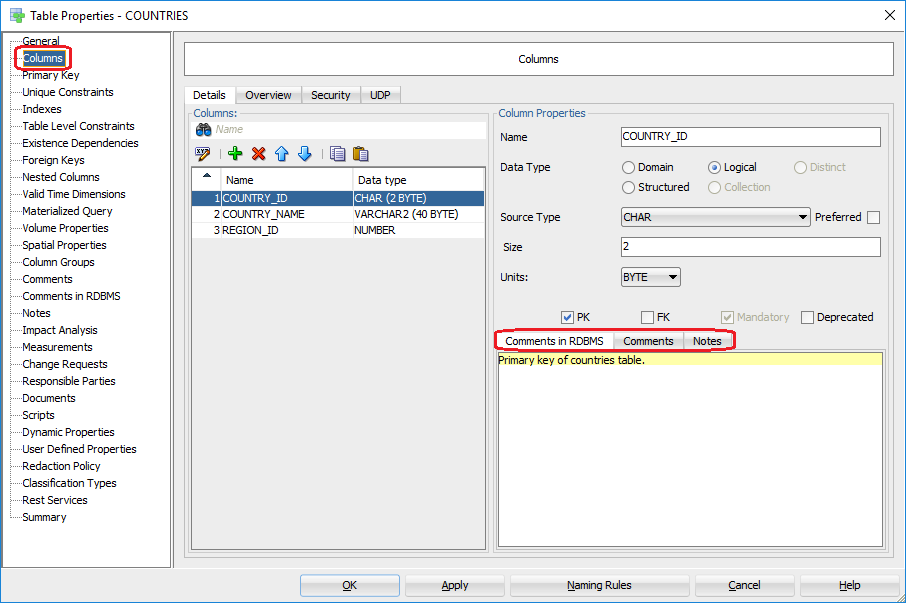
Once you have added a description for a table, it is time to describe columns. To see a list of columns select Columns on the left menu. You choose columns in the middle pane on the Details tab and provide descriptions of the text fields on the right pane.
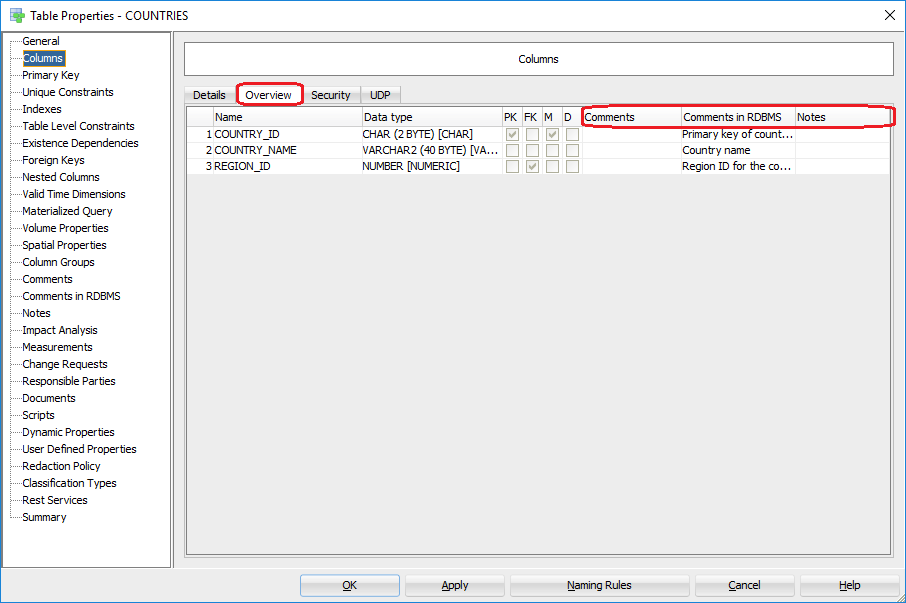
Or from Overview tab.
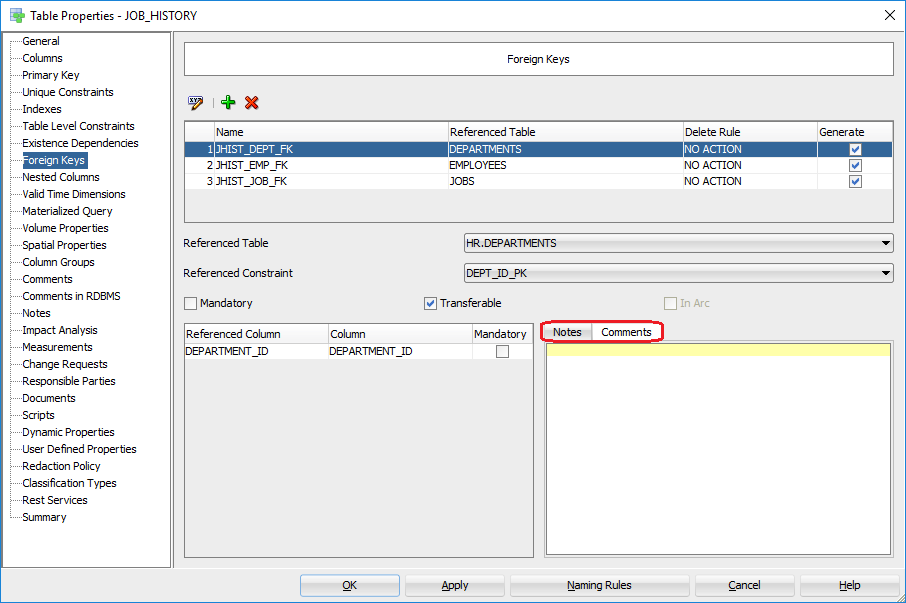
In other elements of your table (Primary Key, Unique Constraints, Indexes, Table level Constraints and Foreign Keys) you can use notes and comments fields. Comments in RDBMS are not available as Oracle DB doesn’t support this.
Comment as many elements as you need. When you finish with the table close it with OK button.

Note that your changes in your model file are not saved yet. After you modify table descriptions, they will be highlighted in a browser window in red. Save the file to keep your changes, if you close Oracle SQL Developer Data Modeler without saving it, you will lose all the changes made.
When you finish documenting your database, you are ready to export the documentation.
Saving descriptions
If you added or edited comments in RDBMS, you can export changes back to the database. I will describe how to do it in another article.
5. Exporting documentation
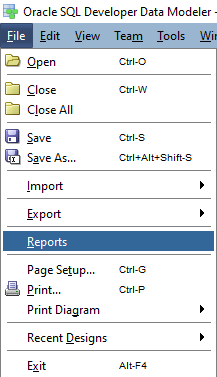
Oracle SQL developer allows you to export your documentation to PDF, HTML or RTF files. Because I want to publish documentation online, I will choose HTML format. Try all types of exports to see which one suit you best.
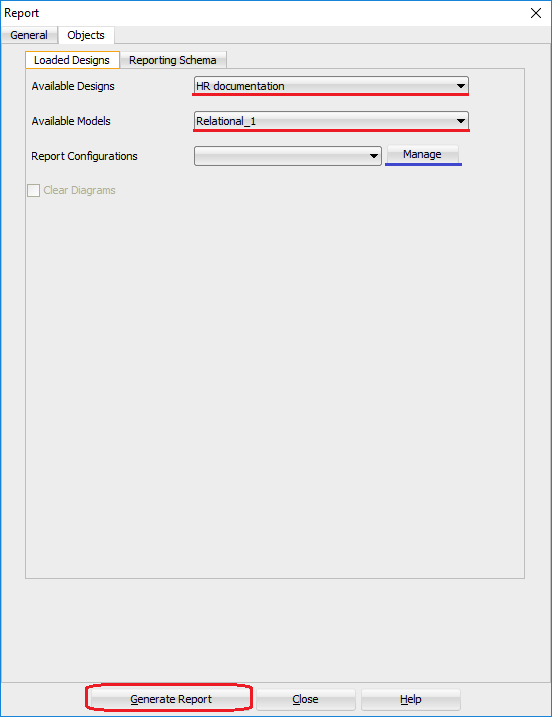
To export go to File -> Reports.
And configure export.
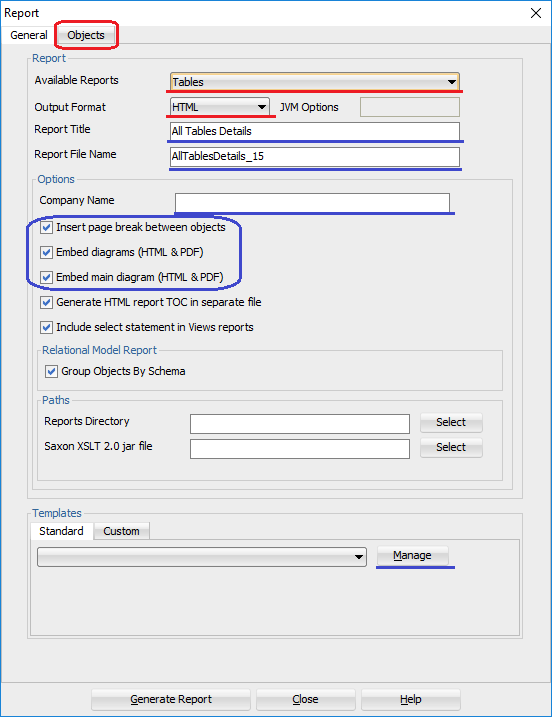
Most important options which you need to set are:
- Available Reports - When you generate documentation from the Relational Model, you can choose Tables or Table Views. Other is used to generate documentation of other models available in SQL Developer Data Modeler like Logical Model, but this is not part of this tutorial.
- Tables - only tables and diagrams will be included in the documentation.
- Table Views – only views and diagrams will be included.
- Output Format - you can choose from PDF, HTML, and RTF.
You might also have a look at other options:
- Report Title – title visible in the documentation.
- Report File Name – name of the file with documentation.
- Company Name – Name visible in the footer of PDF and RTF file export. The selected checkboxes on the picture above are for you to decide if you want to show diagrams in your documentation and if you would like to page break between objects.
Advanced options - documentation scope
If you want to export all objects imported from the database and diagrams just skip this section.
Besides standard configuration, you can create templates of export, where you can choose elements of objects which you want to show in your documentation. To create or edit templates click Manage button.
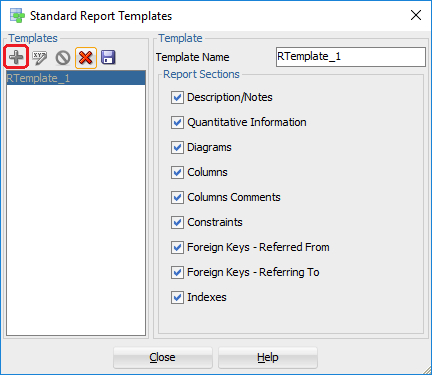
Under Report Configuration in Objects tab, you need to choose which SubViews and which objects you want to export. You can add and edit report configurations after you click Manage button.
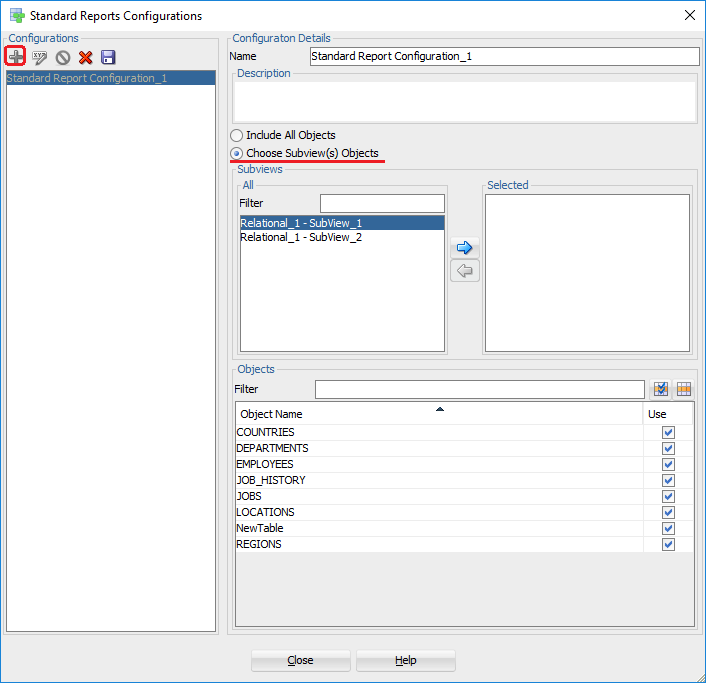
By default for new configuration option Include All Objects is chosen. If you would like to generate documentation for specific SubViews, click on Choose Subview(s) Objects and move SubViews which you want to show in documentation to right (Selected box). You can also hide a specific object from the documentation, simply uncheck tables/views which you want to hide. Now let’s change the name and save configuration by clicking on Floppy disk icon.
Generate export
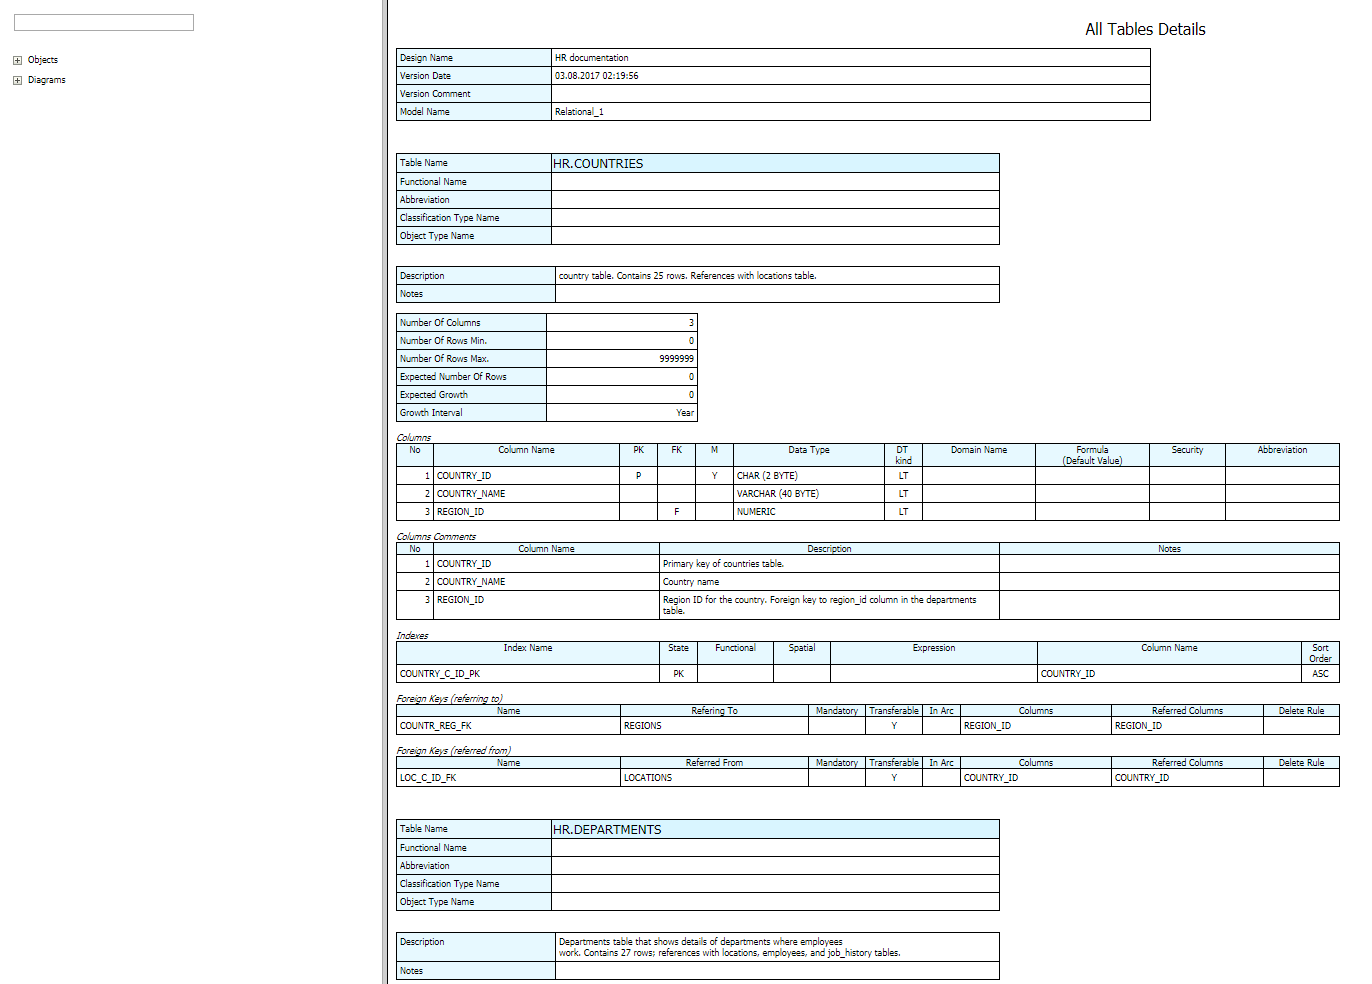
When you are ready, click Generate Report. Next, close dialog that pops up and your documentation is ready!
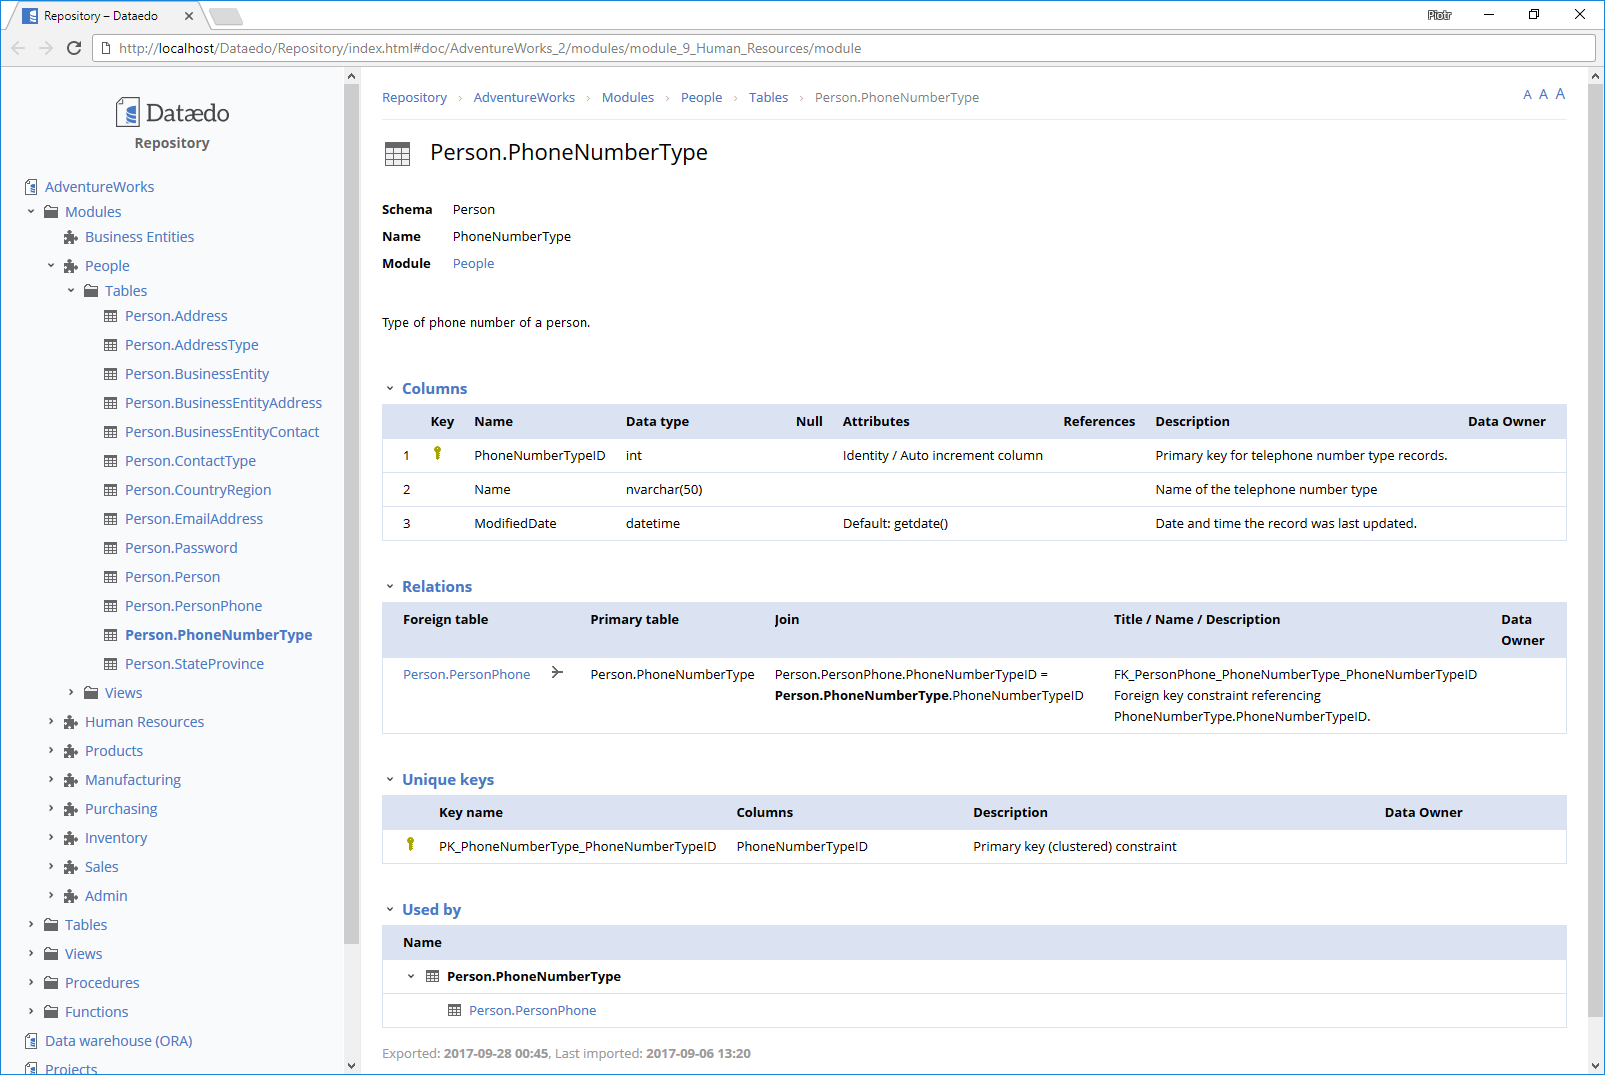
Open sample documentation in new window
Take it to the new level with Dataedo
If you want more describing capabilities using rich text with images, custom fields, ER diagrams and with documentation export that looks like below, try Dataedo tool.