Recently we talked with some of our customers and even though all of them seem to find Dataedo very useful, we found out that many of them are not aware of some helpful or even crucial features. Thus we created a list of 25 tips & tricks anybody working with Dataedo should know.
These tips are universal and you will find them extremely useful – no matter if you are just starting your jurney with Dataedo or if you have been our customer for years. To make it easier we divided our tips into four categories representing different aspects of database documentation process. Enjoy!
Schema import & changes (01:43)
Tip #1: Use ODBC connection (01:46)
We have a handful of native connectors, but if your source is not supported you can always use ODBC connection, which is provided by the vendor or a third-party. Most of databases have these connections. You can read more about ODBC connections here.
Tip #2: Automate schema update (03:38)
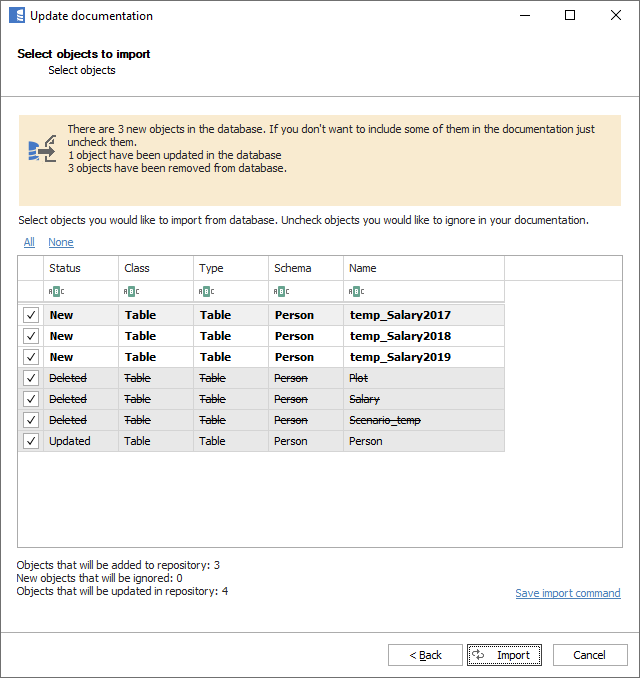
When your database schema changes you can easily import those changes and update your Dataedo documentation schema in a similar way you imported it. To do so click the button “Import changes”, provide connection details and click “connect”.

To automate this process click “Save import command” on the next window - it will create a new command file you can set up a Windows Scheduler task for that will run Dataedo automatically on the chosen time.
You can also learn more about importing schema changes.
Tip #3: Import schema manually (04:59)
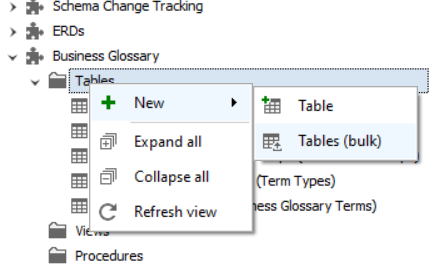
If ODBC connection doesn’t do it for you, you can add a database manually. To do so click “Add” in the ribbon and choose “Manual database” option. Then go to tables and click “New > Tables (bulk)”.
Then click “Copy template” and paste it to Excel or Notepad.
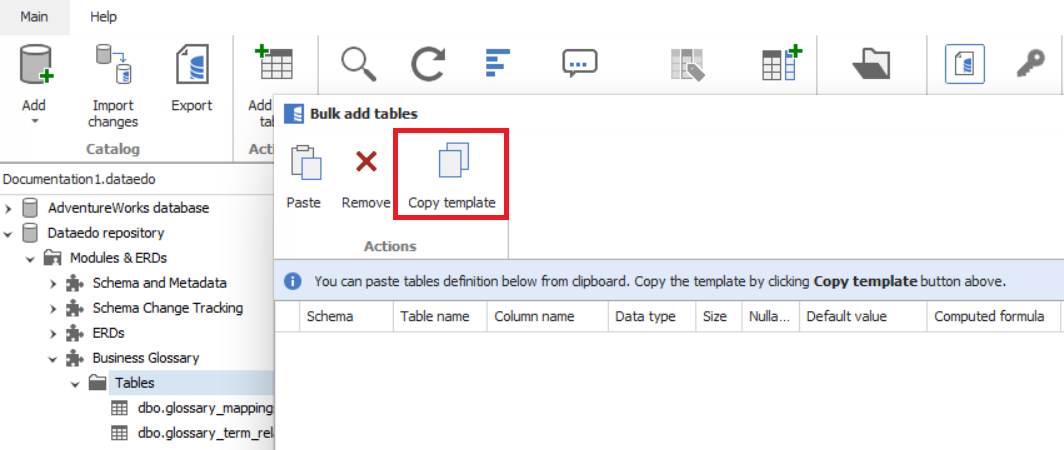
Now you can extract this data from your database using a simple query and paste it back to “Bulk add tables” window in Dataedo. After clicking “add” it will be imported to Dataedo.
You can learn about manual schema here.
Tip #4: Use Schema Change Tracking report (06:43)
This feature is available for enterprise users. On almost any object you can go to the “Schema Changes” tab, choose time window, and click “Generate”. You will see a log of all the changes and be able to add comments explaining why something was edited.
![]()
Find more infromation on schema change tracking.
Tip #5: Remove tables from the repository (07:49)
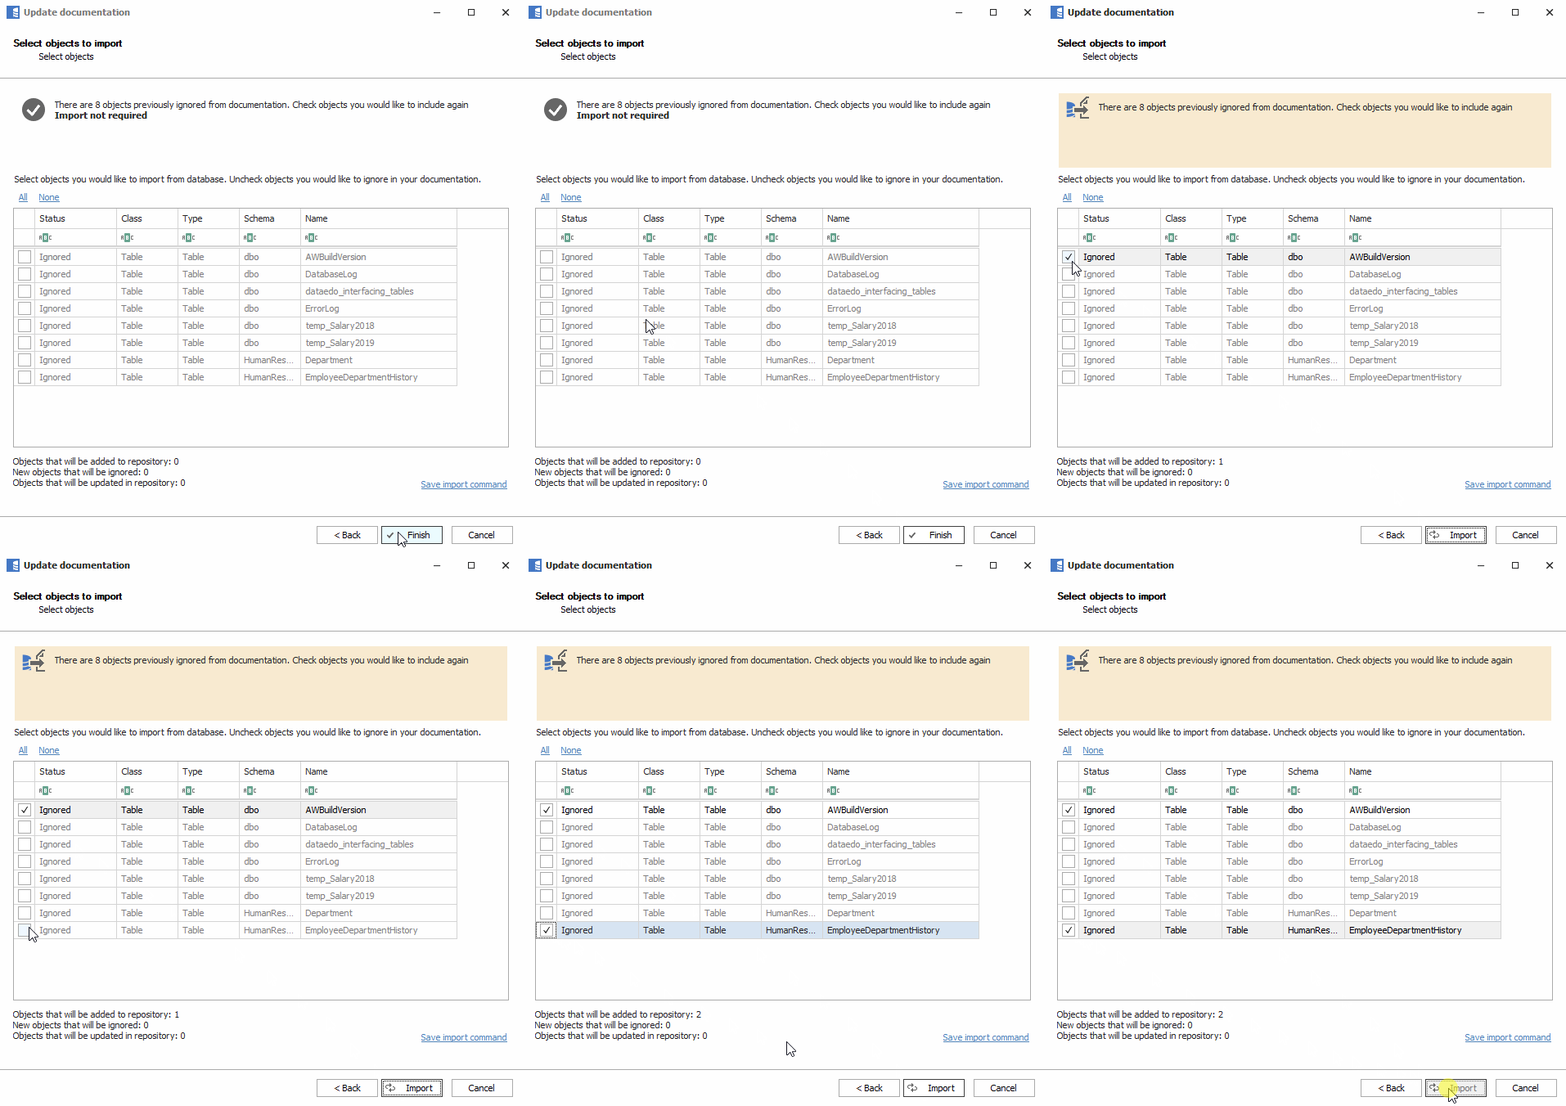
Quite often you might find that some tables are out of use or are temporary / backups and are not needed in the documentation. If you delete it in the Dataedo interface, it will be deleted only from the repository and won’t be imported again with future changes. Deleting a table automatically adds it to “Ignore list”, but If needed, it can be easily restored in the importing changes summary window.
Documentation (08:46)
Tip #6: Organize database with modules (08:53)
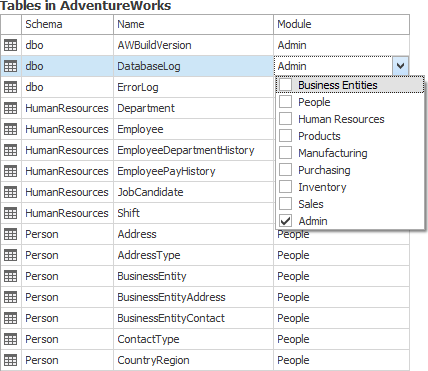
When you go through the list of tables in Dataedo you will see a field “Module”. Modules can help you organize a database into smaller pieces, make it easier to understand what particular tables are used for and to find tables related to particular area. They can be used within one database or across different databases.
Learn more about .
Tip #7: Assign ownership of modules (11:11)
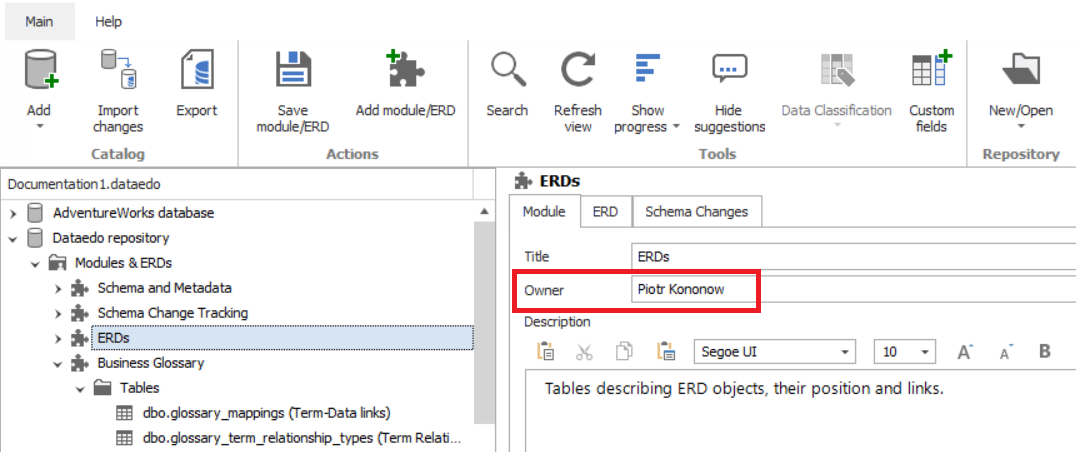
For modules you can create custom fields such as “Owner” or “Architect”, which can be used to indicate who is responsible for a particular part of documentation.
Tip #8: Use progres tracking (12:13)
When you click the button “Show progress” in the ribbon, it will show you what is the progress of documentation of particular modules , tables, and other objects. This will allow you to see where you still have some work to do.
![]()
Learn more about progress tracking.
Tip #9: Use description hints (13:30)
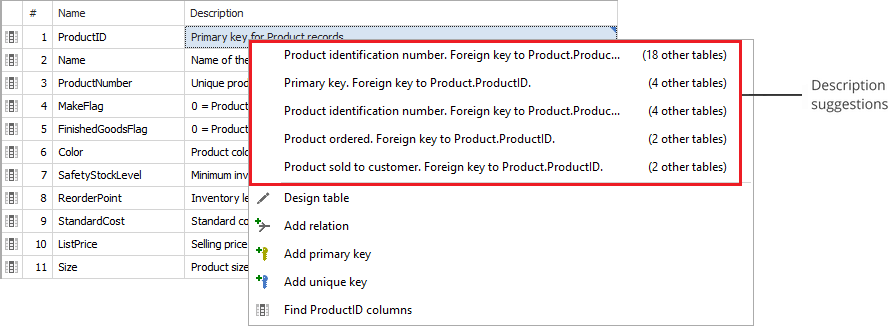
To enable this feature click the “Show suggestions” button in the ribbon. When it’s enabled you will see blue triangles next to the “description” field for some fields. This suggestions come from text from other columns with the same name. It is useful if some columns should have the same descriptions across different tables.
Learn more about adding suggestions.
Tip #10: Use bulk column editor (14:45)
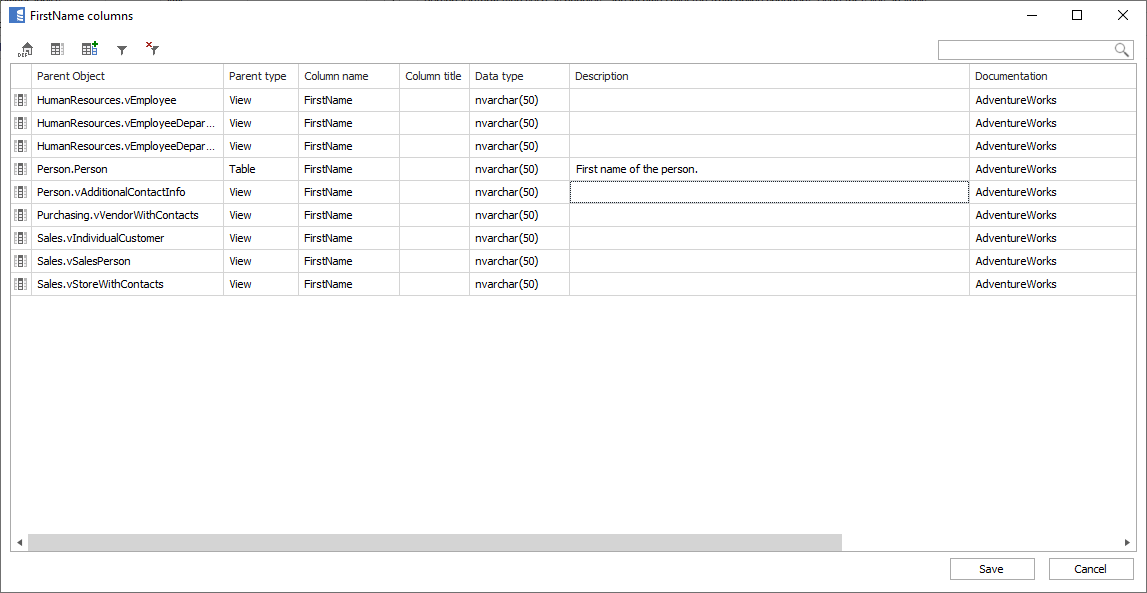
Dataedo editor allows you to browse and edit descriptions, titles and custom fields of all the columns with the same name. This is particularly useful for the documentation of common columns such as modified_date. To bulk edit columns right click one of the columns in the catalog and choose “Find XYZ columns” option. This will open a window with columns editor, where you can easily copy particular field, for example description for all the columns.
Learn more about bulk editing.
Tip #11: Use rich text description fields (15:53)
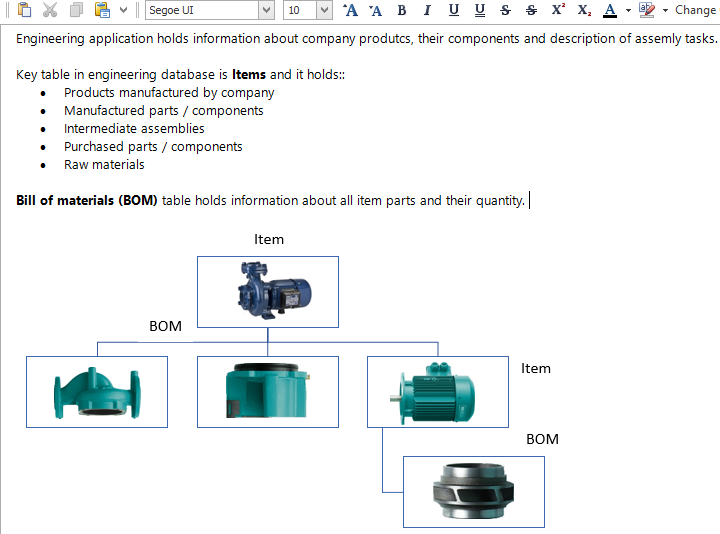
Most objects, such as tables or modules, have a rich text description field. You can use it to paste content from documents and websites without loosing formatting, links and images.
Tip #12: Use titles for aliases (16:43)
You don’t have to change names of tables and other objects if they aren’t clear or if their purpose changes over time. Dataedo allows you to add titles (aliases) to most objects, such as tables or columns. The title is then added after name in the export - for example Name (name of the province), to help you understand what the name stands for.
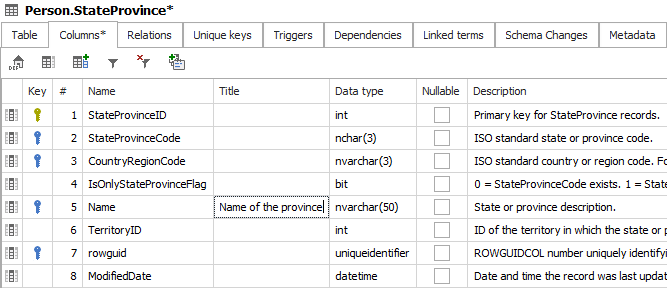
Learn more about adding titles.
Tip #13: Identify the same entity with glossary term (18:31)
If you want to be able to easily find the same element across entire repository or different databases, it is useful to assign it to a glossary term. To do so create a business glossary term for it and assign all entities of the same element (such as columns or tables) to it – you can do it simply by draginng & dropping them to the created glossary term visible in the repository explorer tree.
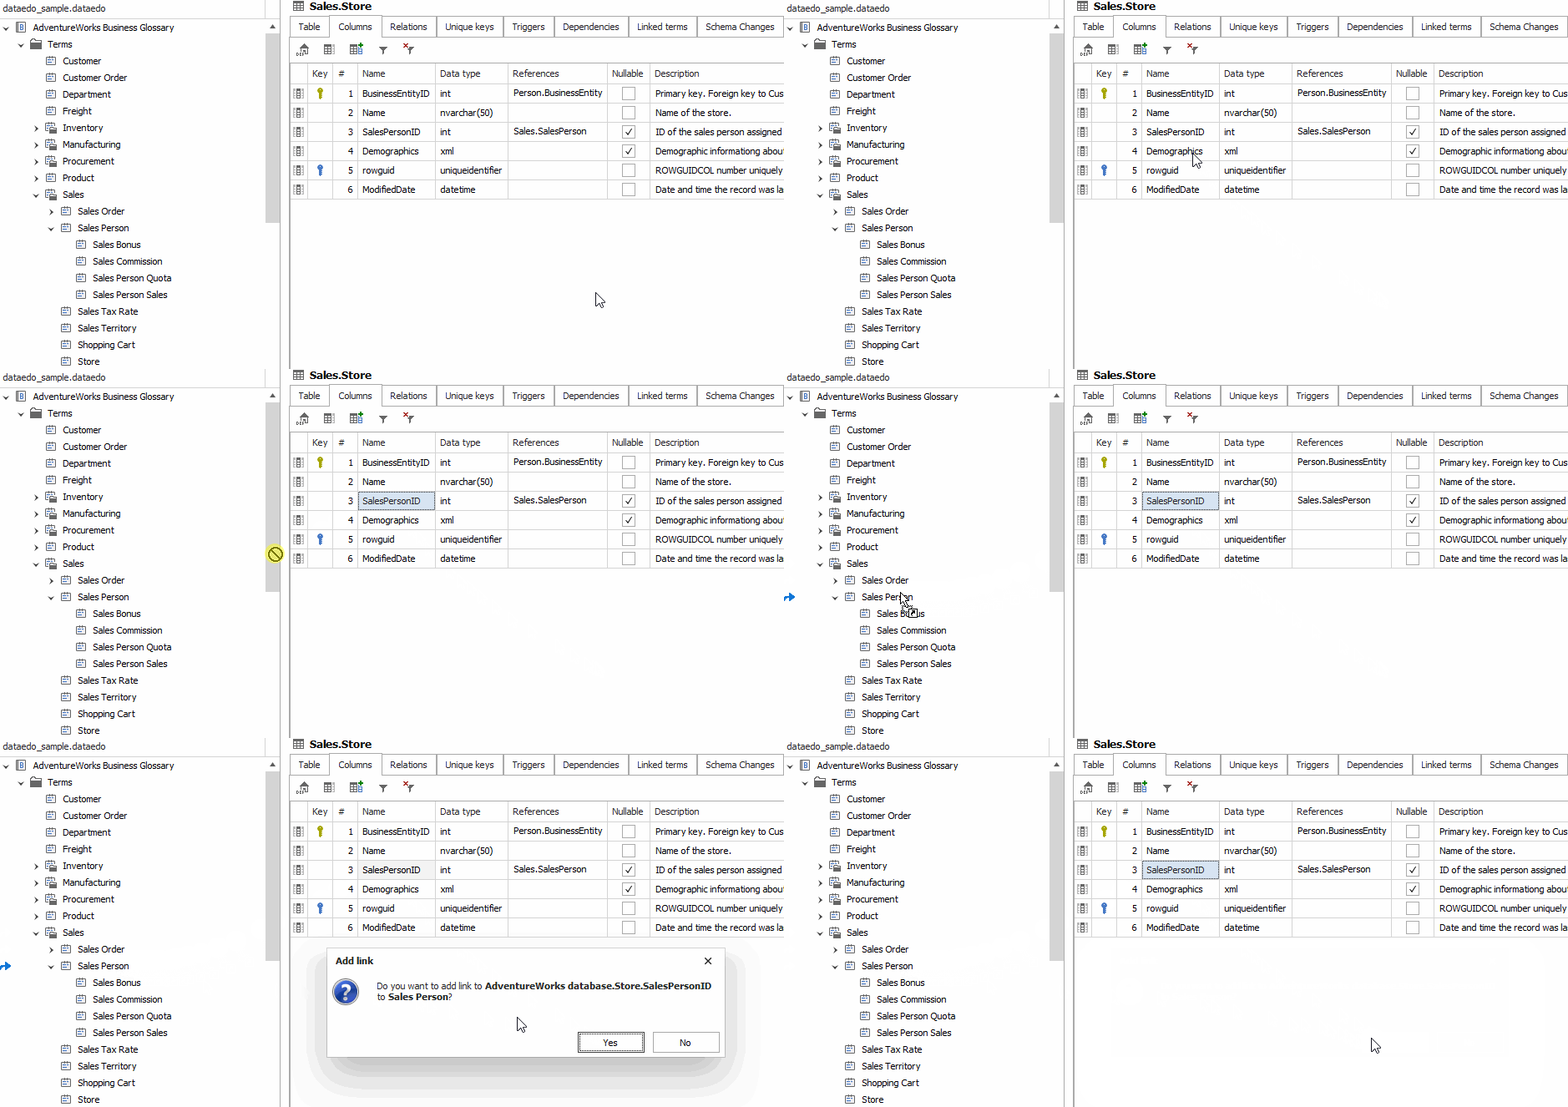
After completing this action when you click the created glossary term and go to “Linked data elements” you will find all the columns and tables that hold this element.
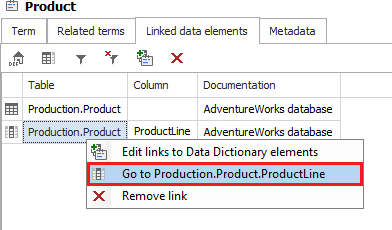
Learn more about linking data assets with glossary terms.
Tip #14: Reorder columns in a table (19:42)
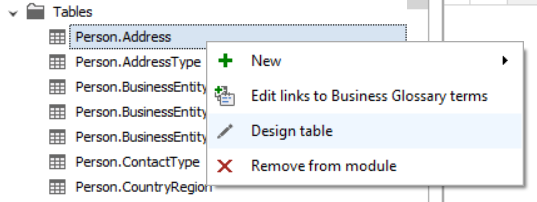
When you are building tables, columns aren’t always created in the logical order. Unfortunately some databases (for example Oracle) don’t allow you to change that order. Thankfully, you can reorder columns in documentation. To do so choose the table you would like to edit, right click on it and choose “design table” option.
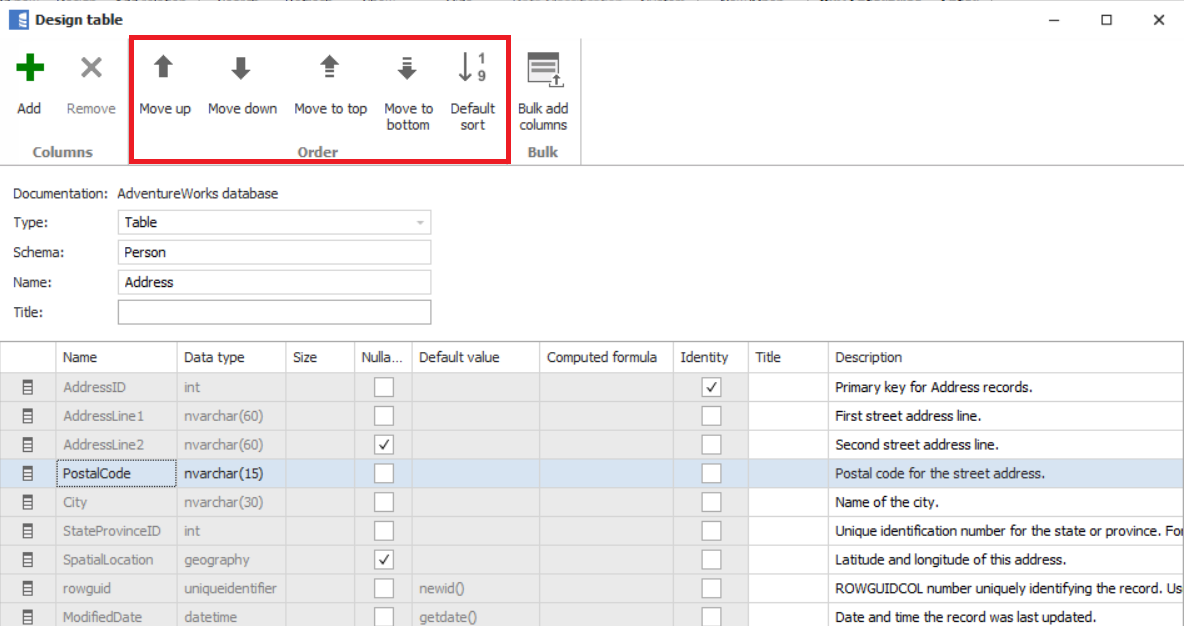
This will open a new window, in which you will be able to reorder columns by using order features from the ribbon (Move up, Move down etc.). Remember to save the changes after achieving desired order.
Tip #15: Define virtual columns (21:32)
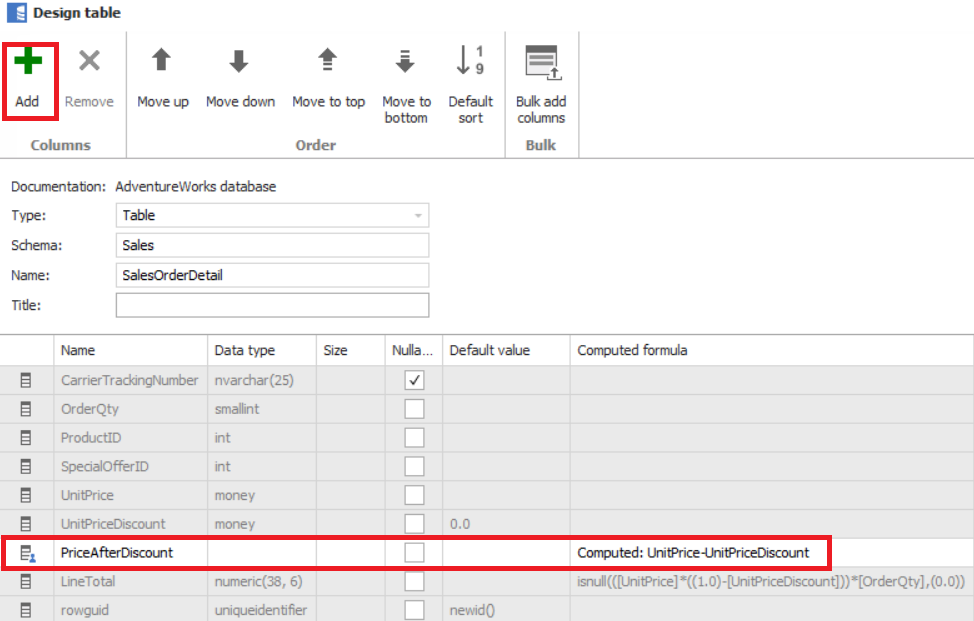
You can use the table designer shown in the previous tip to also create new columns (only for the repository). These can be used for example to store formulas, that will make it easier to prepare reports.
Tip #16: Document PKs, UKs of views (23:24)
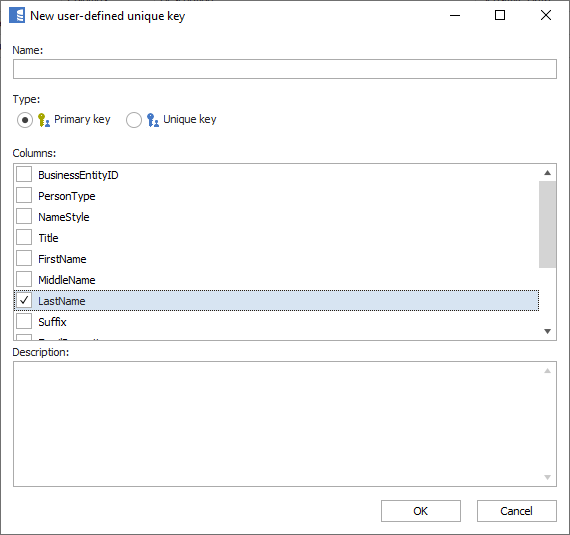
Views rarely have constraints. To use them safely, you should know what’s the uniqueness of particular set. Otherwise you might run into troubles with queries and get duplicated data. To allow other people to reuse views without these concerns, you can define uniqueness of views in the documentation, just as you would do it for tables. To do so right-click on an element you would like to edit and choose “Add primary key”. This will open a form, where you can create a new key.
Learn more about documenting primary and unique keys.
Tip #17: Create manual tables for many-many joins (25:34)
If a table has a field that doesn't have a lookup table, and you would like to show how it joins with other tables, and that perhaps it is an entity of it's own, you can create virtual table, just like we did with virtual column. Right-click on a table, choose "New" and then “Table”.
A new window will open, where you can define table parameters. After creating such virtual table you can use it in diagrams and create joins with it to understand the logic, even when it's not a physical table.

Tip #18: Create Status field (27:01)
Dataedo allows you to create up to 100 custom fields. One of such fields could be a Status. You can use it to define what is the actual status of a table or column - if it still in use (active) or perhaps it was canceled, and so on. You can define the labels yourself.

Learn more about creating custom fields.
Tip #19: Create Owner field (28:31)
Similarly you can create “Owner” field, that will allow to assign ownership of particular modules or tables. You can learn more about it in Tip #7: Assign ownership of modules.
Tip #20: Create Source fields (29:05)
You might also want to create two source fields - “Source system” and “source” that will help everyone who uses a data warehose where did the data come from. In “Source system” you can put which system or database did the data come from and in “Source” from which table & column in particular.
Documentation sharing (30:37)
Tip #21: Share HTML (30:47)
It might be obvious for you, but it’s definietly worth reminding, that the greatest value of data documentation comes from sharing. Dataedo allows you to easily export ready documentation to beautiful, interactive HTML, that can be used across your company.
You can learn how to export & share HTML documentation here.
Tip #22: Use different exports for different audiences (31:09)
During export you can define which modules, objects and custom fields you would like to export. Thanks to that you can create different exports for different audiences – so for example just the Human Resources module for HR analysts.
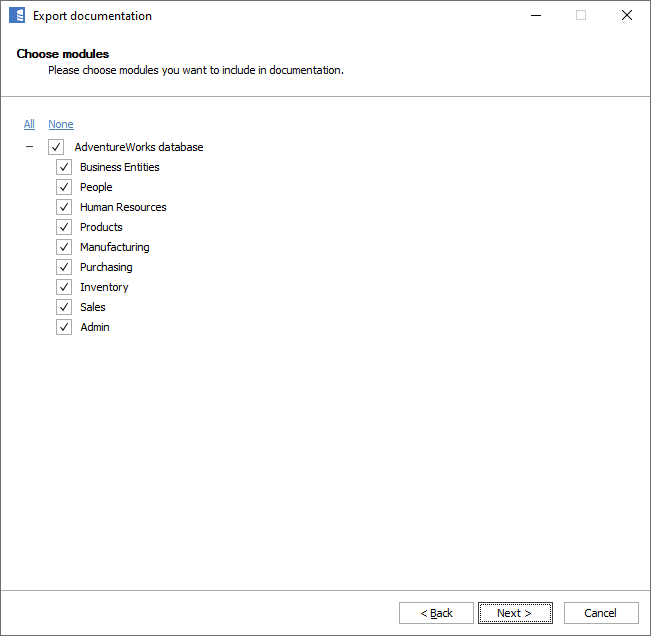
Tip #23: Automate HTML generation (32:41)
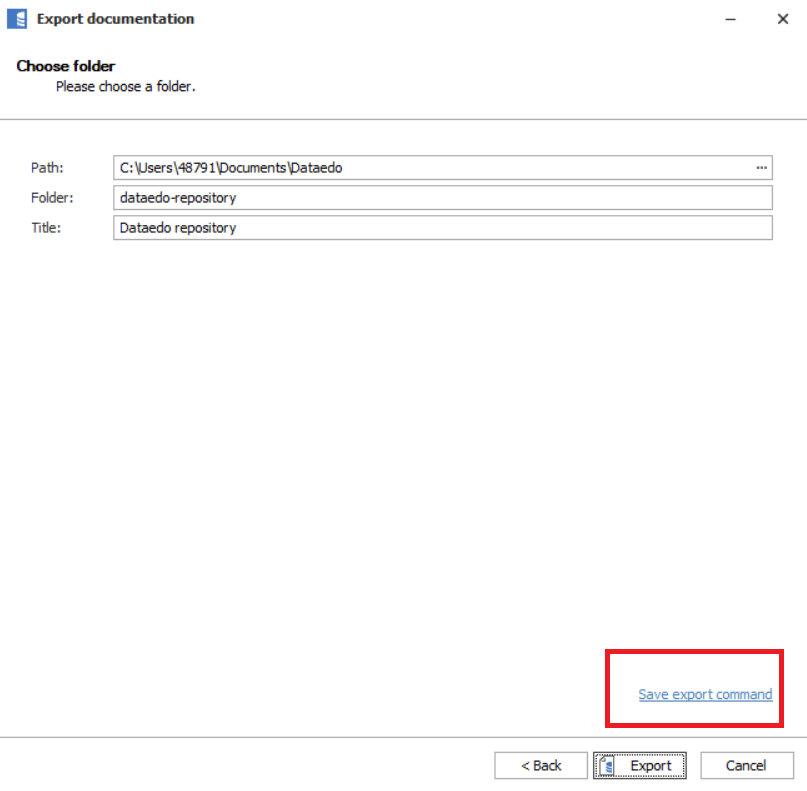
In Tip #2 we automated schema update. You can use the same concept to automate HTML generation. On the last “Export documentation” window click “Save report command” and set up a Windows Scheduler task for it that will run Dataedo automatically on the chosen time.
Final tips (33:56)
Tip #24: Update Dataedo software (34:01)
Always keep your Dataedo software up to date. We are working very hard to make imporvements and fix bugs, so make sure you are benefitting from that.
Tip #25: If you need help – ask! (34:51)
We have a world-class support and we are always happy to help:
- Live chat: https://dataedo.com/chat
- Email: [email protected]
- Resources: https://dataedo.com/support


 Anna Sztabkowska