
Dataedo is a simple, yet powerful tool that let's you create Data Dictionaries for your existing databases. It has a free plan that supports creation of basic Data Dictionaries for one database per repository. This tutorial will show you how to quickly create a Data Dictionary for any of your SQL Server, Oracle or MySQL databases.
Tutorial plan
Introduction:
Tutorial:
- Import Database Schema and Descriptions
- Document Tables
- Document Columns
- Document Relations
- Document Primary and Unique Keys
- Export & Share
What is a Data Dictionary and Why Bother
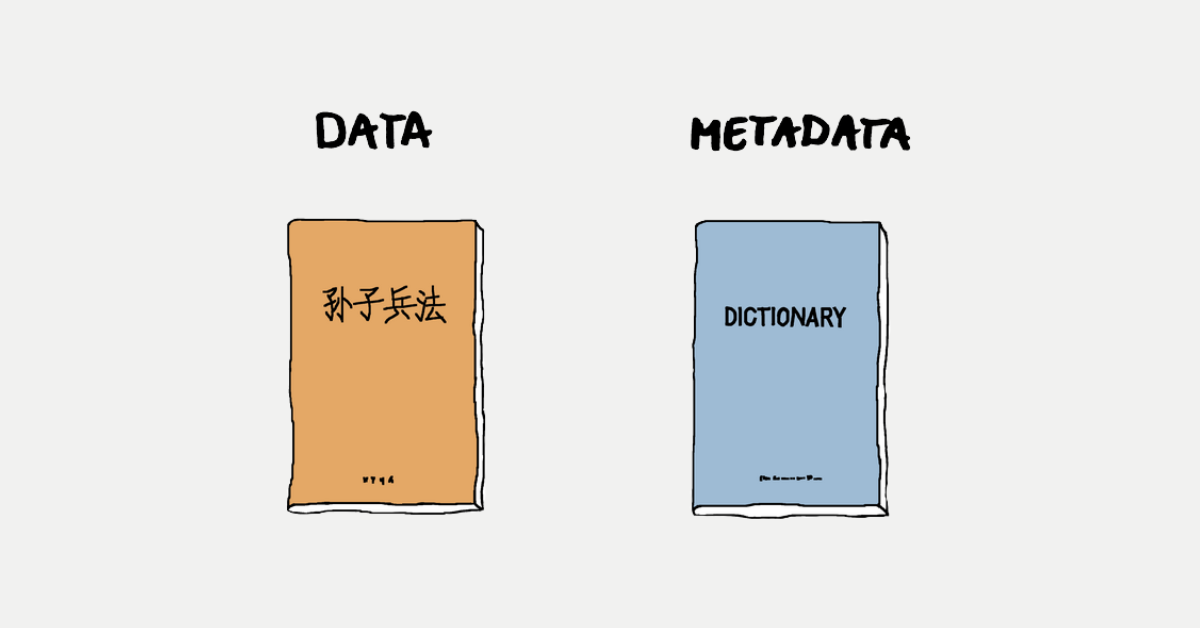
A Data Dictionary is a documentation of your data (metadata) - structure and a description of tables and columns, relations and constraints. It helps anyone who wants to work with databases find and understand data. Without a proper Data Dictionary you will need to depend on the knowledge of people who know the databases or sentence yourself to do a lot of digging through the code of applications, reports, queries, many hours of guesswork and errors. It's really easier and cheaper to do a little documenting.
Data Dictionaries in Dataedo
If you are convinced that it is worth it to create a Data Dictionary for all your databases this is the right tool for you. Here is a quick overview of its features.
What is included in Dataedo Data Dictionary
- List of all tables, views and columns with basic attributes
- Table relations (foreign keys) imported from database,
- Table primary and unique keys
- User provided description of each table, view, column, relation and key
Key Features
- Dataedo automatically imports schema from Oracle, SQL Server, MySQL databases,
- Schema changes (new, deleted or renamed tables and columns) can be imported and documentation is updated automatically,
- Objects removed at schema sync time are kept in repository and marked as deleted,
- Table and column comments are imported from database,
- Ability to define relations and unique keys that were not defined in database,
- All metadata is kept in a file or global repository,
- Ability to schedule repository data model update and output export (from 5.2),
- Ability to visualize data model with multiple ERDs containing selected tables and columns.
Getting Started
Now we can get started. To set up the tool follow those simple steps:
- Download Dataedo,
- Install by running installer (or extract folder from zip archive),
- Run Dataedo,
- Create new file repository with Create file repository button (or server repository if you want to build global repository)
- Open/connect to repository
Some of the features require Pro edition and you need to get a trial to try it:
- Get free 14 day trial,
- Click Enter key button and enter the key you received.
You are ready to start building your first Data Dictionary.
1. Import Database Schema and Descriptions
To create Data Dictionary you need to first import database schema (tables, columns, views etc.). Dataedo also reads any existing descriptions from the database.
This will be a framework which you will populate with your own descriptions and metadata.
To import schema follow these steps:
- Click Add documentation button,
- Choose the database engine you want to connect to - SQL Server, Oracle or MySQL,
- Provide connection details, choose database and click Next,
- Leave next screen and click Read,
- Your database schema is being read and once done the next screen shows you all the objects that were read. Click Next.
- You may now change documentation title. Make it something meaningful so that everyone understands what database this is the documentation of. Click Import to start import.
Your database structure has now been imported to Dataedo repository. You see a new documentation element in the tree navigation in the left pane. Expand it and select objects to browse the schema that was imported. This is a basic Data Dictionary that you may work on adding more descriptions and metadata.
2. Document Tables
As you have populated the Data Dictionary with tables, now it is time to review all of them and provide meaningful descriptions.
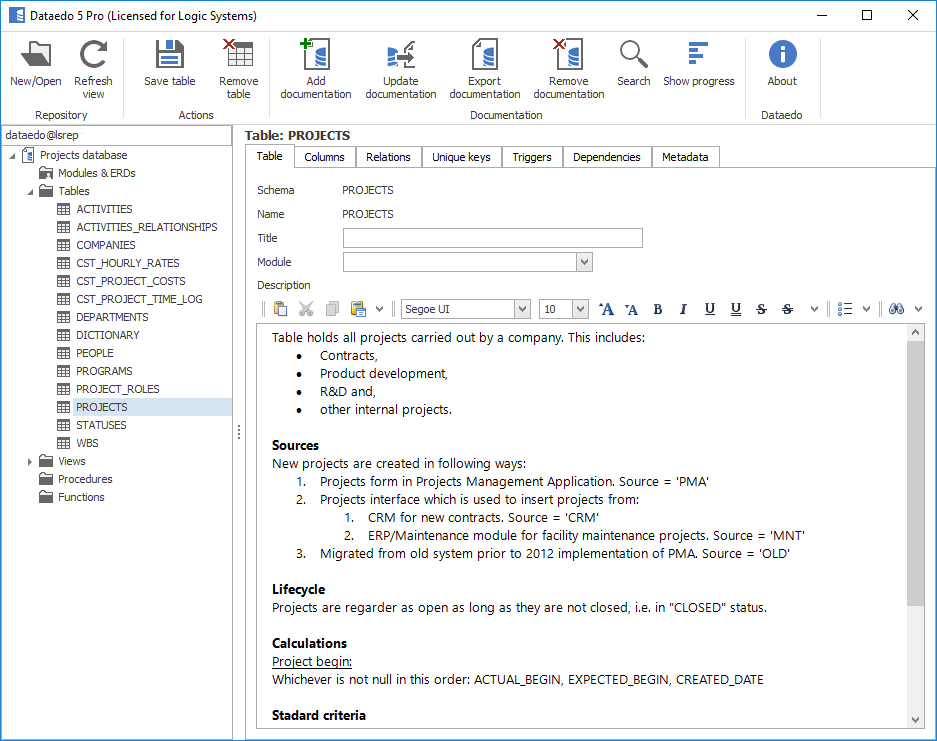
To browse tables expand the Tables element (or Views for views). Select object to see all its details in the right pane. On the first tab you can provide table description using the rich text editor.
If tables or columns had comments in the database they were read into the repository and visible in the editor. If you edit those comments they will be updated in the Dataedo repository only and will not be written back to the database.
In the Description box provide an explanation of table purpose and logic.
You might want to include in your description the following information:
- Purpose of the table,
- What objects are represented in a table (object type(s)),
- Granularity - what one row represents: is it order, or order line?,
- Sources of data - how is data created, where does it come from,
- Statuses - what statuses the represented entity can be in?,
- Calculations,
- Standard criteria and SQL queries,
- Use of the data - any known key use of table,
- Any other important logic related with table.
Use rich text features - headers, lists, text formatting, links to external resources and paste images and diagrams to better communicate ideas.
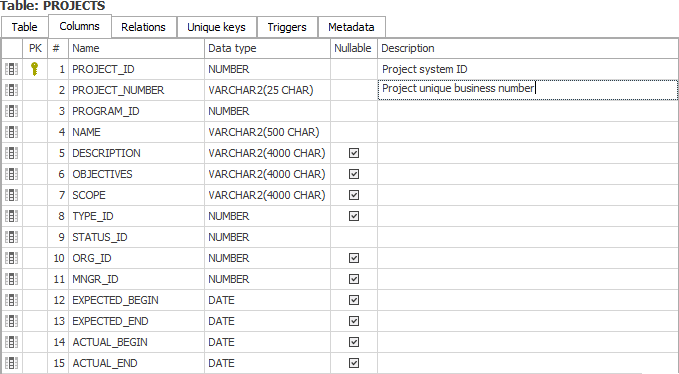
3. Document Columns
When you have described a table, it is time to do the same for each column. This is a hard manual work but somebody's got to do it.
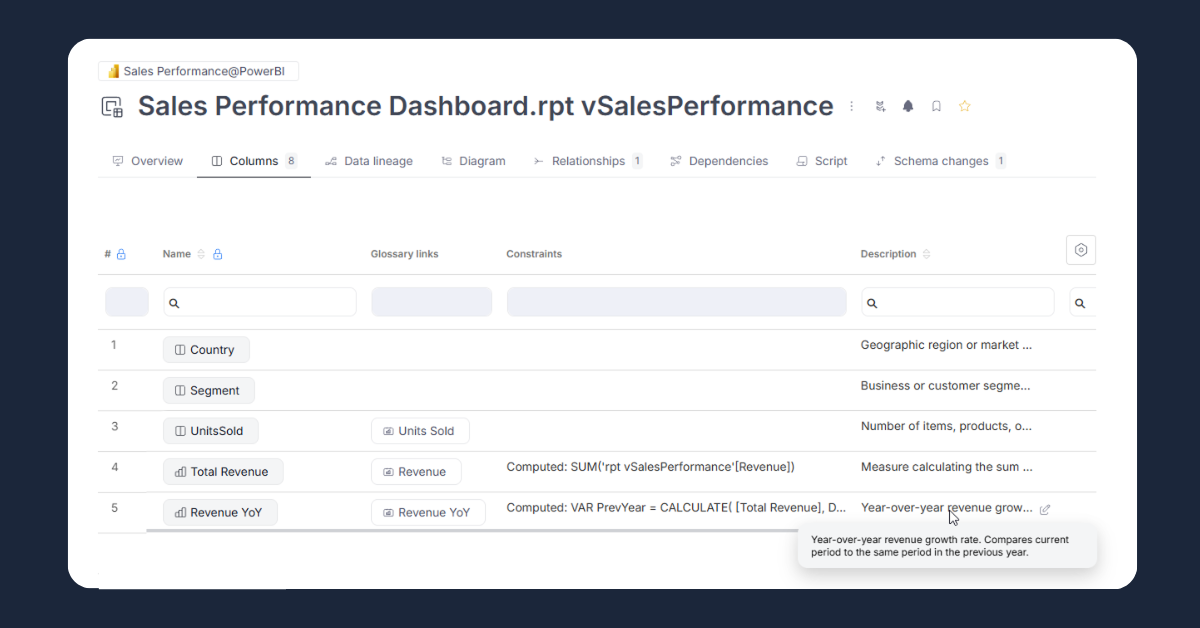
Go to the Columns tab to browse table columns and provide your descriptions in the Description column.
If columns had a description in the database, they were imported and are visible in the description field. Review each column and provide meaningful descriptions.
Consider including following information:
- Purpose of the column,
- Where does the data come from,
- List of values, range of values, format.
Dataedo automatically reads the following metadata from the database:
- Data type,
- Nullability,
- Identity,
- Default value,
- Computed column specification,
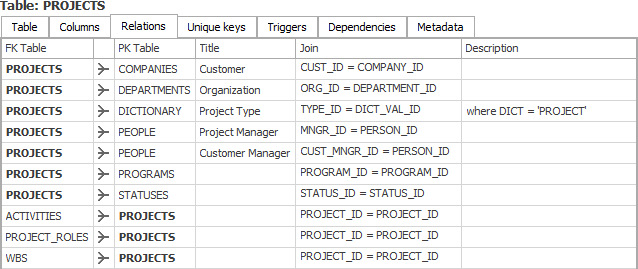
4. Document Relations
Besides columns, another key element of the Data Dictionary are the relationships between tables. How to join tables is crucial for any data querying and extraction exercise.
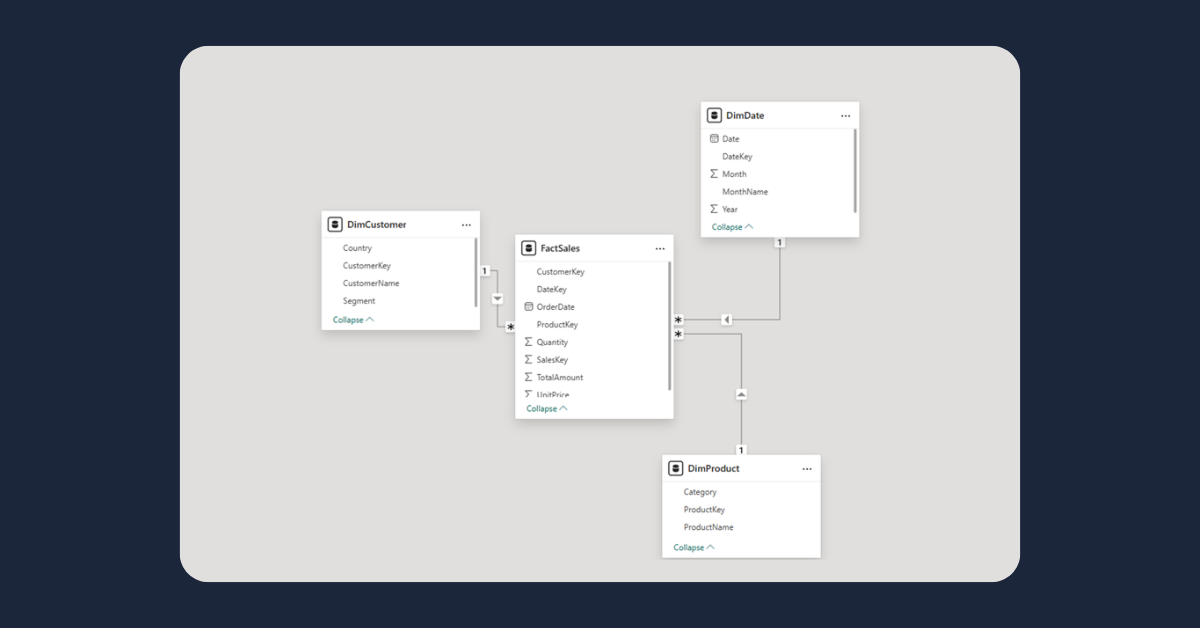
Dataedo reads existing relations (foreign keys) to the repository and includes it automatically in the Data Dictionary and ER diagrams.
For each relation you can provide a role title (from 5.2) which could later be used in ERDs and a description:
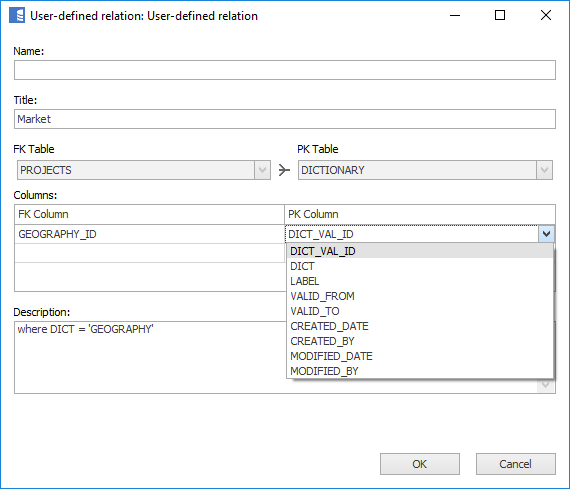
In many cases, there are no referential integrity checks (no foreign keys) defined in the database. This is also almost always the case with views (most databases don't allow primary/foreign keys for views). In such cases logic of how tables are related to each other is scattered across various code and in developers' heads. Having that knowledge in a global accessible repository would be a huge benefit and time saver.
Dataedo enables you to document relations in a repository in the same manner as those imported from the database schema. To add a new relation to the repository click the Add relation button and then define primary table, join columns and optionally add a title and a description.
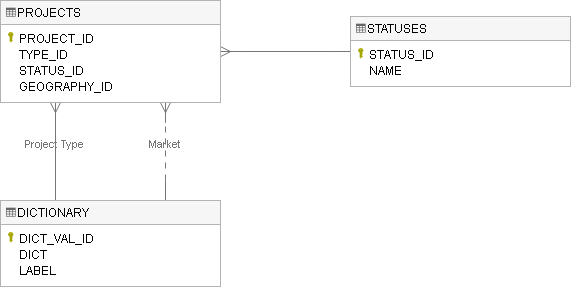
As you can see, just an icon distinguishes imported and manual relations:
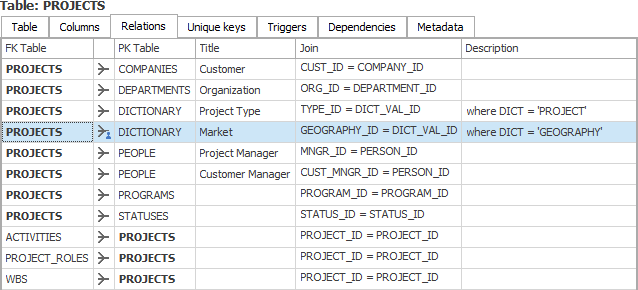
Relations entered into the repository are not pushed back to the database.
Relations from the repository would later be automatically shown in the Entity Relationship Diagrams (ERDs) (this functionality is discussed in this ERD tutorial):
5. Document Primary and Unique Keys
Another important element of the Data Dictionary and Data Model are primary and unique keys. They define which columns or group of columns have unique values. Primary keys are a special type of unique key and identify how a row in a table may be identified. This information is also important for joining tables and understanding data stored in the table.
Dataedo reads primary keys and unique indexes/constraints from database schema and includes them in the keys list in Unique keys tab.

Just as with foreign keys, unique constraints are not always created in the database. This is almost always the case for views - most database systems don't allow such constraints for views. Dataedo enables you to add your own primary/unique key to the repository so you can define this assumption about the data.
To add a new key click Add key button and choose key type and unique columns. You can also provide a name and a description (explain why data is/should be unique).

You can see that the manual key is visible in the same format as the imported keys:

7. Export & Share
If you followed steps 1-6 you have created a very useful data (or metadata) artifact - a Data Dictionary. To get the value from it, share it with your team and everyone else that wants to access data. It can be accessed with Dataedo program or you can export it to PDF, Excel or HTML and share.
Here is how it looks: