One of the defining features of Dataedo is its HTML documentation export which allows you to easily share your documentation with your whole organization.
You can host exported HTML on any web server available in your network or over Internet.
This is a guide on publishing your exports on popular web servers.
Before you start
To be able to publish Dataedo documentation on a web server you need to have:
- Any web server with admin access (to publish html files).
- Dataedo tool with access to repository (to export html files)
Step 1: Export
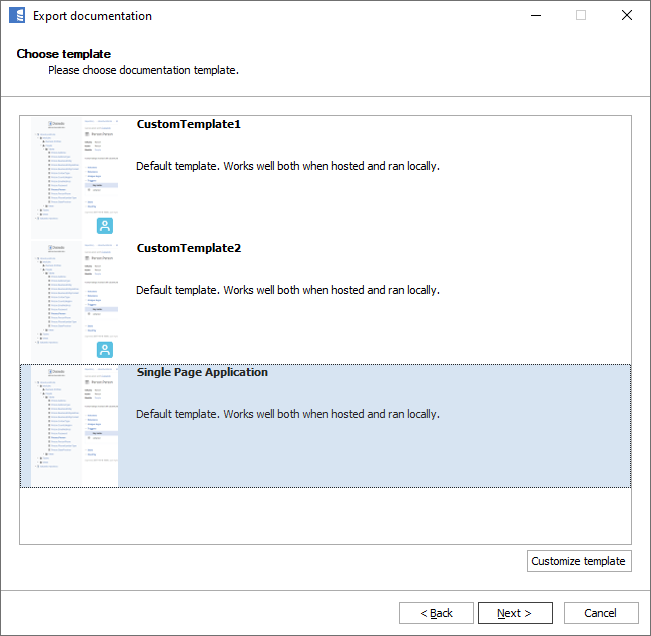
First, you need to export your documentation to HTML.
Step 2: Publish
If you don't have a web server in your environment, you can install Microsoft IIS server (requires Windows, a step by step guide can be found on Microsoft Technet) or a ready made stack containing Apache web server (like the one from Bitnami).
Dataedo HTML export creates a set of static web pages, and will not require special setup for most web servers.
Apache server
As Dataedo HTML export creates a static web pages, in most cases it's enough to copy the exported files to the relevant folder.
In Apache on Linux, the default path for the tree is:
/var/www/
(we use /var/www/dataedo/).
In Apache on Windows it's usually:
*installdir*/htdocs/
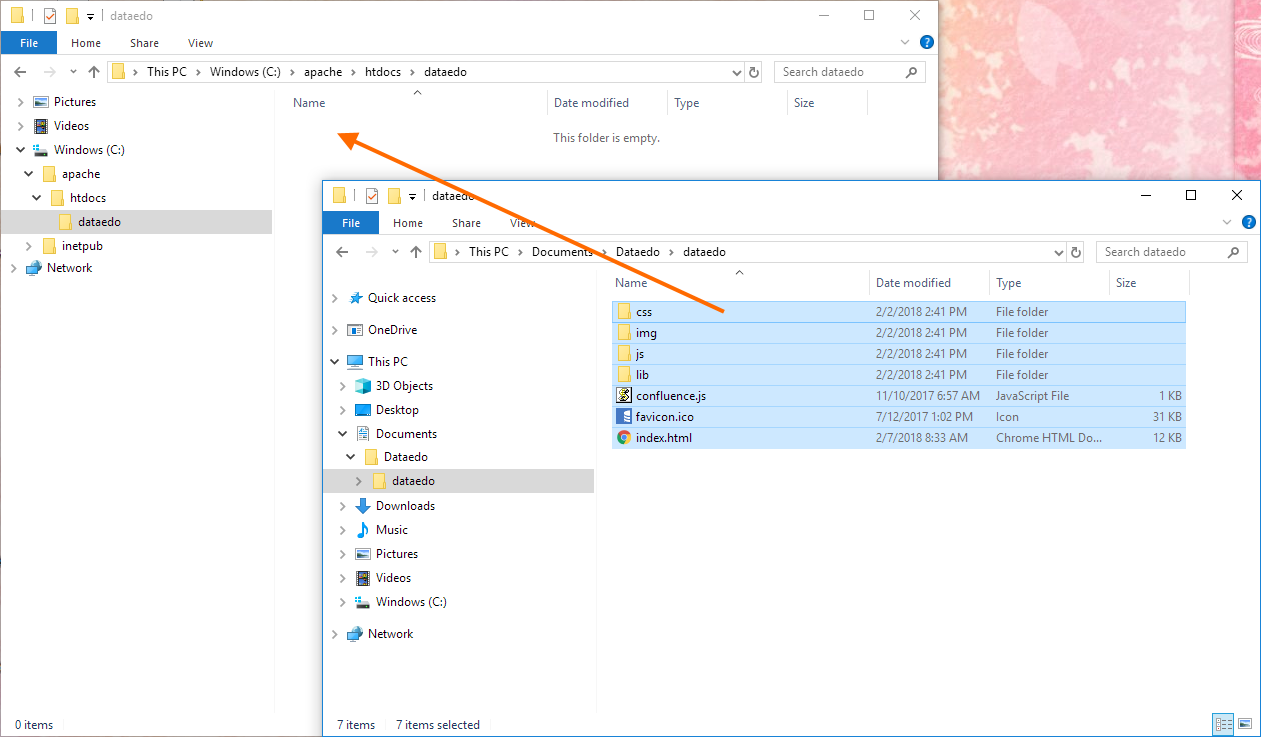
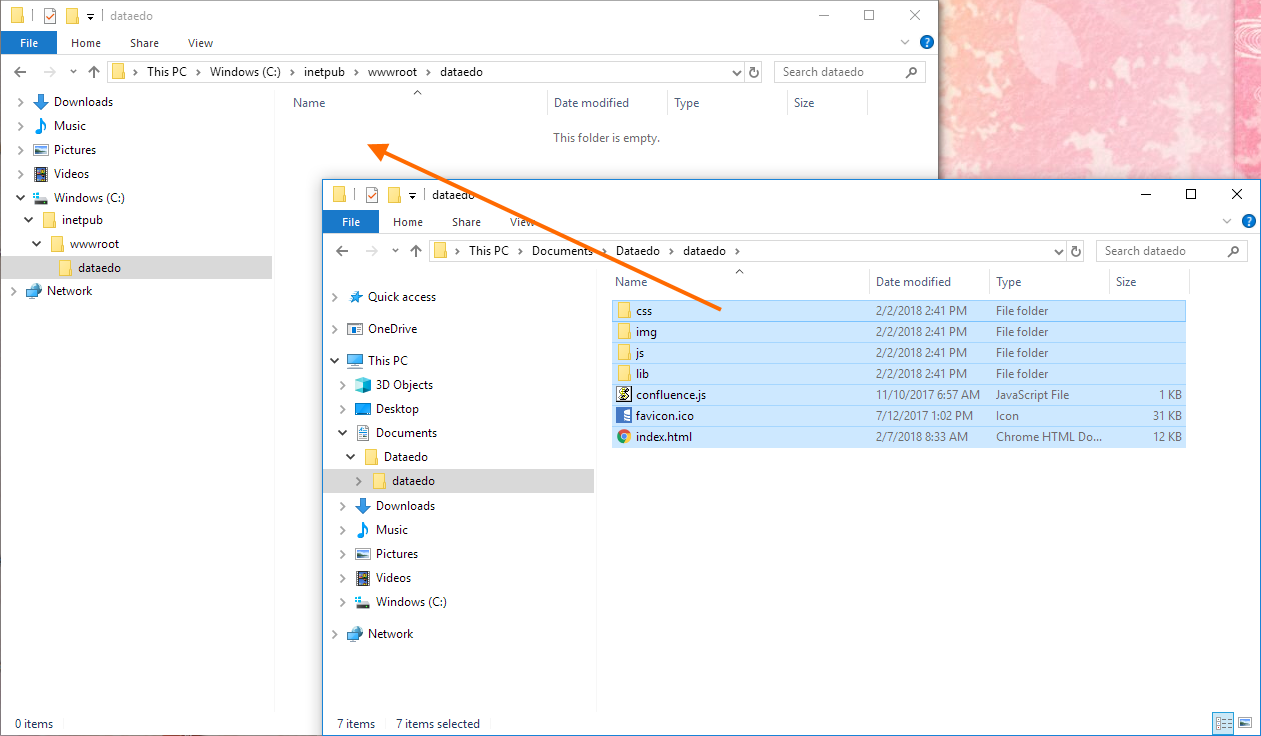
Copy the contents of exported folder either to this path (if you don't want to host other pages) or to a subfolder (we're using a subfolder named dataedo):
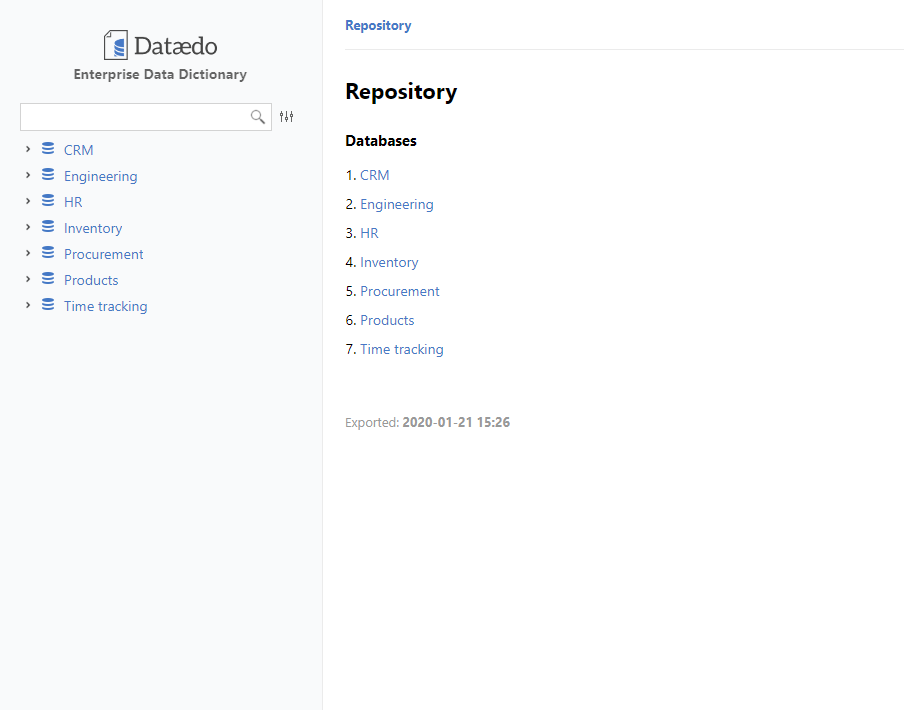
Then the documentation would be available under:
http://myserver/dataedo
To update documentation just overwite the files with your new export.
IIS server
Hosting on IIS you first need to create a site - a step by step guide can be found on Microsoft Technet.
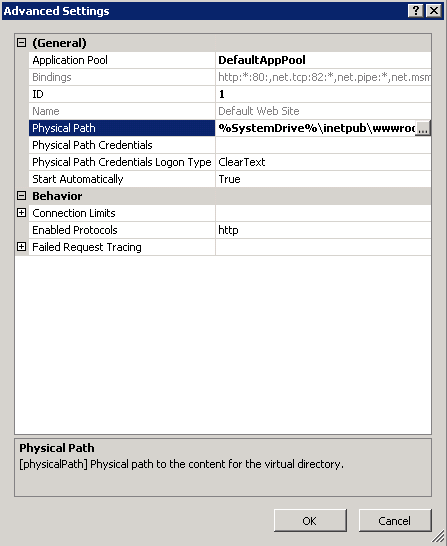
After creating a site, note the Physical path setting - this is the path where you need to place the exported files.
You can find this setting later on by right clicking the site you've created, then choosing Manage Web Site and Advanced Settings.
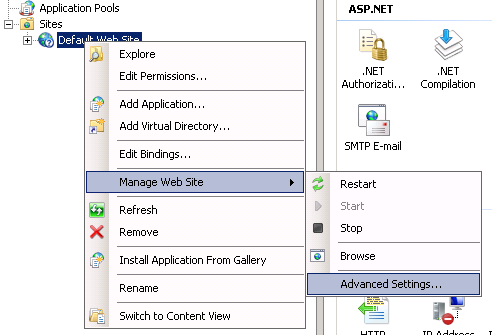
The Physical Path variable will be visible in the General group.
Copy the contents of exported folder either to this path (if you don't want to host other pages) or to a subfolder (we're using a subfolder named dataedo):
Then the documentation would be available under:
http://myserver/dataedo

To update documentation just overwite the files with your new export.
Automate the process
If you want to provide your team with most up to date documentation you'll probably want to automate the proces of exporting and publishing.
The first step would be to create a Dataedo command file - this is a file that will be a parameter to running Dataedo exprort from command line. More about this here.
To create a file choose Save export command file option in the export wizard.
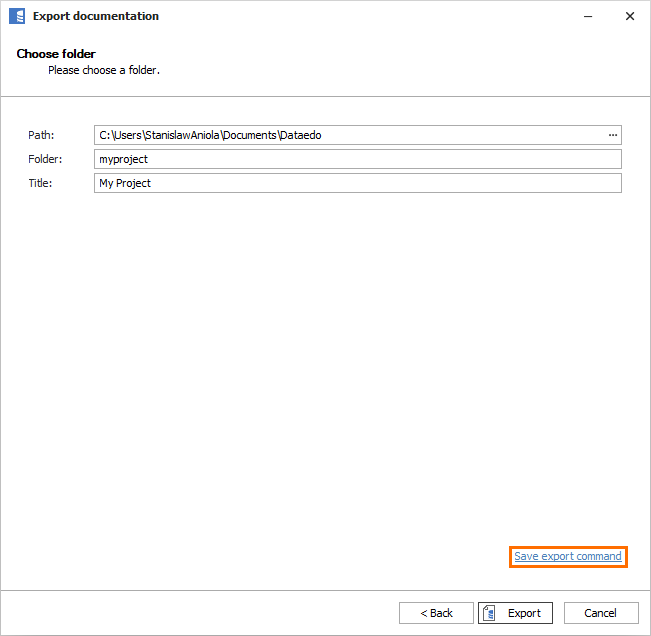
Then you need to edit the command file. To make sure old export gets overwritten, find the Overwrite node and change its value from false to true. Check the OutputPath and make sure it points to the right export folder. We recommend exporting to a temporary location first (in case of any errors), and then copying the finished file to the folder it will be hosted from.
Then create a batch file that will call the command file, then using %errorlevel% variable check whether the new export was succesful and only if it was, overwrite the old export with new files.
For example:
@echo off
SETLOCAL ENABLEDELAYEDEXPANSION
rem Dataedo file path
SET ddo="C:\Program Files (x86)\Dataedo 7\Dataedo7.exe"
rem Export command file path
SET ddocmd_path="C:\Documentation export\export.dataedocmd"
rem Temporary export location (the same as specified in the .dataedocmd file)
SET ddo_export_output="C:\Documentation export\Export output"
rem Final hosting location
SET host_path="C:\apache\htdocs\dataedo"
rem Run the export command
%ddo% /dataedocmd %ddocmd_path%
rem Copy finished export if it was successful (no errors)
IF %errorlevel%==0 xcopy %ddo_export_output% %host_path% /Y /E /Q
@echo on
Then schedule a task in your system (for instance with Windows Scheduler) that runs this script. You can find more details here: Automate Dataedo with commandline execution.


