Salesforce native connector was introduced in Dataedo 10.1.
Add new connection
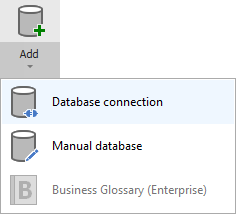
To connect to Salesforce create new documentation by clicking Add documentation and choosing Database connection.
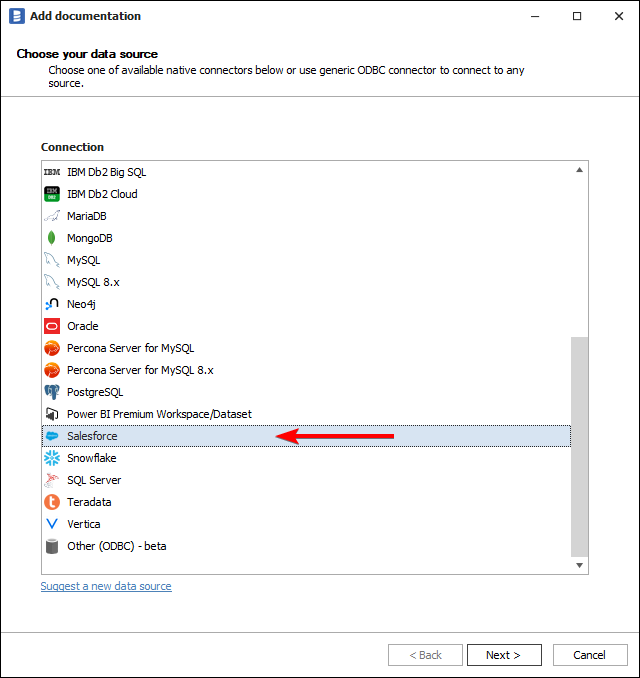
On the Add documentation screen choose Salesforce:
Connection details
Select authentication type:
- Interactive sign-in - upon clicking Connect button, you will see a Salesforce webpage where you provide a Username and a Password
- Sing in with values - in order to Connect you need to configure Connected app and then provide the values.
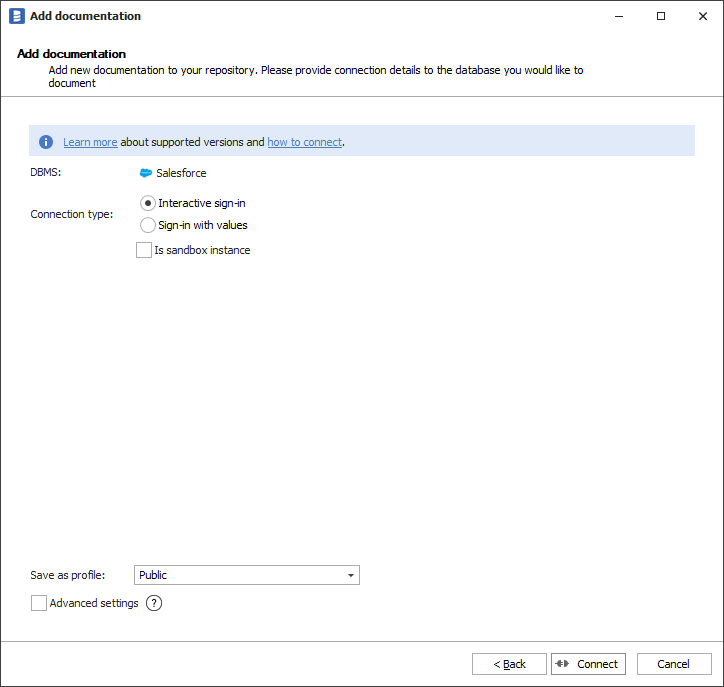
Provide connection details:
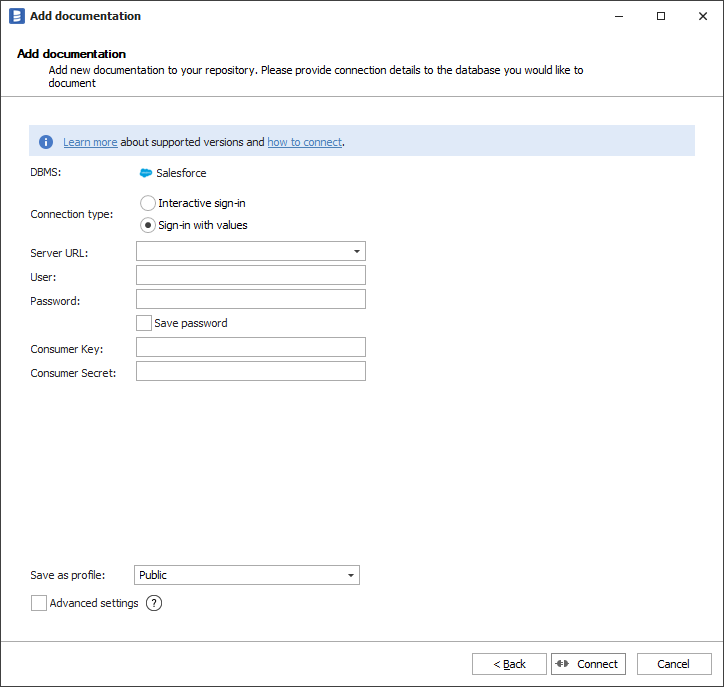
- Server URL - URL of your Salesforce organization's domain e.g. https://yourcompanyname.my.salesforce.com
- User
- Password
- Consumer Key - Check out how to obtain a Consumer Key and Consumer Secret from Salesforce down below.
- Consumer Secret
Get Consumer Key and Secret Key from Salesforce
To connect Salesforce with Dataedo app the Salesforce administrator needs to set up Connected app within the admin panel.
Step 1. Click setup icon in a top right corner and then Setup
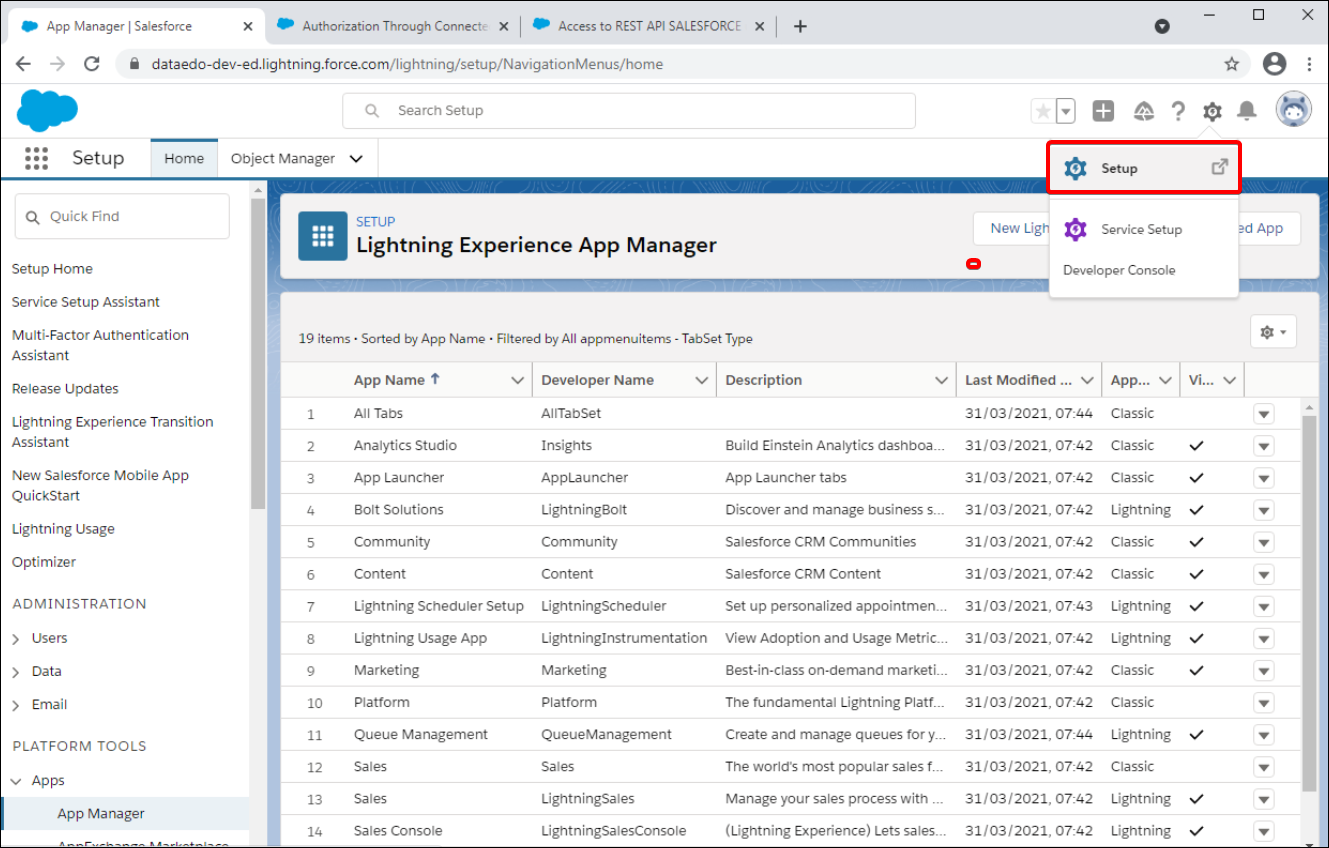
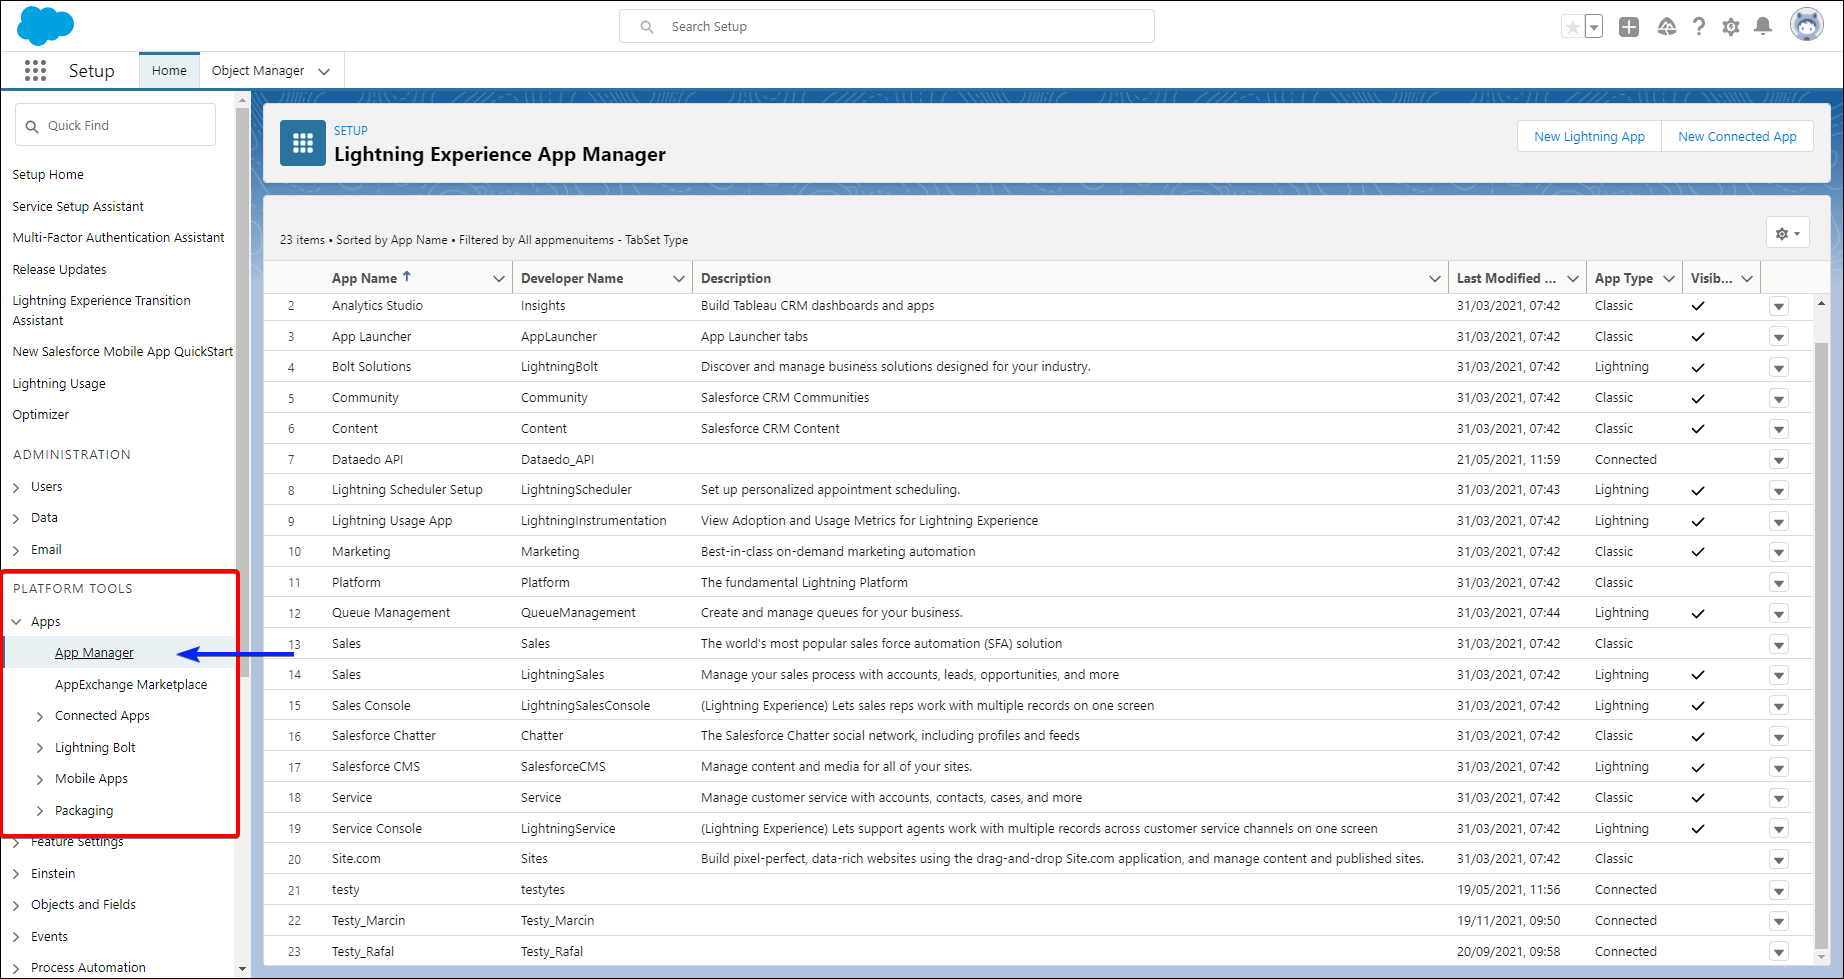
Step 2. In the left sidebar within a PLATFORM TOOLS group you can find Apps and then App Manager. Click it to list all the connected Applications used across your organization.
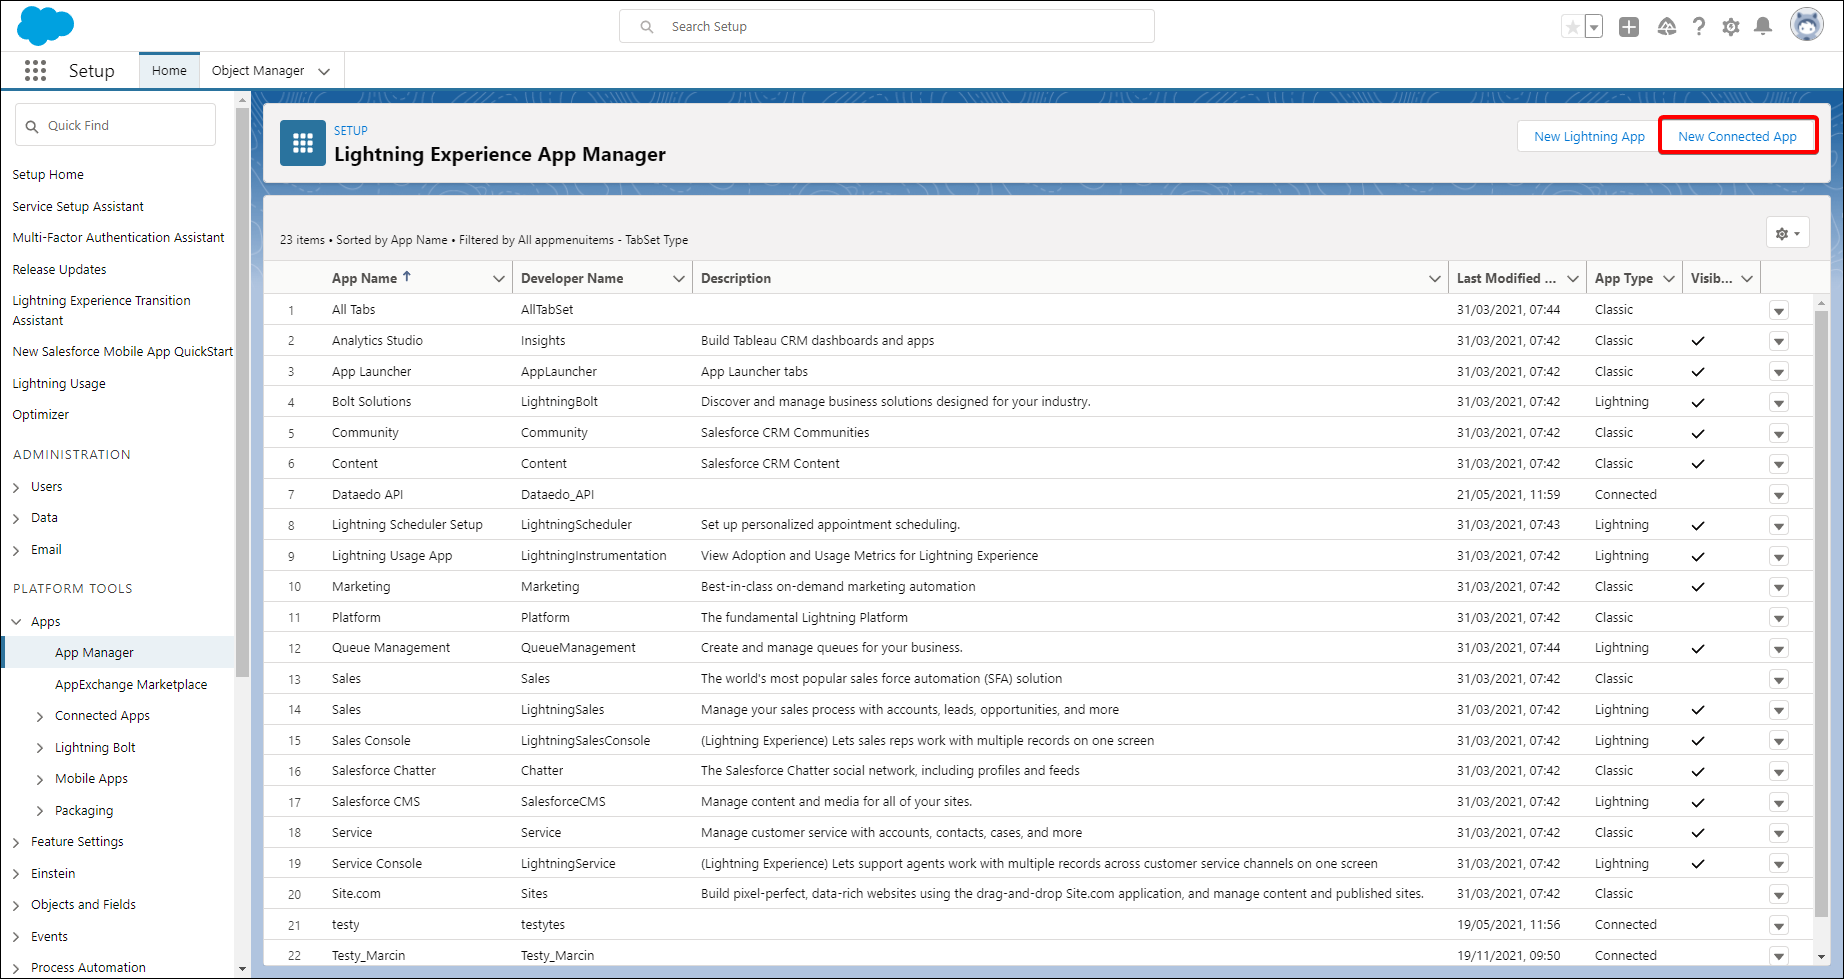
Step 3. Select New Connected App on the right.
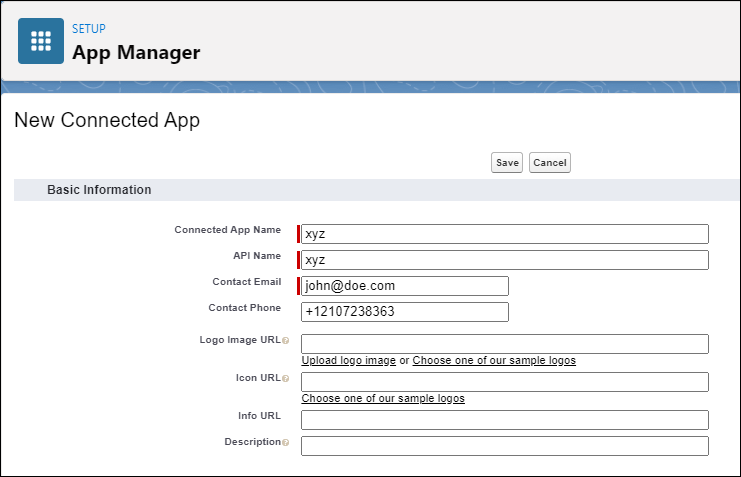
Step 4.
Fill in all the required information inside the Basic Information section.
Here's an example configuration:
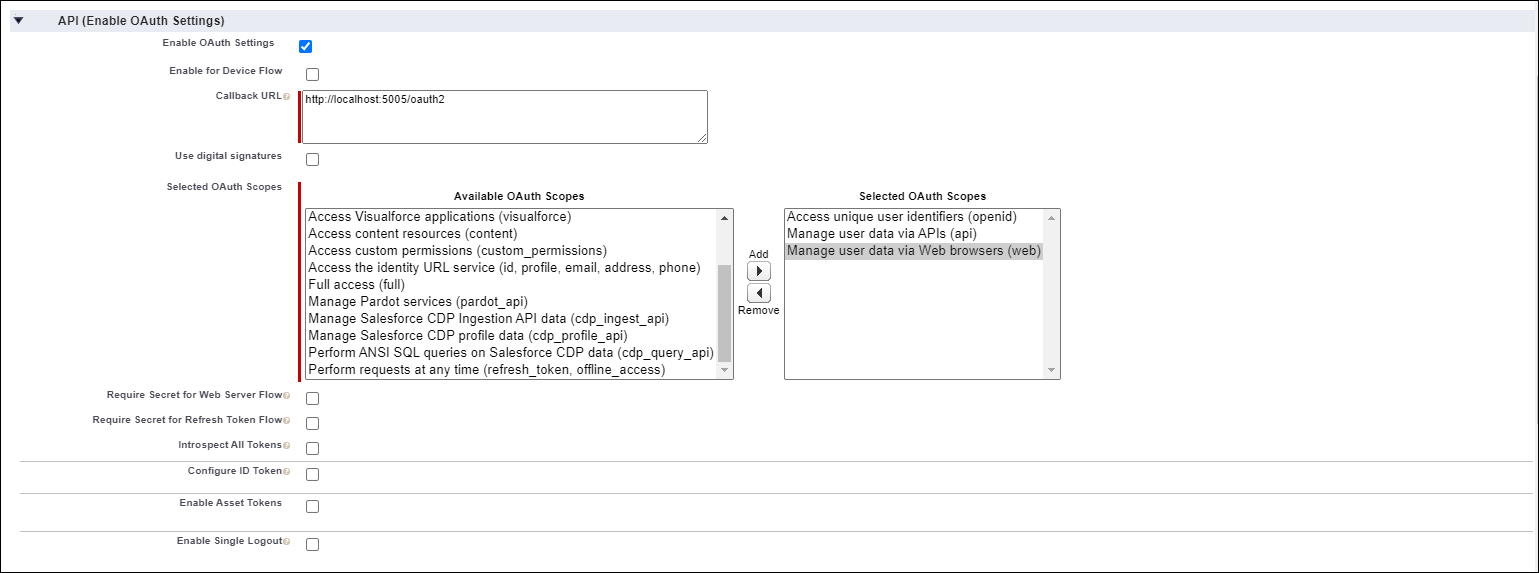
Step 5.
- Select Enable OAuth Settings
- Set Callback URL to http://localhost:5005/oauth2
- Make sure that Require Secret for Web Server Flow and Require Secret for Refresh Token Flow are unselected
- In Selected OAuth Scopes add:
- Access unique user identifiers (openid)
- Manage user data via APIs (api)
- Manage user data via Web browsers (web)
- Submit with Save on top of the page.
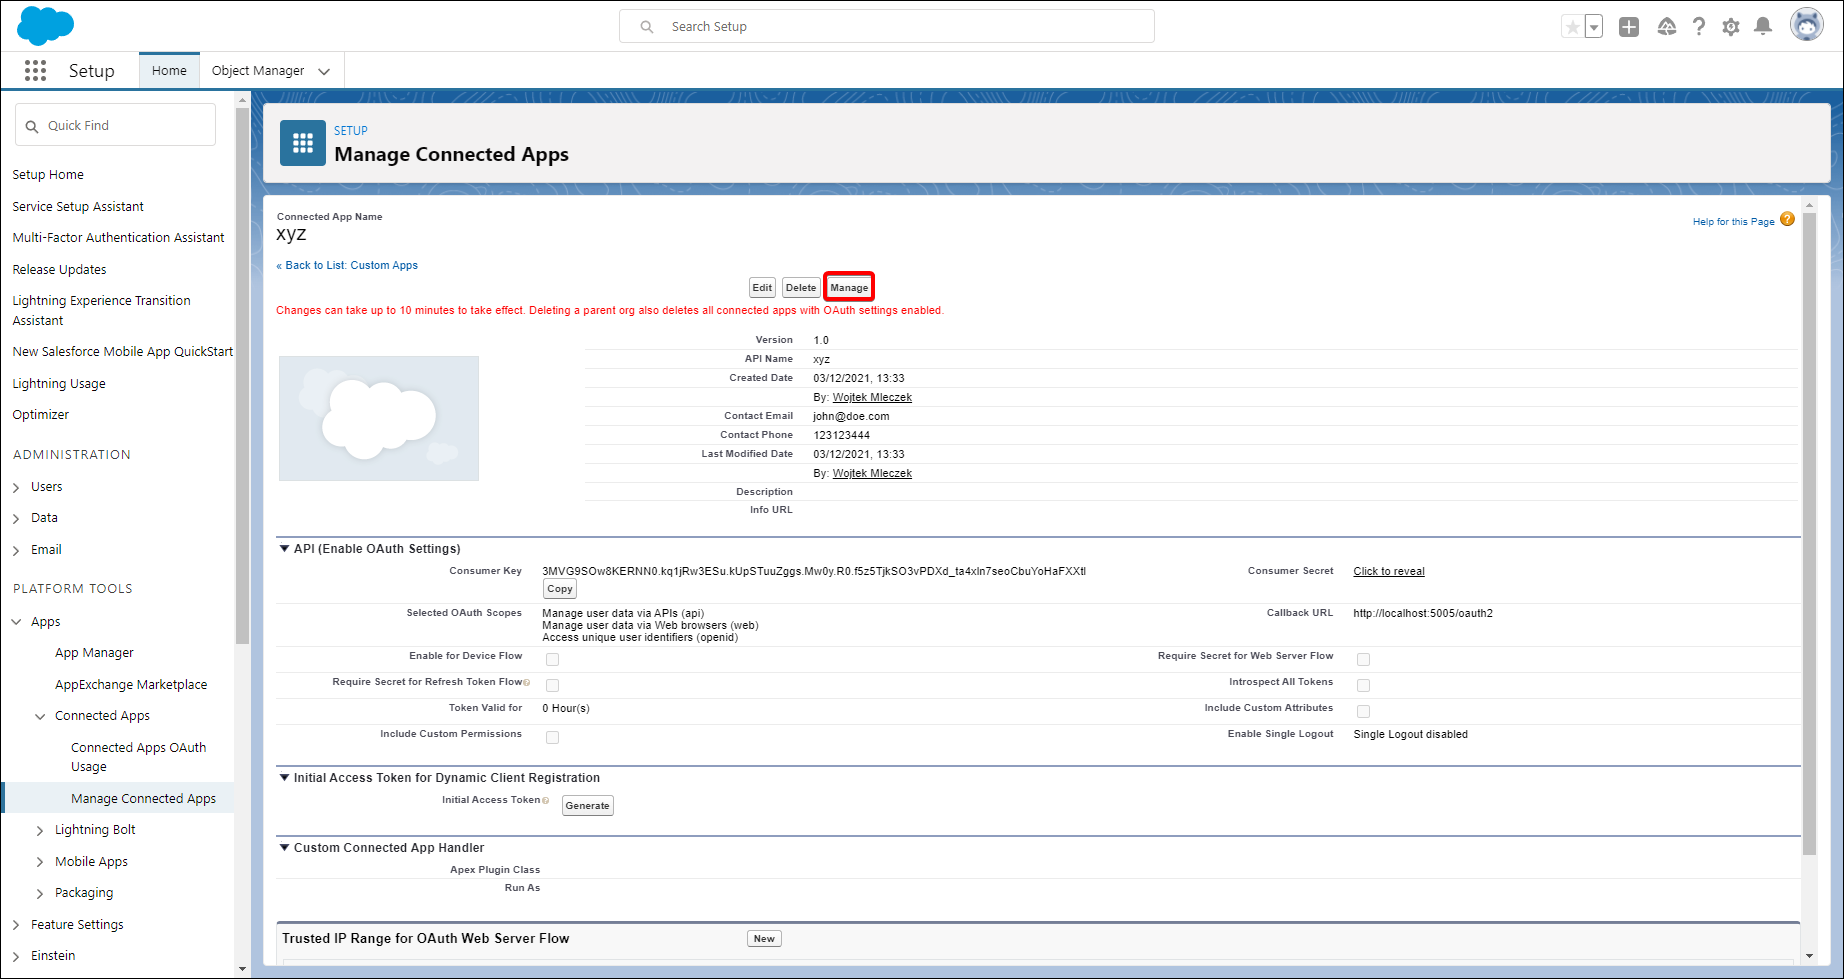
Step 6. After creating Connected App you can see a summary. To unlock signing in with password:
- Click Manage
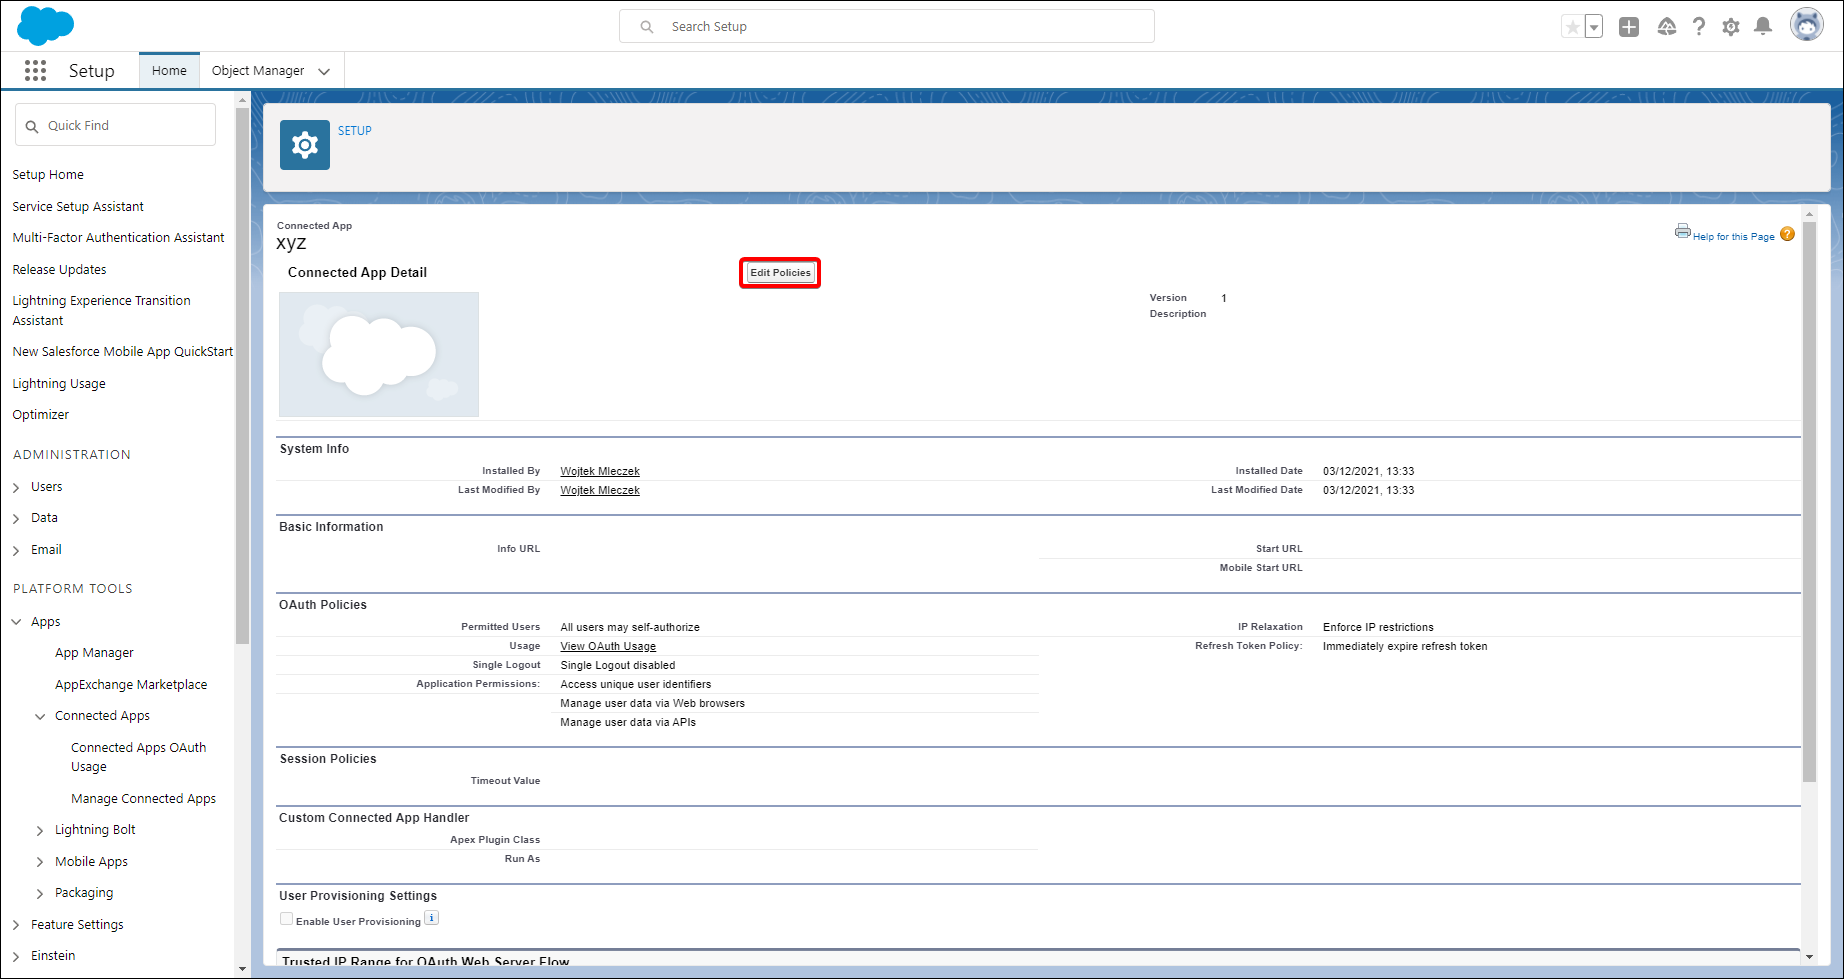
- Then press Edit Policies
- Inside OAuth Policies change Permitted Users to All users may self-authorize and IP Relaxation to Relax IP restrictions .
- Submit changes by clicking "Save" at the bottom.
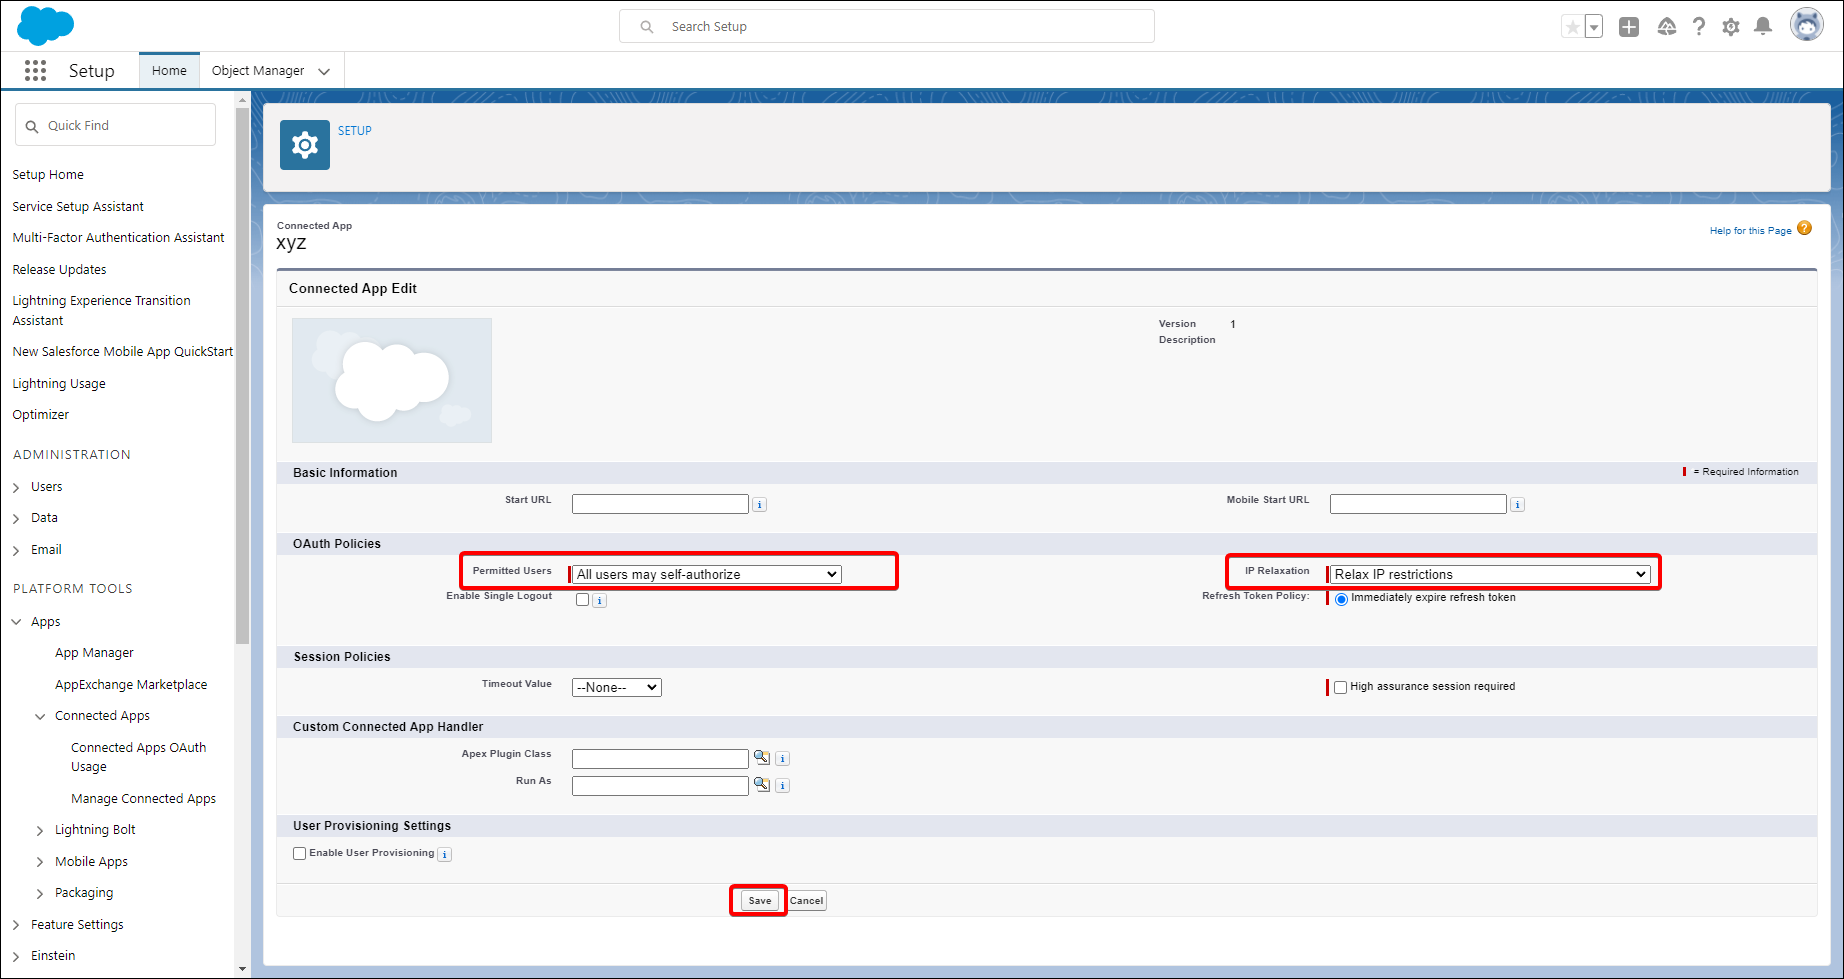
You might need to wait around 10 minutes to let changes propagate through Salesforce systems.
Step 7.
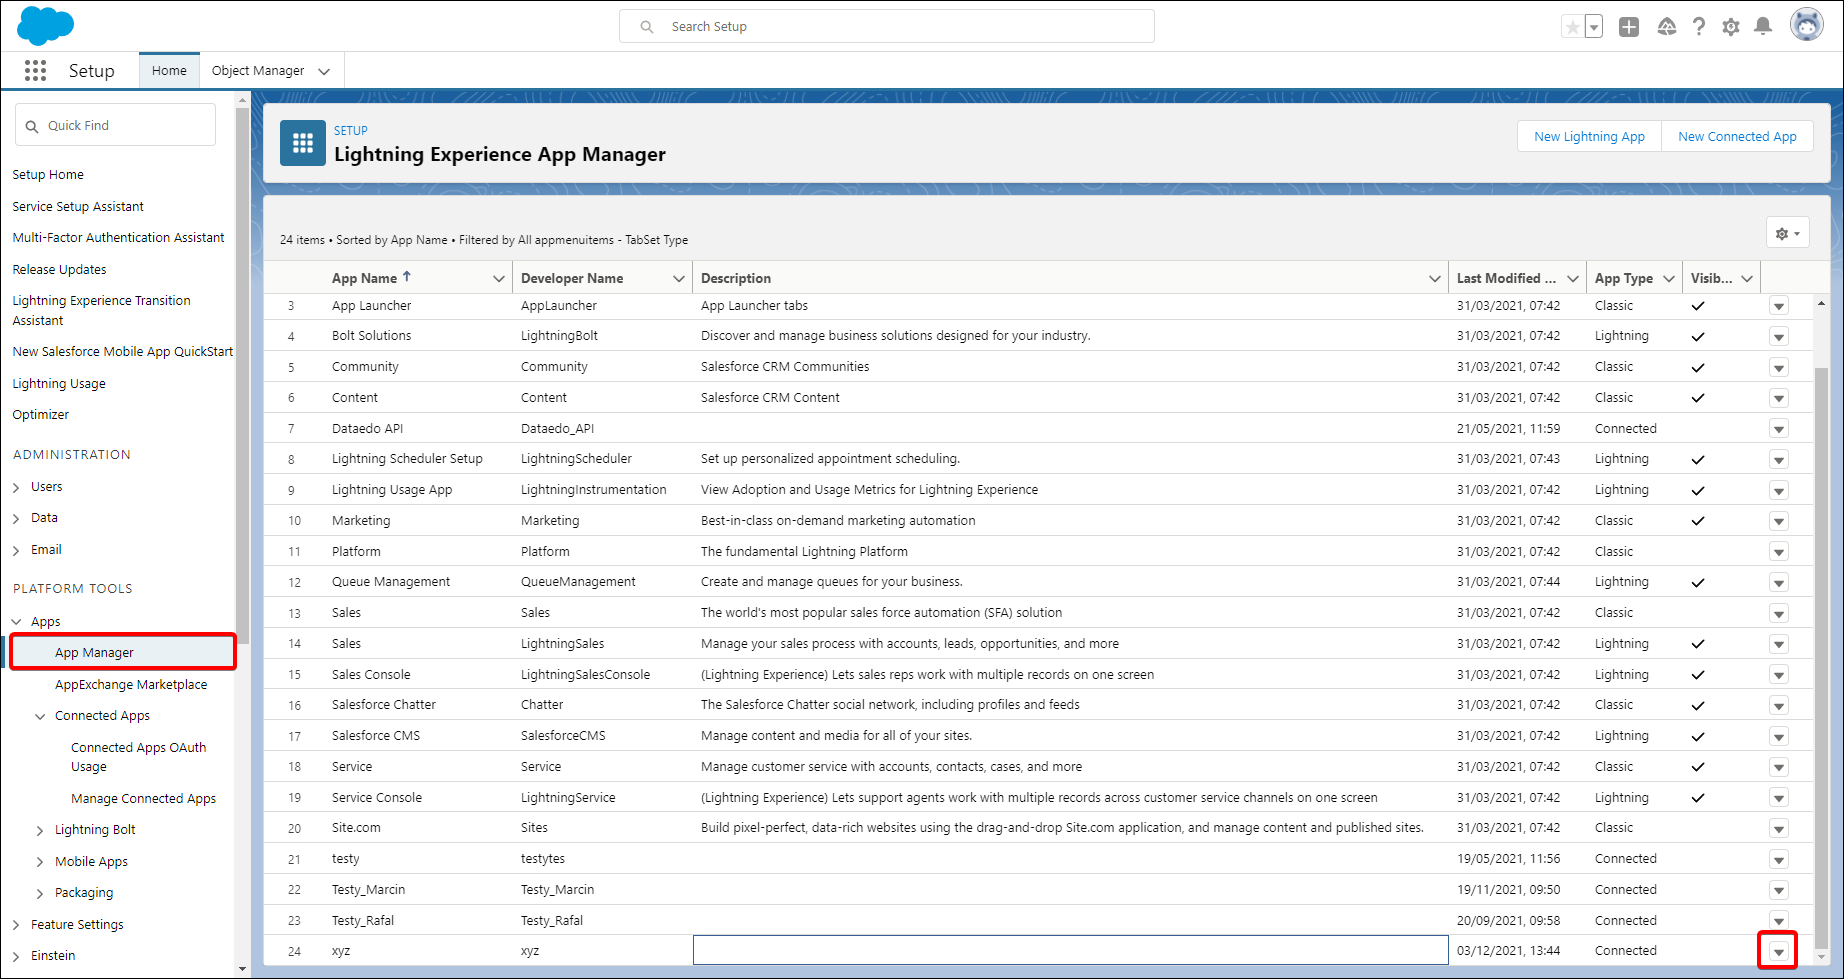
Go to Apps > App Manager click down arrrow icon next to the newly created app and View.
Step 8.
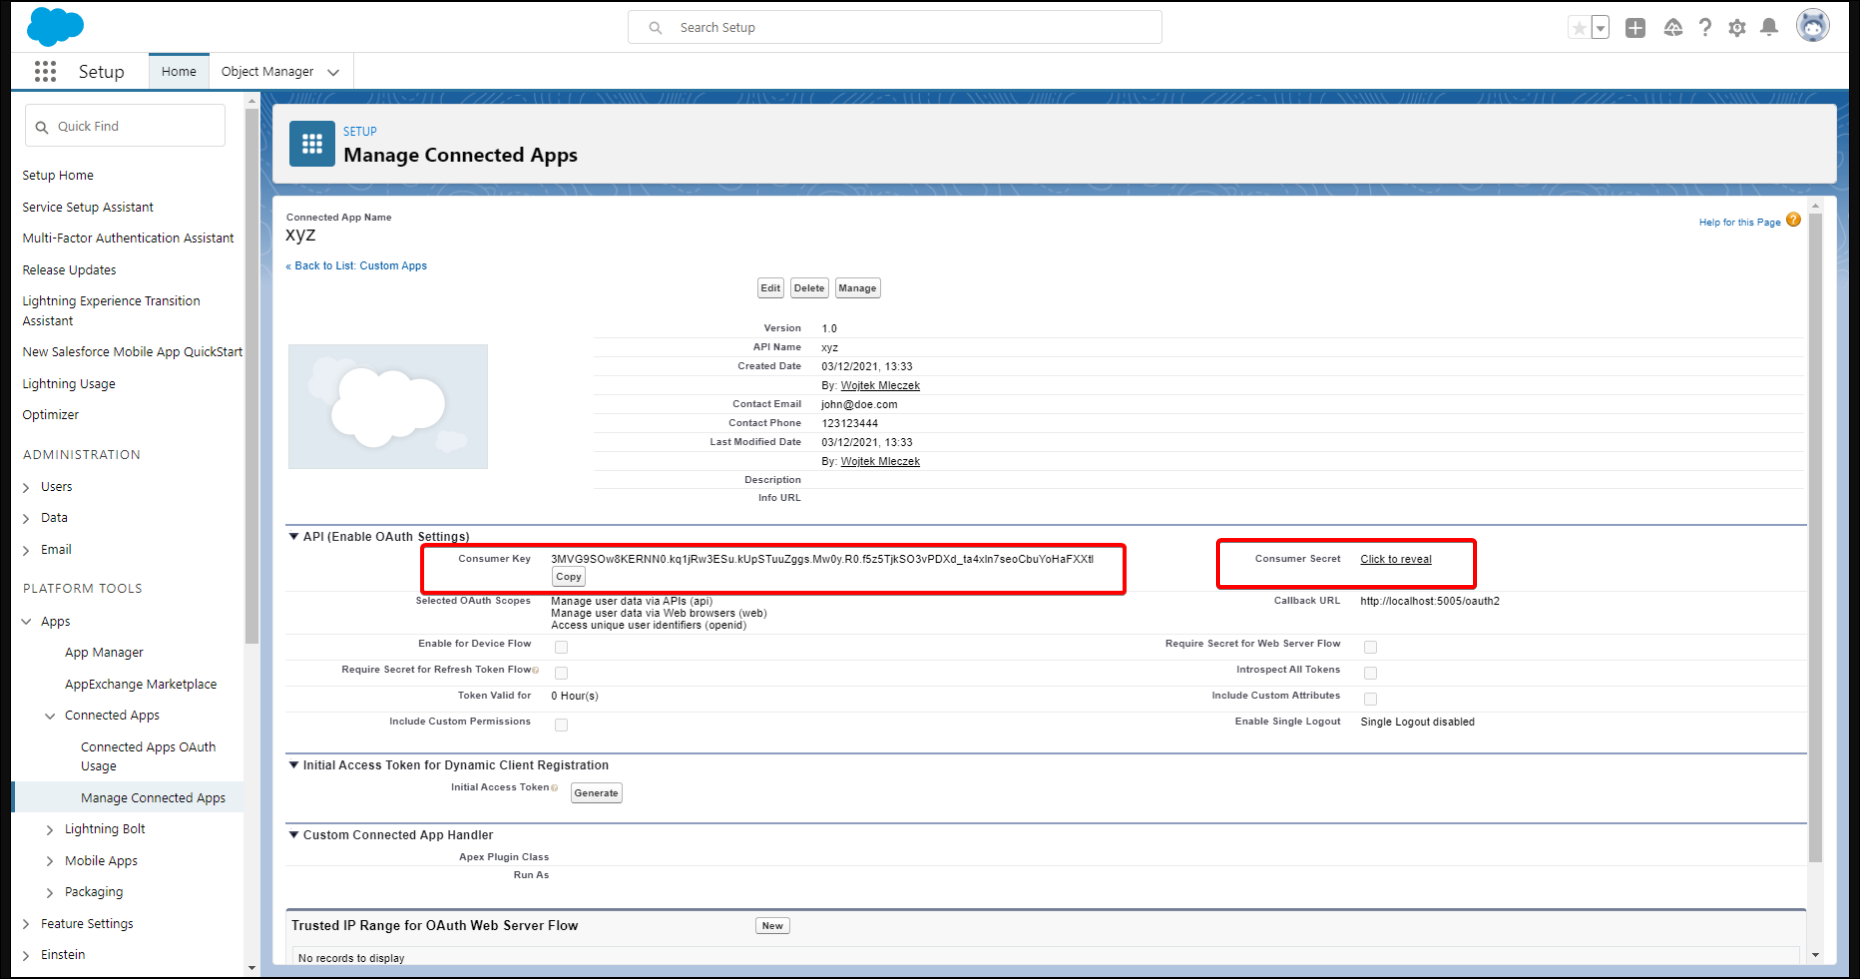
You can find the Consumer Key on the left side. To get Consumer Secret click "Click to reveal" on the right and copy the key.
Saving password
You can save password for later connections by checking Save password option. Password are saved in the repository database.
Importing metadata
When connection was successful Dataedo will read objects and show a list of objects found. You can choose which objects to import. You can also use advanced filter to narrow down list of objects.
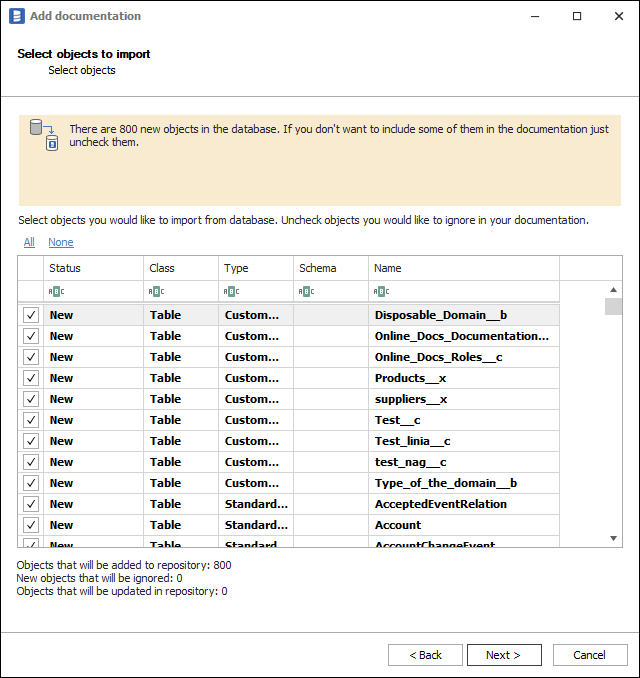
Confirm list of objects to import by clicking Next.
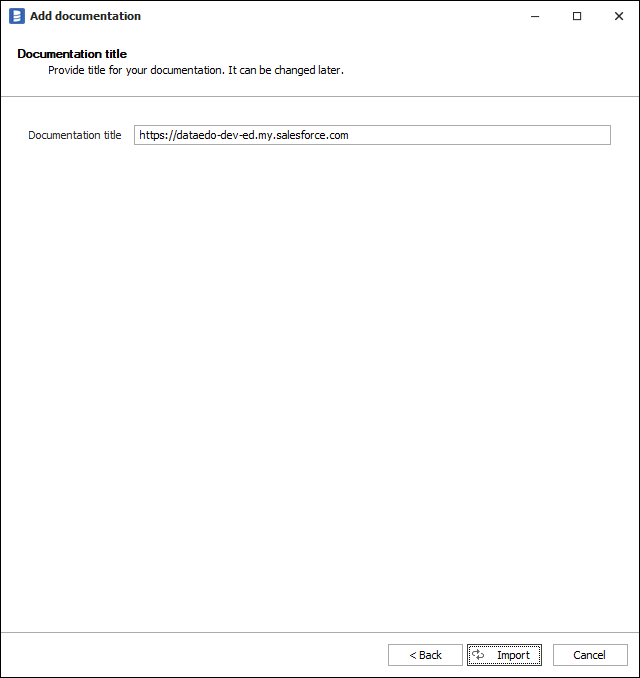
Next screen allows you to change default name of the documentation under which it will be visible in Dataedo repository.
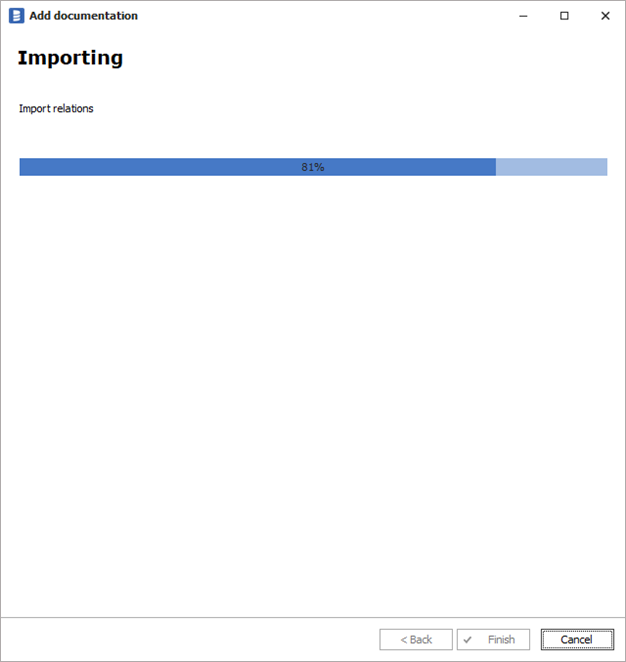
Click Import to start the import.
When done close import window with Finish button.
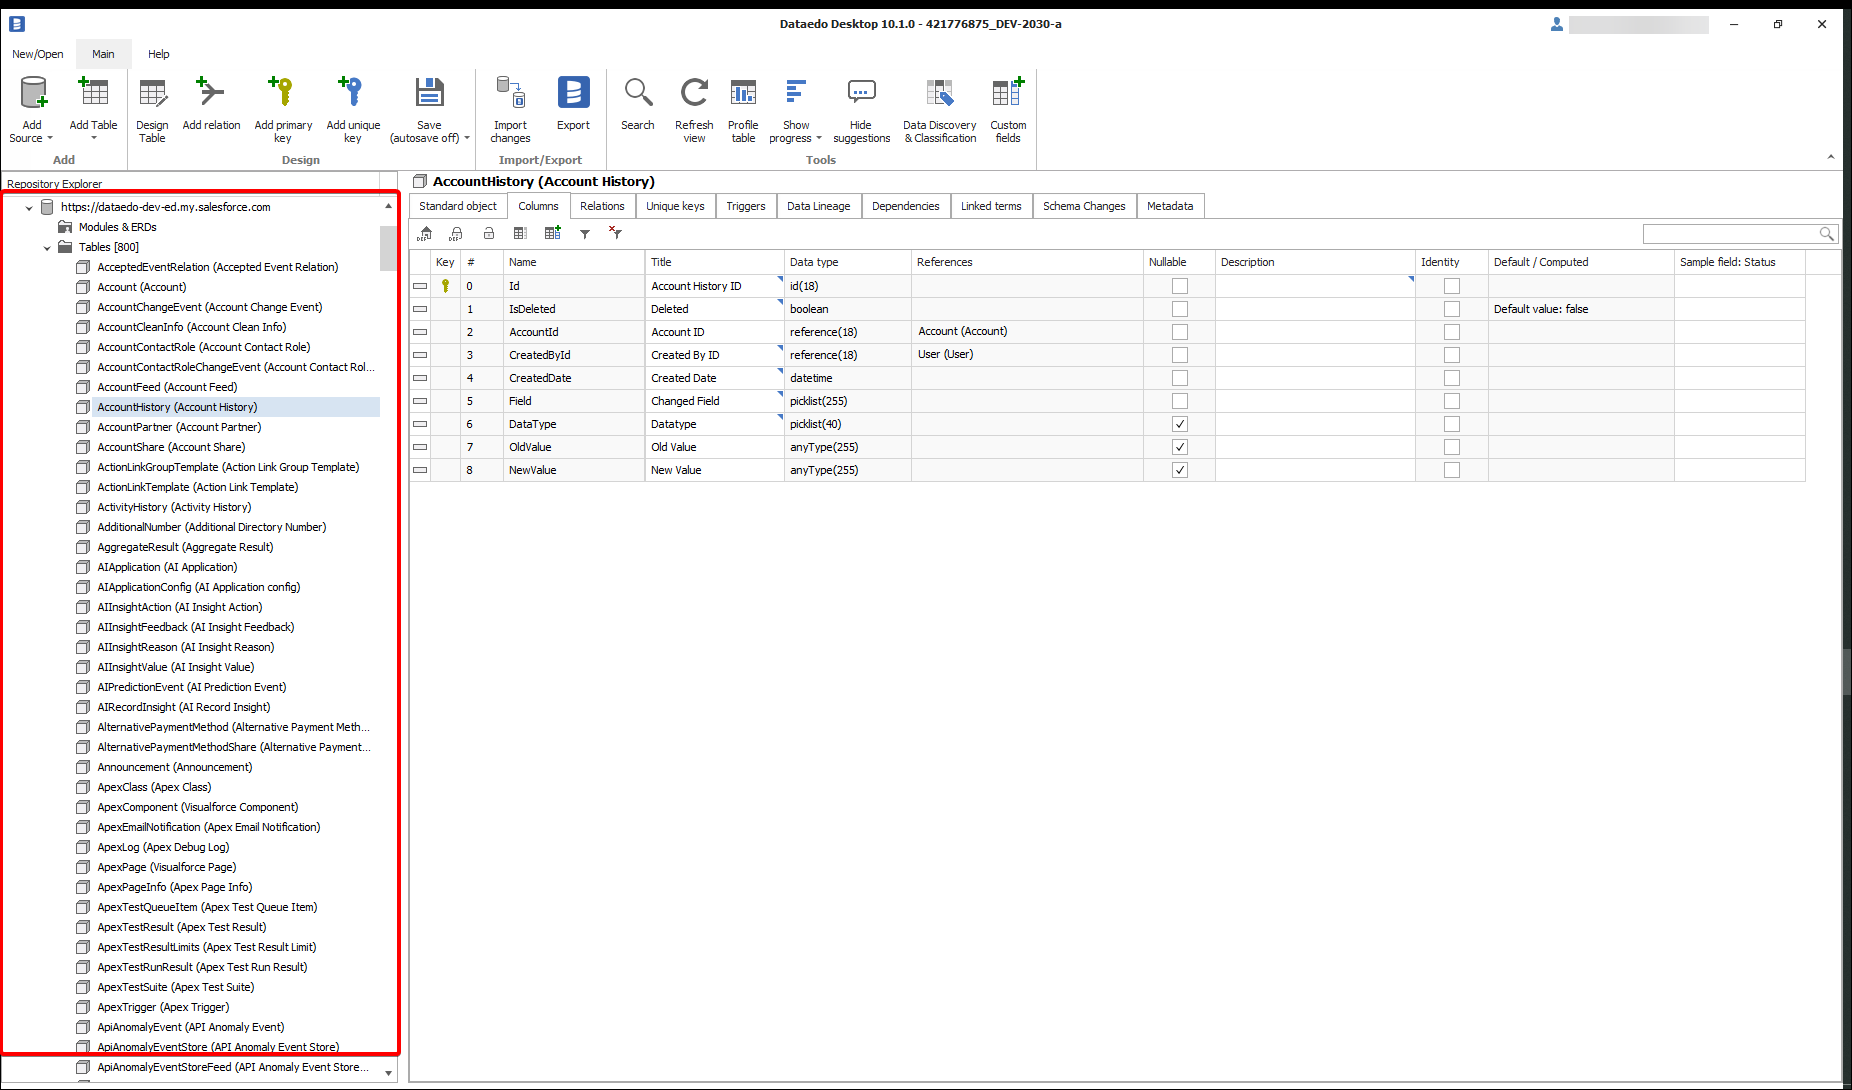
Outcome
Your Salesforce objects have been imported to new documentation in the repository.


 Dominik Ilnicki