


What is encryption, SSL, TLS?
SSL and TLS are a technology used to encrypt communication over the web, so that if someone captures data will only see a meaningless sequence of characters, rather than actual information. For many companies, if all communication is sent within the internal network it's fine not to use encryption. In most other cases, especially in a public network, it's better to have it safely encrypted, e.g., by using an SSL certificate.
Dataedo, as almost every database client, will always first try to encrypt the connection. If encryption fails, it fails will proceed with unencrypted communication if the database allows it. So unless the server is set to force SSL connection, you will be able to connect to it even if encryption fails for any reason.
Dataedo 10.1 uses more strict requirements for encryption than the previous versions. Each certificate must be issued by Trusted Root Authority or configured as trusted in Windows options. Furthermore, it has to have all the information required to establish a safe connection. Note that tools with less restrictive requirements may still allow you to connect to even if your certificate does not meet mentioned requirements. In these cases, even though the traffic is encrypted, the connection may not be fully secure.
How to check certificate validity
First, check if the certificate was issued by a trusted root authority (the full list is available at Common CA Database for Microsoft). To get such a certificate you need to contact one of the mentioned organizations. If your certificate is signed by one of these organizations, no further steps are required.
Otherwise, it is most likely a self-signed certificate that was issued on the user’s behalf. Several free tools can create self-signed certificates. For self-signed certificates, a few steps need to be completed to ensure that the certificate can be used with Dataedo.
Configuring a self-signed certificate
Opening and exporting the certificate file
If you have a .cer certificate file, you can open it by double-clicking it. Otherwise, you need to open the certificate through Certificates snap-in in MMC console.
To run MMC console open run box with Win+R shortcut, and type in mmc command. Once MMC console is opened follow the image below to open the Certificate snap-in menu.
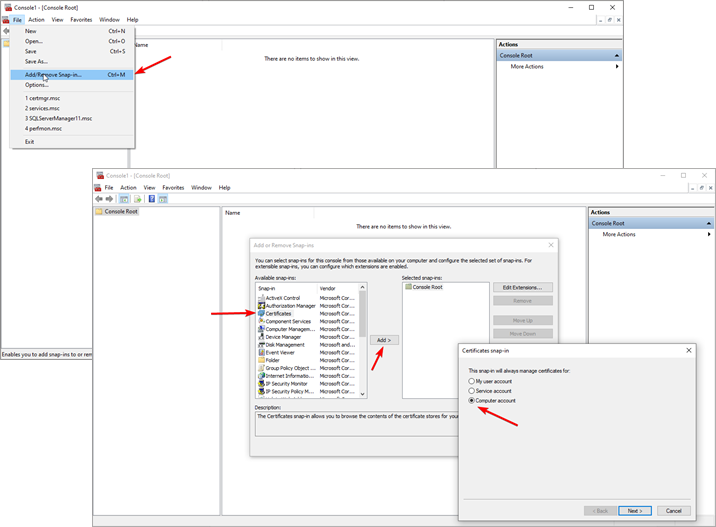
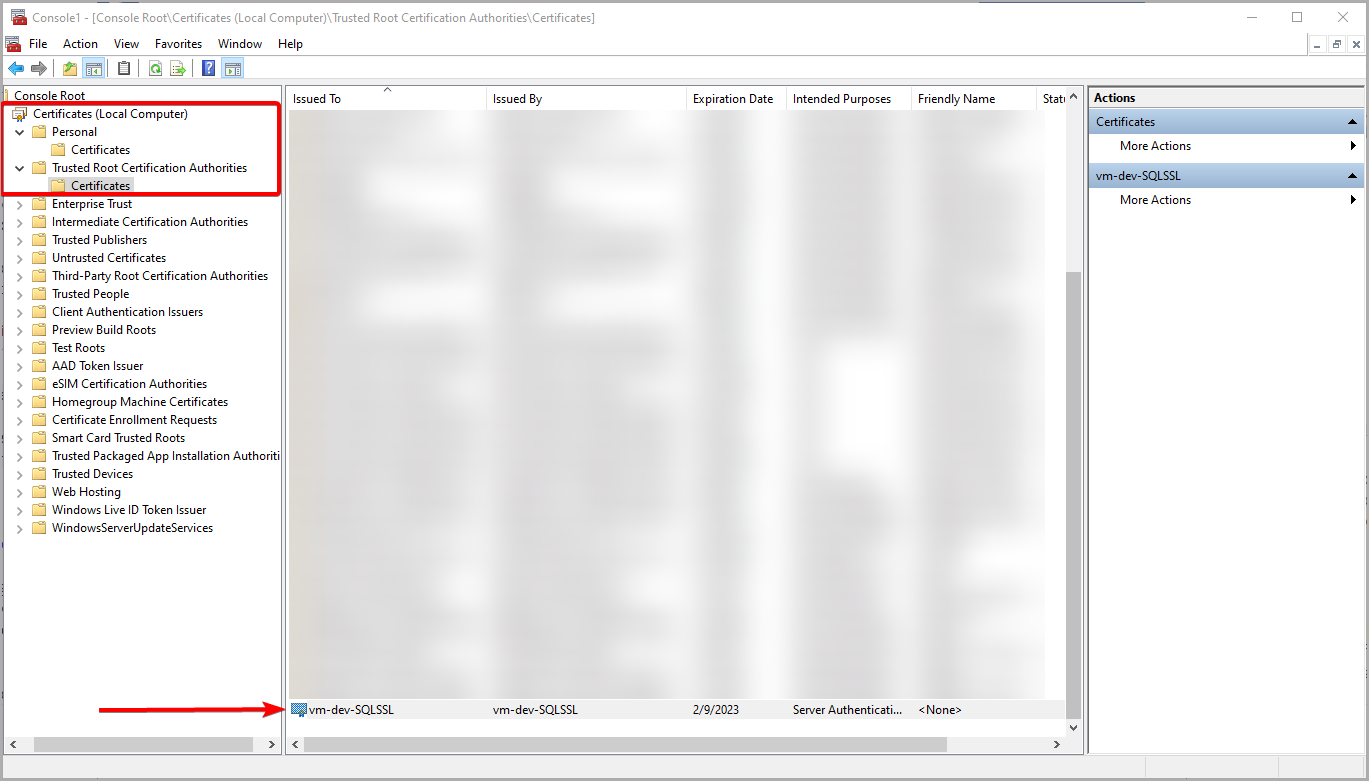
To find the certificate, you need to expand Certificates (Local Computer) root and open Certificates catalog under Personal node. You should find your SQL Server certificate entry on the list. If you cannot find it, it should be in Certificates under Trusted Root Certification Authorities. In case if it is not present in either of lists, contact an administrator.
Once you find the right entry, open it with simple double click.
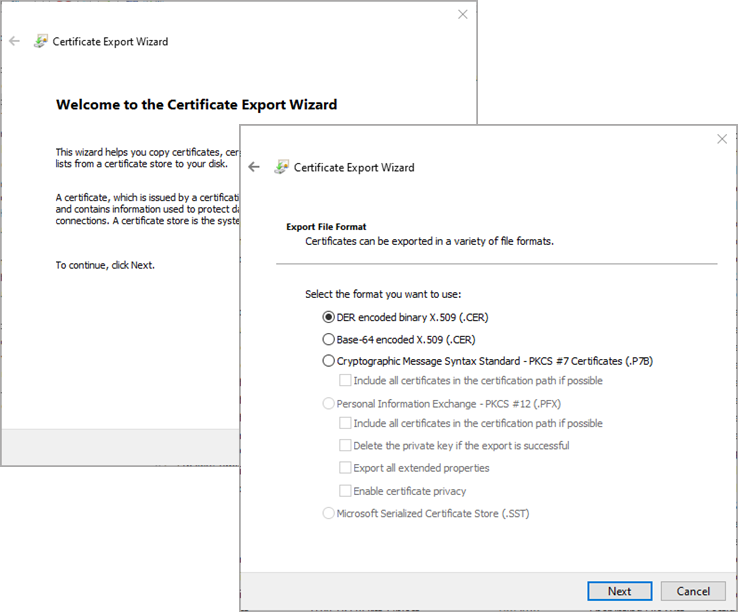
If you need to export the certificate, you can do it by right-clicking the entry and under All tasks selecting Export option

Then, to export a certificate:
- On Welcome screen just go Next
- In Export File Format window select DER encoded binary X.509 (.CER). Go Next
- Browse for catalog where to save the certificate and set it's name. GoNext
- Complete the export by confirming settings with Finish button.
Checking the hostname in the certificate’s subject
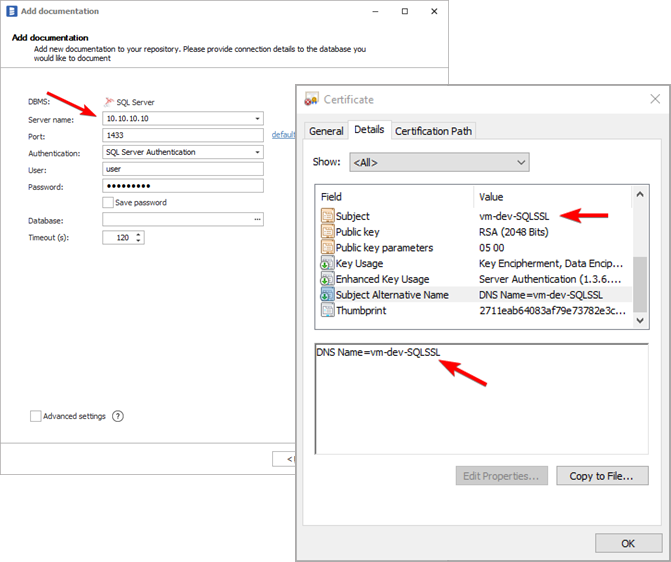
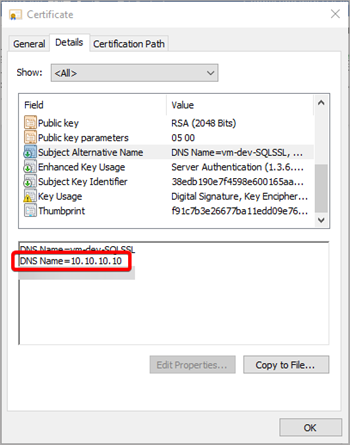
A common issue with self-signed certificates is using a different subject than the hostname used for the connection. The hostname which you use during connection should be explicitly present in the certificate. To verify this, double click the certificate file to open it and look for the Details tab. Then, your Server name should be present in either Subject or Subject Alternative Name field.
Now open Dataedo and check the address you type in the Server name field. In my case, it's 10.10.10.10, and since it is not present the certificate, it won’t work with Dataedo.
Creating a new self-signed certificate
A certificate cannot be edited after creation - instead, a new certificate with the right server name needs to be generated. As an example, we'll use a Powershell command to generate the certificate, but you can use other tools as preferred.
New-SelfSignedCertificate -Type SSLServerAuthentication `
    -Subject "CN=$env:COMPUTERNAME"
    -FriendlyName 'Dataedo-CERTIFICATE'
    -DnsName "$env:COMPUTERNAME", '10.10.10.10'
    -KeyAlgorithm 'RSA' -KeyLength 2048 -Hash 'SHA256'
   -TextExtension '2.5.29.37={text}1.3.6.1.5.5.7.3.1'
   -Provider ‘Microsoft RSA SChannel Cryptographic Provider’
   -KeySpec KeyExchange
   -CertStoreLocation Cert:\LocalMachine\My
As you can see, in the DnsName option, I added 10.10.10.10 as the server name. You can find out more about the command above in the documentation for the New-SelfSignedCertificat cmdlet.
To check the certificate, open it by double-clicking. You can now see my server’s name in Subject Alternative Name:
Installing the self-signed certificate
These steps require the administrator permissions and should be done on each user’s machine.
Every machine that will use the certificate for encryption needs to have it installed first. So both the machine running the SQL Server and each machine running Dataedo will need the certificate added to Trusted Root Authorities Store.
To do so, start by exporting the certificate to a .cer file. Then run Microsoft Management console as an administrator - type mmc in the start menu, right-click the icon, and choose Run as Administrator.
Then expand the Console Root, Certificates (Local Computer), and Trusted Root Authorities Store. Right-click on Certificates. Choose All Tasks > Import and select the previously exported .cer file.

After repeating this process both on the server and user's machines, your certificate is trusted by the operating system, and connections from Dataedo can be encrypted.