


 Hubert Książek
Netsuite is not supported since version 23.1
Starting with Dataedo version 23.1, Dataedo will no longer support the NetSuite connector. It will not be possible to add NetSuite as a new data source and perform Import Changes.NetSuite is scalable cloud-based businnes management application that provides solutions for ERP, CRM, HR, accounting, global business management, services automation, omnichannel commerce and analytics.
Connector
Supported Versions
NetSuite2.com Data Source
Supported metadata
- Tables
- Tables description
- Columns
- Data type
- Description
- Primary keys
- Columns
Relations
Views are referred to as tables.
- Fields are referred to as columns.
Data profiling
Datedo does not support data profiling in NetSuite.
Setting up NetSuite account
Enable the Connect Service feature
- Ensure that your Account Administrator has enabled your Account and Role with the Connect Service feature.
- Navigate to: Setup => Company => Enable Features.

- Go to the Analytics tab, chceck the SUITEANALYTICS CONNECT box and click Save.

Create required role
- Navigate to Setup => User/Roles => Manage Roles => New.

- Name the role, go to the Permissions => Setup and add the SuiteAnalytics Connect permission, click Save button.
Optionally, you can add permissions to the other tables that you want to import into Dataedo, on the Permissions tab.

NetSuite will probably, also return an invalid message, when authenticating in Dataedo, about 2FA.
Assign a role to the user
- Navigate to Lists => Employees => Employees => Search.

- Using the search engine find the user to whom you want to assign roles.
- Click Edit button on the employee page.

- Scroll down, click on the Access tab then in Roles add the role that you created earlier with SuiteAnalytics Connect permission. Click save button.

Check credentials
- Login to role that you created earlier.
- Go to homepage.
- Click on Set Up SuiteAnalytics Connect in Setting tab.

- In the Your Configuration tab you will find the necessary crudentials.

If your SERVICE DATASOURCE is NetSuite.com you need to change it on NetSuite2.com. Refer to
how to change NetSuite.com datasource on NetSuite2.com documentation. Dataedo only supports NetSuite2.com as datasource.
Importing metadata
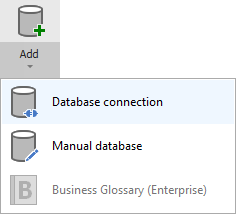
Connect to NetSuite and create new documentation by clicking Add documentation and choosing Database connection.
On the connection screen choose NetSuite.

Fill in your credentials. The login and password should be the same as the user account from which the other data was taken, such as Account Id or Role Id. Click connect.

When connection was successful, Dataedo will read objects and show a list of objects found. You can choose which objects to import. You can also use advanced filter to narrow down list of objects.

Click Import to start the import.
Outcome
Your database has been imported to new documentation in the repository.
